---
url: /guide/start/index.md
---
# Introduction
Rsbuild is a high-performance build tool powered by Rspack. It provides carefully designed default build configurations that deliver an out-of-the-box development experience while fully leveraging Rspack's performance.
Rsbuild provides [rich build features](/guide/start/features), including compilation of TypeScript, JSX, Sass, Less, CSS Modules, Wasm, and more. It also supports Module Federation, image compression, type checking, PostCSS, Lightning CSS, and additional features.
## 🚀 Performance
Powered by Rspack's Rust-based architecture, Rsbuild delivers blazing-fast performance that will reshape your development workflow.
⚡️ **Build 1000 React components:**
import { BenchmarkGraph } from '@components/Benchmark';
> 📊 Benchmark results from [build-tools-performance](https://github.com/rspack-contrib/build-tools-performance).
## 💡 Comparisons
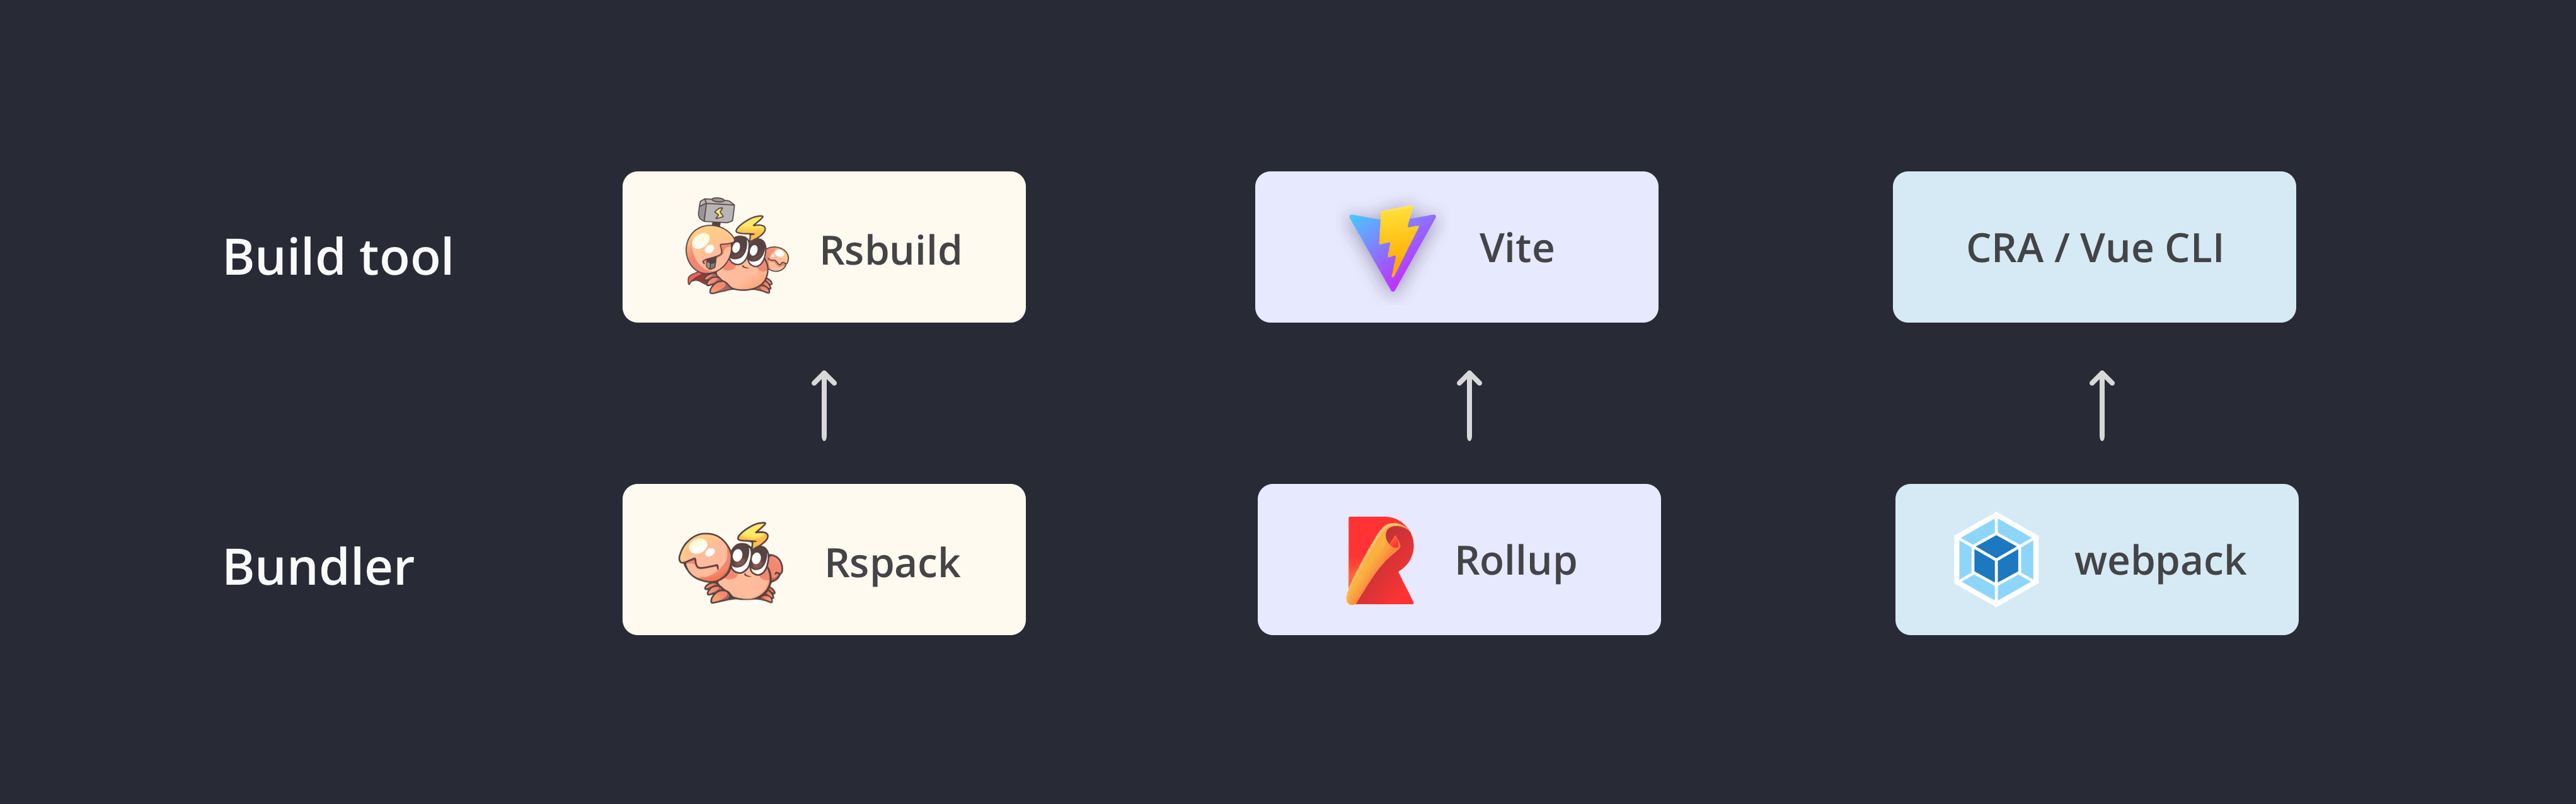
Rsbuild is a build tool comparable to [Vite](https://vitejs.dev/), [Create React App](https://github.com/facebook/create-react-app), and [Vue CLI](https://github.com/vuejs/vue-cli). All of these tools include built-in dev servers, command-line tools, and sensible build configurations for an out-of-the-box experience.
### CRA / Vue CLI
You can think of Rsbuild as a modernized version of Create React App or Vue CLI, with these key differences:
- The underlying bundler has been switched from webpack to Rspack, delivering 5 to 10 times better build performance.
- It's decoupled from frontend UI frameworks and supports all frameworks via [plugins](/plugins/list/index), including React, Vue, Svelte, Solid, and more.
- It provides better extensibility. You can flexibly extend Rsbuild through [configurations](/config/index), [Plugin API](/plugins/dev/index), and [JavaScript API](/api/start/index).
### Vite
Rsbuild has many similarities to Vite, as both aim to improve the frontend development experience. The main differences are:
- **Production consistency**: Rsbuild uses Rspack for bundling in both development and production builds, ensuring high consistency between development and production outputs. Vite uses ESM during development for faster startup, but this approach can introduce inconsistencies between development and production outputs.
- **Ecosystem compatibility**: Rsbuild is compatible with most webpack plugins and all Rspack plugins, while Vite is compatible with Rollup plugins. If you're using many plugins and loaders from the webpack ecosystem, migrating to Rsbuild is more straightforward.
- **Module Federation**: The Rsbuild team works closely with the [Module Federation](/guide/advanced/module-federation) development team, providing first-class support for Module Federation to help you develop large web applications with micro frontend architecture.
## 🔥 Features
Rsbuild has the following features:
- **Easy to configure**: One of Rsbuild's goals is to provide out-of-the-box build capabilities for Rspack users, allowing developers to start web projects with zero configuration. Additionally, Rsbuild provides a semantic build configuration API to reduce the learning curve for Rspack.
- **Performance oriented**: Rsbuild integrates high-performance Rust-based tools from the community, including [Rspack](https://rspack.rs), [SWC](https://swc.rs/), and [Lightning CSS](https://lightningcss.dev/), delivering first-class build speed and development experience.
- **Plugin ecosystem**: Rsbuild has a lightweight plugin system and includes a range of high-quality official plugins. Furthermore, Rsbuild is compatible with most webpack plugins and all Rspack plugins, allowing you to use existing community or in-house plugins without rewriting code.
- **Stable artifacts**: Rsbuild places a strong focus on build artifact stability. It ensures high consistency between artifacts in development and production builds, and automatically handles syntax downgrading and polyfill injection. Rsbuild also provides plugins for type checking and artifact syntax validation to prevent quality and compatibility issues from reaching production code.
- **Framework agnostic**: Rsbuild is not coupled to any frontend UI framework. It supports frameworks like React, Vue, Svelte, Solid, and Preact through plugins, with plans to support more UI frameworks from the community in the future.
## 🦀 Rstack
Rstack is a unified JavaScript toolchain centered on Rspack, with high performance and consistent architecture.
Rstack includes the following tools:
| Name | Description | Version |
| ----------------------------------------------------- | ------------------------ | -------------------------------------------------------------------------------------------------------------------------------------------------------------------------------- |
| [Rspack](https://github.com/web-infra-dev/rspack) | Bundler | |
| [Rsbuild](https://github.com/web-infra-dev/rsbuild) | Build tool | |
| [Rslib](https://github.com/web-infra-dev/rslib) | Library development tool | |
| [Rspress](https://github.com/web-infra-dev/rspress) | Static site generator | |
| [Rsdoctor](https://github.com/web-infra-dev/rsdoctor) | Build analyzer | |
| [Rstest](https://github.com/web-infra-dev/rstest) | Testing framework | |
| [Rslint](https://github.com/web-infra-dev/rslint) | Linter | |
## 🔗 Links
- [awesome-rstack](https://github.com/web-infra-dev/awesome-rstack): A curated list of awesome things related to Rstack.
- [rstack-examples](https://github.com/rspack-contrib/rstack-examples): Examples showcasing Rstack tools.
- [storybook-rsbuild](https://github.com/rspack-contrib/storybook-rsbuild): Storybook builder powered by Rsbuild.
- [rsbuild-plugin-template](https://github.com/rspack-contrib/rsbuild-plugin-template): Use this template to create your own Rsbuild plugin.
- [rstack-design-resources](https://github.com/rspack-contrib/rstack-design-resources): Design resources for Rstack.
## 🧑💻 Community
Come and chat with us on [Discord](https://discord.gg/XsaKEEk4mW)! The Rstack team and users are active there, and we're always looking for contributions.
## ✨ Next step
You may want:
import NextSteps from '@components/NextSteps';
import Step from '@components/Step';
---
url: /guide/start/quick-start.md
---
# Quick start
## Online examples
We provide online Rsbuild examples that showcase Rspack's build performance and Rsbuild's development experience:
- [StackBlitz example](https://stackblitz.com/~/github.com/rspack-contrib/rsbuild-stackblitz-example)
- [CodeSandbox example](https://codesandbox.io/p/github/rspack-contrib/rsbuild-codesandbox-example)
## Environment preparation
Rsbuild supports using [Node.js](https://nodejs.org/), [Deno](https://deno.com/), or [Bun](https://bun.sh/) as the JavaScript runtime.
Use the following installation guides to choose a runtime:
- [Install Node.js](https://nodejs.org/en/download)
- [Install Bun](https://bun.com/docs/installation)
- [Install Deno](https://docs.deno.com/runtime/getting_started/installation/)
:::tip Version requirements
- Rsbuild >= v1.5.0 requires Node.js 18.12.0 or higher.
- Rsbuild < 1.5.0 requires Node.js 16.10.0 or higher.
:::
## Create an Rsbuild application
Use [create-rsbuild](https://www.npmjs.com/package/create-rsbuild) to create a new Rsbuild application. Run the following command:
import { PackageManagerTabs } from '@theme';
Follow the prompts to choose from available options, including whether to add optional tools like TypeScript and ESLint.
After creating the application, complete these steps:
- Run `git init` to initialize a Git repository.
- Run `npm install` (or your package manager's install command) to install dependencies.
- Run `npm run dev` to start the dev server, which runs on `http://localhost:3000` by default.
### Templates
When creating an application, you can choose from the following templates provided by `create-rsbuild`:
| Template | Official docs | Rsbuild integration guide |
| -------- | ------------------------------- | --------------------------------------- |
| vanilla | Native JavaScript | - |
| react | [React 19](https://react.dev/) | [Using React](/guide/framework/react) |
| react18 | [React 18](https://react.dev/) | [Using React](/guide/framework/react) |
| vue | [Vue 3](https://vuejs.org/) | [Using Vue](/guide/framework/vue) |
| vue2 | [Vue 2](https://v2.vuejs.org/) | [Using Vue](/guide/framework/vue) |
| lit | [Lit](https://lit.dev/) | - |
| preact | [Preact](https://preactjs.com/) | [Using Preact](/guide/framework/preact) |
| svelte | [Svelte](https://svelte.dev/) | [Using Svelte](/guide/framework/svelte) |
| solid | [Solid](https://solidjs.com/) | [Using Solid](/guide/framework/solid) |
`create-rsbuild` provides basic templates. You can find more templates at:
- Visit [Rspack - Ecosystem](https://rspack.rs/guide/start/quick-start#ecosystem) to learn about higher-level tools built on Rsbuild.
- Visit [awesome-rstack - Starter](https://github.com/web-infra-dev/awesome-rstack?tab=readme-ov-file#starter) for community-maintained templates.
### Optional tools
`create-rsbuild` can help you set up commonly used tools, including [Biome](https://github.com/biomejs/biome), [ESLint](https://github.com/eslint/eslint), [Prettier](https://github.com/prettier/prettier), and [Storybook](https://storybook.js.org/). Use the arrow keys to navigate and the space bar to select. Press Enter without selecting anything if you don't need these tools.
```
◆ Select additional tools (Use to select, to continue)
│ ◻ Add Biome for code linting and formatting
│ ◻ Add ESLint for code linting
│ ◻ Add Prettier for code formatting
│ ◻ Add Storybook for component development
│ ◻ Add Rstest for unit testing
└
```
:::tip
Biome provides similar linting and formatting features to ESLint and Prettier. If you select Biome, you typically won't need to add ESLint or Prettier.
:::
### Current directory
To create an application in the current directory, set the target folder to `.`:
```
◆ Create Rsbuild Project
│
◇ Project name or path
│ .
│
◇ "." is not empty, please choose:
│ Continue and override files
```
### Non-interactive mode
[create-rsbuild](https://npmjs.com/package/create-rsbuild) supports a non-interactive mode through command-line options. This mode skips prompts and creates the project directly, which is useful for scripts, CI, and automation.
For example, the following command creates a React app in the `my-app` directory:
```bash
npx -y create-rsbuild@latest my-app --template react
# Using abbreviations
npx -y create-rsbuild@latest my-app -t react
# Specify multiple tools
npx -y create-rsbuild@latest my-app -t react --tools eslint,prettier
```
All CLI flags supported by `create-rsbuild`:
```
Usage: create-rsbuild [dir] [options]
Options:
-h, --help display help for command
-d, --dir create project in specified directory
-t, --template specify the template to use
--tools select additional tools (biome, eslint, prettier, storybook, rstest)
--override override files in target directory
--packageName specify the package name
Templates:
react-js, react-ts, vue3-js, vue3-ts, vue2-js, vue2-ts, svelte-js, svelte-ts,
solid-js, solid-ts, vanilla-js, vanilla-ts
```
## Migrate from existing projects
To migrate from an existing project to Rsbuild, refer to the following guides:
- [Migrate from webpack](/guide/migration/webpack)
- [Migrate from Create React App](/guide/migration/cra)
- [Migrate from Vue CLI](/guide/migration/vue-cli)
- [Migrate from Vite](/guide/migration/vite)
- [Migrate from Modern.js Builder](/guide/migration/modern-builder)
- [Migrate from Tsup to Rslib](https://rslib.rs/guide/migration/tsup)
- [Migrate from Storybook to Storybook Rsbuild](https://rspack.rs/guide/migration/storybook)
### Other projects
If your project doesn't match the above migration guides, you can manually install the [@rsbuild/core](https://npmjs.com/package/@rsbuild/core) package:
After installation, refer to the following documents to configure your project:
- See [CLI](/guide/basic/cli) to learn about available CLI commands.
- See [Plugin List](/plugins/list/index) to select Rsbuild plugins.
- See [Configure Rsbuild](/guide/configuration/rsbuild) to configure Rsbuild.
## CLI
Rsbuild includes a lightweight CLI with commands like `dev` and `build`.
```json title="package.json"
{
"scripts": {
// start the dev server
"dev": "rsbuild dev",
// build for production
"build": "rsbuild build",
// preview the production build locally
"preview": "rsbuild preview"
}
}
```
Refer to the [CLI](/guide/basic/cli) to learn about all available commands and options.
## Entry module
By default, Rsbuild CLI uses `src/index.(js|ts|jsx|tsx)` as the entry module. You can modify the entry module using the [source.entry](/config/source/entry) option.
```ts title="rsbuild.config.ts"
export default {
source: {
entry: {
foo: './src/pages/foo/index.ts',
bar: './src/pages/bar/index.ts',
},
},
};
```
## Core packages
### @rsbuild/core
Core Rsbuild package that provides the CLI commands and JavaScript API.
### create-rsbuild
Create a new Rsbuild project.
## Next step
You may want:
import NextSteps from '@components/NextSteps';
import Step from '@components/Step';
---
url: /guide/start/features.md
---
# Features
Overview of the main features supported by Rsbuild.
## JavaScript
| Features | Description | Links |
| -------------------- | --------------------------------------------------------------------------------------------------------- | ----------------------------------------------------------------------------------------------------------------------------------- |
| Rspack | Use Rspack as the bundler by default |
[Configure Rspack](/guide/configuration/rspack)
|
| SWC compilation | Transform and minify JavaScript and TypeScript code using SWC by default |
[Configure SWC](/guide/configuration/swc)
|
| TS compilation | TypeScript files are compiled using SWC by default |
|
## HTML
| Features | Description | Links |
| ------------------- | -------------------------------------------- | ----------------------------------------------------------------------------------------------------------------------------------------- |
| Set title | Set HTML `` tag | <ul><li>[Set page title](/guide/basic/html-template#set-page-title)</li><li>[html.title](/config/html/title)</li></ul> |
| Set meta | Set HTML `<meta>` tag | <ul><li>[Set meta tags](/guide/basic/html-template#set-meta-tags)</li><li>[html.meta](/config/html/meta)</li></ul> |
| Set favicon | Set favicon | <ul><li>[Set page icon](/guide/basic/html-template#set-page-icon)</li><li>[html.favicon](/config/html/favicon)</li></ul> |
| Set app icon | Set web application icons | <ul><li>[Set page icon](/guide/basic/html-template#set-page-icon)</li><li>[html.appIcon](/config/html/app-icon)</li></ul> |
| EJS template engine | Optional feature, use EJS template engine | <ul><li>[HTML template - EJS](/guide/basic/html-template#ejs)</li></ul> |
| Pug template engine | Optional feature, use pug template engine | <ul><li>[Pug plugin](https://github.com/rspack-contrib/rsbuild-plugin-pug)</li></ul> |
| Inline JS files | Optional feature, inline JS files into HTML | <ul><li>[Inline static assets](/guide/optimization/inline-assets)</li><li>[output.inlineScripts](/config/output/inline-scripts)</li></ul> |
| Inline CSS files | Optional feature, inline CSS files into HTML | <ul><li>[Inline static assets](/guide/optimization/inline-assets)</li><li>[output.inlineStyles](/config/output/inline-styles)</li></ul> |
## Server
| Features | Description | Links |
| ----------------- | ------------------------------------------------------------------------- | --------------------------------------------------------------- |
| Public dir | Serves public assets from the `public` directory by default | <ul><li>[server.publicDir](/config/server/public-dir)</li></ul> |
| SSR | Optional feature, implement server-side rendering | <ul><li>[SSR](/guide/advanced/ssr)</li></ul> |
| Proxy | Optional feature, proxy requests to the specified service | <ul><li>[server.proxy](/config/server/proxy)</li></ul> |
| Open page | Optional feature, automatically open page in browser when starting server | <ul><li>[server.open](/config/server/open)</li></ul> |
| HTTPS | Optional feature, enable HTTPS server | <ul><li>[server.https](/config/server/https)</li></ul> |
| Custom middleware | Optional feature, use custom middleware | <ul><li>[Middleware](/guide/basic/server#middleware)</li></ul> |
## UI framework
| Features | Description | Links |
| ------------- | -------------------------------------------------------------------------- | -------------------------------------------------------------------------------------------------- |
| React | Optional feature, enable compilation of React JSX | <ul><li>[React plugin](/plugins/list/plugin-react)</li></ul> |
| React Refresh | Optional feature, enable React Refresh | <ul><li>[Hot module replacement](/guide/advanced/hmr)</li><li>[dev.hmr](/config/dev/hmr)</li></ul> |
| SVGR | Optional feature, transform SVG to React component | <ul><li>[SVGR plugin](/plugins/list/plugin-svgr)</li></ul> |
| Vue 3 SFC | Optional feature, enable compilation of Vue 3 SFC (Single File Components) | <ul><li>[Vue plugin](/plugins/list/plugin-vue)</li></ul> |
| Vue 3 JSX | Optional feature, enable compilation of Vue 3 JSX syntax | <ul><li>[Vue JSX plugin](https://github.com/rspack-contrib/rsbuild-plugin-vue-jsx)</li></ul> |
| Vue 2 SFC | Optional feature, enable compilation of Vue 2 SFC (Single File Components) | <ul><li>[Vue 2 plugin](https://github.com/rspack-contrib/rsbuild-plugin-vue2)</li></ul> |
| Vue 2 JSX | Optional feature, enable compilation of Vue 2 JSX syntax | <ul><li>[Vue 2 JSX plugin](https://github.com/rspack-contrib/rsbuild-plugin-vue2-jsx)</li></ul> |
| Svelte | Optional feature, enable compilation of Svelte component | <ul><li>[Svelte plugin](/plugins/list/plugin-svelte)</li></ul> |
| Solid | Optional feature, enable compilation of Solid JSX | <ul><li>[Solid plugin](/plugins/list/plugin-solid)</li></ul> |
## Static assets
| Features | Description | Links |
| ---------------------- | ---------------------------------------------------------------------------- | ---------------------------------------------------------------------------------------------------------------------------------------- |
| Image assets | Support importing image assets in code | <ul><li>[Static assets](/guide/basic/static-assets)</li></ul> |
| Font assets | Support importing font assets in code | <ul><li>[Static assets](/guide/basic/static-assets)</li></ul> |
| Video assets | Support importing video assets in code | <ul><li>[Static assets](/guide/basic/static-assets)</li></ul> |
| Wasm assets | Support importing WebAssembly assets in code | <ul><li>[Static assets](/guide/basic/static-assets)</li></ul> |
| Node addons | Support importing Node.js addons in code | <ul><li>[Static assets](/guide/basic/static-assets)</li></ul> |
| Inline static assets | Small assets are inlined into JavaScript bundles by default | <ul><li>[Inline static assets](/guide/optimization/inline-assets)</li><li>[output.dataUriLimit](/config/output/data-uri-limit)</li></ul> |
| Clean up static assets | Automatically clean up static assets in the dist directory before each build | <ul><li>[output.cleanDistPath](/config/output/clean-dist-path)</li ></ul> |
| Copy static assets | Optional feature, copy static assets to the dist directory | <ul><li>[output.copy](/config/output/copy)</li></ul> |
| Generate manifest file | Optional feature, generate `manifest.json` file | <ul><li>[output.manifest](/config/output/manifest)</li></ul> |
## Performance and debugging
| Features | Description | Links |
| -------------------------- | ---------------------------------------------------------------------------------------------------------------------------- | ---------------------------------------------------------------------------------------------------------------------------------------- |
| Chunk splitting | A variety of chunk splitting strategies are built into Rsbuild to automatically split the bundle into files of moderate size | <ul><li>[Code splitting](/guide/optimization/code-splitting)</li><li>[performance.chunkSplit](/config/performance/chunk-split)</li></ul> |
| Print file size | After the production build, all bundle sizes are displayed by default | <ul><li>[performance.printFileSize](/config/performance/print-file-size)</li></ul> |
| Analyze build process | Optional feature, use Rsdoctor to analyze build process | <ul><li>[Use Rsdoctor](/guide/debug/rsdoctor)</li></ul> |
| Analyze bundle size | Optional feature, analyze bundle size through Bundle Analyzer | <ul><li>[performance.bundleAnalyze](/config/performance/bundle-analyze)</li></ul> |
| Remove console | Optional feature, remove `console.[methodName]` in code | <ul><li>[performance.removeConsole](/config/performance/remove-console)</li ></ul> |
| Optimize moment.js size | Optional feature, remove the redundant locale files of moment.js | <ul><li>[performance.removeMomentLocale](/config/performance/remove-moment-locale)</li></ul> |
| Dedupe packages | Optional feature, remove duplicate npm packages | <ul><li>[resolve.dedupe](/config/resolve/dedupe)</li></ul> |
| Component on-demand import | Optional feature, selectively import code and styles from component libraries | <ul><li>[source.transformImport](/config/source/transform-import)</li></ul> |
| Image compression | Optional feature, compress used image resources | <ul><li>[Image compress plugin](https://github.com/rspack-contrib/rsbuild-plugin-image-compress)</li></ul> |
| Preload | Optional feature, fetches and caches a resource ahead of the current navigation | <ul><li>[performance.preload](/config/performance/preload)</li></ul> |
| Prefetch | Optional feature, fetches and caches a resource for an upcoming navigation | <ul><li>[performance.prefetch](/config/performance/prefetch)</li></ul> |
| Preconnect | Optional feature, opens a connection to the resource's origin before it's needed | <ul><li>[performance.preconnect](/config/performance/preconnect)</li></ul> |
| DNS prefetch | Optional feature, preemptively perform DNS resolution for the target resource's origin | <ul><li>[performance.dnsPrefetch](/config/performance/dns-prefetch)</li></ul> |
---
url: /guide/start/glossary.md
---
# Glossary
## Bundler
Refers to module bundlers such as [Rspack](https://rspack.rs/) and [webpack](https://webpack.js.org/).
The main goal of bundlers is to bundle JavaScript, CSS, and other files together, and the bundled files can be used in the browser, Node.js, or other environments. When bundlers process web applications, they build a dependency graph and then combine each module into one or more bundles.
## CSR
CSR stands for "Client-Side Rendering". It means that the page is rendered in the browser using JavaScript, and logic such as data fetching, templates, and routing is completed on the client-side rather than the server.
In CSR, the server sends an empty HTML shell and some JavaScript scripts to the browser, and then the browser fetches data from the server's API and renders dynamic content to the page.
## Environment
The runtime environment for build output, see [Multi-environment builds](/guide/advanced/environments).
## Micro-frontend
Micro-frontend (MFE) is an architecture style similar to microservices. It is a composition of multiple independently delivered frontend applications, forming a cohesive whole. MFE decomposes frontend applications into smaller, simpler applications that can be developed, tested, and deployed independently while still appearing as a cohesive single product to users.
It primarily solves two problems:
- Maintaining large, complex applications becomes difficult over time.
- Cross-team collaboration inefficiencies.
## Modern.js
[Modern.js](https://github.com/web-infra-dev/modern.js) is an open source web engineering system from ByteDance that provides multiple solutions to help developers solve problems in different development scenarios.
## Module Federation
Module Federation is an architectural pattern for JavaScript application decomposition (similar to microservices on the server-side), allowing you to share code and resources between multiple JavaScript applications (or micro-frontends).
See [Module Federation](/guide/advanced/module-federation) for more details.
## Rspack
[Rspack](https://rspack.rs/) is a high-performance JavaScript bundler written in Rust. It offers strong compatibility with the webpack ecosystem, allowing seamless replacement of webpack, and provides lightning-fast build speeds.
## Rspress
[Rspress](https://github.com/web-infra-dev/rspress) is a fast static site generator based on Rsbuild.
## SSR
SSR stands for "Server-Side Rendering". It means that the HTML of the web page is generated by the server and sent to the client, rather than sending only an empty HTML shell and relying on JavaScript to generate the page content.
See [Server-side rendering (SSR)](/guide/advanced/ssr) for more details.
## SWC
SWC (Speedy Web Compiler) is a transformer and minifier for JavaScript and TypeScript written in Rust.
See [Configure SWC](/guide/configuration/swc) for more details.
## More
See additional glossary terms in [Rspack - Glossary](https://rspack.rs/misc/glossary).
---
url: /guide/framework/react.md
---
# React
This document explains how to use Rsbuild to build a React application.
## Create a React application
Create a React application with Rsbuild using [create-rsbuild](/guide/start/quick-start#create-an-rsbuild-application). Run this command:
import { PackageManagerTabs } from '@theme';
<PackageManagerTabs
command={{
npm: 'npm create rsbuild@latest',
yarn: 'yarn create rsbuild',
pnpm: 'pnpm create rsbuild@latest',
bun: 'bun create rsbuild@latest',
}}
/>
Then select `React 19` or `React 18` when prompted to "Select framework".
## Use React in an existing project
To compile React's JSX syntax, register the Rsbuild [React Plugin](/plugins/list/plugin-react). The plugin automatically adds the necessary configuration for building React applications.
For example, register in `rsbuild.config.ts`:
```ts title="rsbuild.config.ts"
import { defineConfig } from '@rsbuild/core';
import { pluginReact } from '@rsbuild/plugin-react';
export default defineConfig({
plugins: [pluginReact()],
});
```
:::tip
For projects using Create React App, you can refer to the [CRA Migration Guide](/guide/migration/cra).
:::
## Use SVGR
Rsbuild supports converting SVG to React components via [SVGR](https://react-svgr.com/).
To use SVGR, register the [SVGR plugin](/plugins/list/plugin-svgr).
## React Fast Refresh
Rsbuild uses React's official [Fast Refresh](https://npmjs.com/package/react-refresh) capability to perform component hot updates.
React Refresh requires components to follow certain standards, or HMR may not work. Use [eslint-plugin-react-refresh](https://github.com/ArnaudBarre/eslint-plugin-react-refresh) to validate your code.
If React component hot updates don't work, or component state is lost after updates, your React component is likely using an anonymous function. React Fast Refresh requires named functions to preserve component state after hot updates.
Here are some examples of wrong usage:
```tsx
// bad
export default function () {
return <div>Hello World</div>;
}
// bad
export default () => <div>Hello World</div>;
```
The correct usage is to declare a name for each component function:
```tsx
// good
export default function MyComponent() {
return <div>Hello World</div>;
}
// good
const MyComponent = () => <div>Hello World</div>;
export default MyComponent;
```
## React Compiler
React Compiler is a build-time tool that automatically optimizes your React app. It works with plain JavaScript, and understands the Rules of React, so you don’t need to rewrite any code to use it.
Before using React Compiler, we recommend reading the [React Compiler documentation](https://react.dev/learn/react-compiler) to understand its functionality, current state, and usage.
### How to use
Steps to use React Compiler in Rsbuild:
1. Upgrade `react` and `react-dom` to v19. If you can't upgrade, install the [react-compiler-runtime](https://npmjs.com/package/react-compiler-runtime) package to run the compiled code on earlier versions.
2. React Compiler currently only provides a Babel plugin. Install [@rsbuild/plugin-babel](/plugins/list/plugin-babel) and [babel-plugin-react-compiler](https://npmjs.com/package/babel-plugin-react-compiler).
3. Register the Babel plugin in your Rsbuild config file:
```ts title="rsbuild.config.ts"
import { defineConfig } from '@rsbuild/core';
import { pluginBabel } from '@rsbuild/plugin-babel';
import { pluginReact } from '@rsbuild/plugin-react';
export default defineConfig({
plugins: [
pluginReact(),
pluginBabel({
include: /\.(?:jsx|tsx)$/,
babelLoaderOptions(opts) {
opts.plugins?.unshift('babel-plugin-react-compiler');
},
}),
],
});
```
> You can also refer to the [example project](https://github.com/rspack-contrib/rstack-examples/tree/main/rsbuild/react-compiler-babel).
### Configuration
Set the config for React Compiler as follows:
```ts title="rsbuild.config.ts"
import { defineConfig } from '@rsbuild/core';
import { pluginBabel } from '@rsbuild/plugin-babel';
import { pluginReact } from '@rsbuild/plugin-react';
const ReactCompilerConfig = {
/* ... */
};
export default defineConfig({
plugins: [
pluginReact(),
pluginBabel({
include: /\.(?:jsx|tsx)$/,
babelLoaderOptions(opts) {
opts.plugins?.unshift([
'babel-plugin-react-compiler',
ReactCompilerConfig,
]);
},
}),
],
});
```
For React 17 and 18 projects, install [react-compiler-runtime](https://npmjs.com/package/react-compiler-runtime) and specify the `target`:
```ts title="rsbuild.config.ts"
const ReactCompilerConfig = {
target: '18', // '17' | '18' | '19'
};
```
## Router
### TanStack Router
[TanStack Router](https://tanstack.com/router/) is a fully type-safe React router with built-in data fetching, stale-while revalidate caching and first-class search-param APIs.
TanStack Router provides `@tanstack/router-plugin` to integrate with Rsbuild, which provides support for file-based routing. See:
- [Installation guide](https://tanstack.com/router/latest/docs/framework/react/installation/with-rspack)
- [Example project](https://github.com/TanStack/router/tree/main/examples/react/quickstart-rspack-file-based)
### React Router
[React Router](https://reactrouter.com/) is a user‑obsessed, standards‑focused, multi‑strategy router for React.
- To use React Router as a library, you can just follow the official documentation and no configuration is required.
- To use React Router as a framework, the community is working on an experimental Rsbuild plugin, see [rsbuild-plugin-react-router](https://github.com/rspack-contrib/rsbuild-plugin-react-router).
## CSS-in-JS
See [CSS-in-JS](/guide/styling/css-in-js) for how to use CSS-in-JS in Rsbuild.
## Customize JSX
Rsbuild uses SWC to compile JSX. You can customize the functions used by the compiled JSX code:
- If the JSX runtime is `automatic`, use [importSource](/plugins/list/plugin-react#swcreactoptionsimportsource) to customize the import path of the JSX runtime, for example, import from Preact or Emotion.
- If the JSX runtime is `classic`, use `pragma` and `pragmaFrag` to specify the JSX function and Fragment component.
> `@rsbuild/plugin-react` uses `automatic` as the default JSX runtime, see [swcReactOptions.runtime](/plugins/list/plugin-react#swcreactoptionsruntime).
### Via configuration
Configure through the `@rsbuild/plugin-react`'s [swcReactOptions](/plugins/list/plugin-react#swcreactoptions).
- If `runtime` is `automatic`:
```ts title="rsbuild.config.ts"
import { defineConfig } from '@rsbuild/core';
import { pluginReact } from '@rsbuild/plugin-react';
export default defineConfig({
plugins: [
pluginReact({
swcReactOptions: {
runtime: 'automatic',
importSource: '@emotion/react',
},
}),
],
});
```
- If `runtime` is `classic`:
```ts title="rsbuild.config.ts"
import { defineConfig } from '@rsbuild/core';
import { pluginReact } from '@rsbuild/plugin-react';
export default defineConfig({
plugins: [
pluginReact({
swcReactOptions: {
runtime: 'classic',
pragma: 'h',
pragmaFrag: 'Fragment',
},
}),
],
});
```
### Via comments
You can also customize JSX behavior by adding specific comments at the top of individual JSX or TSX files, which will take precedence over the configuration.
- If the JSX runtime is `automatic`:
```tsx title="App.tsx"
/** @jsxImportSource custom-jsx-library */
const App = () => {
return <div>Hello World</div>;
};
```
- If the JSX runtime is `classic`:
```tsx title="App.tsx"
/** @jsx Preact.h */
/** @jsxFrag Preact.Fragment */
const App = () => {
return <div>Hello World</div>;
};
```
## Performance profiling
### React Scan
React Scan can automatically detect performance issues in your React app.
See [React Scan - Rsbuild Guide](https://github.com/aidenybai/react-scan/blob/main/docs/installation/rsbuild.md) to learn how to use React Scan with Rsbuild.
---
url: /guide/framework/vue.md
---
# Vue
This document explains how to build a Vue 3 or Vue 2 application using Rsbuild.
## Create a Vue application
Create a Vue application with Rsbuild using [create-rsbuild](/guide/start/quick-start#create-an-rsbuild-application). Run this command:
import { PackageManagerTabs } from '@theme';
<PackageManagerTabs
command={{
npm: 'npm create rsbuild@latest',
yarn: 'yarn create rsbuild',
pnpm: 'pnpm create rsbuild@latest',
bun: 'bun create rsbuild@latest',
}}
/>
Then select `Vue 3` or `Vue 2` when prompted to "Select framework".
## Vue 3
### Use Vue in an existing project
To compile Vue SFC (Single File Components), register the Rsbuild [Vue plugin](/plugins/list/plugin-vue). The plugin automatically adds the necessary configuration for Vue builds.
For example, register in `rsbuild.config.ts`:
```ts title="rsbuild.config.ts"
import { defineConfig } from '@rsbuild/core';
import { pluginVue } from '@rsbuild/plugin-vue';
export default defineConfig({
plugins: [pluginVue()],
});
```
:::tip
For projects using Vue CLI, you can refer to the [Vue CLI Migration Guide](/guide/migration/vue-cli).
:::
### Use the JSX syntax of Vue
To use the JSX syntax of Vue, you also need to register the [@rsbuild/plugin-vue-jsx](https://github.com/rspack-contrib/rsbuild-plugin-vue-jsx).
### TypeScript support
Rsbuild supports compiling TypeScript by default.
Please refer to the [TypeScript - IDE Support](https://vuejs.org/guide/typescript/overview.html#ide-support) section of the Vue documentation to learn how to set up Vue TypeScript support in your IDE.
## Vue 2
### Use Vue 2 in an existing project
To compile Vue SFC (Single File Components), you need to register the Rsbuild [Vue 2 plugin](https://github.com/rspack-contrib/rsbuild-plugin-vue2). The plugin will automatically add the necessary configuration for Vue builds.
For example, register in `rsbuild.config.ts`:
```ts title="rsbuild.config.ts"
import { defineConfig } from '@rsbuild/core';
import { pluginVue2 } from '@rsbuild/plugin-vue2';
export default defineConfig({
plugins: [pluginVue2()],
});
```
:::tip
- The Vue 2 plugin only supports Vue >= 2.7.0.
- For projects using Vue CLI, you can refer to the [Vue CLI Migration Guide](/guide/migration/vue-cli).
:::
### Use the JSX syntax of Vue
To use the JSX syntax of Vue, you also need to register the [@rsbuild/plugin-vue2-jsx](https://github.com/rspack-contrib/rsbuild-plugin-vue2-jsx).
### Type declarations
In a TypeScript project, you need to add type definitions for `*.vue` files so that TypeScript can recognize them correctly.
Create `env.d.ts` in the `src` directory and add the following content:
```ts title="src/env.d.ts"
declare module '*.vue' {
import Vue from 'vue';
export default Vue;
}
```
---
url: /guide/framework/preact.md
---
# Preact
In this document, you will learn how to build a Preact application using Rsbuild.
## Create a Preact application
Use [create-rsbuild](/guide/start/quick-start#create-an-rsbuild-application) to create a Preact application with Rsbuild. Run the following command:
import { PackageManagerTabs } from '@theme';
<PackageManagerTabs
command={{
npm: 'npm create rsbuild@latest',
yarn: 'yarn create rsbuild',
pnpm: 'pnpm create rsbuild@latest',
bun: 'bun create rsbuild@latest',
}}
/>
Then select `Preact` when prompted to "Select framework".
## Use Preact in an existing project
To compile Preact, you need to register the Rsbuild [Preact Plugin](/plugins/list/plugin-preact). The plugin will automatically add the necessary configuration for Preact builds.
For example, register in `rsbuild.config.ts`:
```ts title="rsbuild.config.ts"
import { defineConfig } from '@rsbuild/core';
import { pluginPreact } from '@rsbuild/plugin-preact';
export default defineConfig({
plugins: [pluginPreact()],
});
```
## Preact Fast Refresh
Preact plugin uses [@preact/prefresh](https://github.com/preactjs/prefresh) and [@rspack/plugin-preact-refresh](https://github.com/rspack-contrib/rspack-plugin-preact-refresh) to hot reload Preact components.
### Component recognition
Prefresh needs to be able to recognize your components. This means that components should
start with a capital letter and hooks should start with `use` followed by a capital letter.
This allows the plugin to effectively recognize these.
Do note that a component as seen below is not named:
```jsx
export default () => {
return <p>Want to refresh</p>;
};
```
Instead do:
```jsx
const MyComponent = () => {
return <p>Want to refresh</p>;
};
export default MyComponent;
```
When you are working with HOC's be sure to lift up the `displayName` so the plugin can
recognize it as a component.
---
url: /guide/framework/svelte.md
---
# Svelte
In this document, you will learn how to build a Svelte application using Rsbuild.
## Create a Svelte application
Use [create-rsbuild](/guide/start/quick-start#create-an-rsbuild-application) to create a Svelte application with Rsbuild. Run the following command:
import { PackageManagerTabs } from '@theme';
<PackageManagerTabs
command={{
npm: 'npm create rsbuild@latest',
yarn: 'yarn create rsbuild',
pnpm: 'pnpm create rsbuild@latest',
bun: 'bun create rsbuild@latest',
}}
/>
Then select `Svelte` when prompted to "Select framework".
## Use Svelte in an existing project
To compile Svelte components (`.svelte` files), you need to register the Rsbuild [Svelte plugin](/plugins/list/plugin-svelte). The plugin will automatically add the necessary configuration for Svelte builds.
For example, register in `rsbuild.config.ts`:
```ts title="rsbuild.config.ts"
import { defineConfig } from '@rsbuild/core';
import { pluginSvelte } from '@rsbuild/plugin-svelte';
export default defineConfig({
plugins: [pluginSvelte()],
});
```
---
url: /guide/framework/solid.md
---
# Solid
In this document, you will learn how to build a Solid application using Rsbuild.
## Create a Solid application
Use [create-rsbuild](/guide/start/quick-start#create-an-rsbuild-application) to create a Solid application with Rsbuild. Run the following command:
import { PackageManagerTabs } from '@theme';
<PackageManagerTabs
command={{
npm: 'npm create rsbuild@latest',
yarn: 'yarn create rsbuild',
pnpm: 'pnpm create rsbuild@latest',
bun: 'bun create rsbuild@latest',
}}
/>
Then select `Solid` when prompted to "Select framework".
## Use Solid in an existing project
To compile Solid components, you need to register the Rsbuild [Solid plugin](/plugins/list/plugin-solid). The plugin will automatically add the necessary configuration for Solid builds.
For example, register in `rsbuild.config.ts`:
```ts title="rsbuild.config.ts"
import { defineConfig } from '@rsbuild/core';
import { pluginBabel } from '@rsbuild/plugin-babel';
import { pluginSolid } from '@rsbuild/plugin-solid';
export default defineConfig({
plugins: [
pluginBabel({
include: /\.(?:jsx|tsx)$/,
}),
pluginSolid(),
],
});
```
---
url: /guide/basic/cli.md
---
# CLI
Rsbuild includes a lightweight CLI with commands like [rsbuild dev](#rsbuild-dev) and [rsbuild build](#rsbuild-build).
## All commands
To view all available CLI commands, run this command in your project directory:
```bash
npx rsbuild -h
```
The output is shown below:
```
Usage:
$ rsbuild [command] [options]
Commands:
dev Start the dev server
build Build the app for production
preview Preview the production build locally
inspect Inspect the Rspack and Rsbuild configurations
```
## Common flags
The Rsbuild CLI includes several common flags that work with all commands:
| Flag | Description |
| -------------------------- | ------------------------------------------------------------------------------------------------------------------------------------------ |
| `--base <base>` | Set the base path of the server, see [server.base](/config/server/base) |
| `-c, --config <config>` | Set the configuration file (relative or absolute path), see [Specify config file](/guide/configuration/rsbuild#specify-config-file) |
| `--config-loader <loader>` | Set the config file loader (`auto` \| `jiti` \| `native`), see [Specify config loader](/guide/configuration/rsbuild#specify-config-loader) |
| `--env-mode <mode>` | Set the env mode to load the `.env.[mode]` file, see [Env mode](/guide/advanced/env-vars#env-mode) |
| `--env-dir <dir>` | Set the directory for loading `.env` files, see [Env directory](/guide/advanced/env-vars#env-directory) |
| `--environment <name>` | Set the environment name(s) to build, see [Build specified environment](/guide/advanced/environments#build-specified-environment) |
| `-h, --help` | Display help for command |
| `--log-level <level>` | Set the log level (`info` \| `warn` \| `error` \| `silent`), see [logLevel](/config/log-level) |
| `-m, --mode <mode>` | Set the build mode (`development` \| `production` \| `none`), see [mode](/config/mode) |
| `--no-env` | Disable loading of `.env` files |
| `-r, --root <root>` | Set the project root directory (absolute path or relative to [cwd](https://nodejs.org/api/process.html#processcwd)) |
## rsbuild dev
The `rsbuild dev` command starts a local dev server and compiles source code for development.
```bash
Usage: rsbuild dev [options]
Options:
-o, --open [url] Open the page in browser on startup
--port <port> Set the port number for the server
--host <host> Set the host that the server listens to
```
Start the dev server by running `rsbuild` directly (equivalent to `rsbuild dev`):
```bash
npx rsbuild
```
### Opening page
The `--open` option automatically opens a page when starting the dev server (equivalent to setting [server.open](/config/server/open) to `true`).
```bash
rsbuild dev --open
```
The `--open` option also accepts a specific URL to open. For example:
```bash
rsbuild dev --open http://localhost:3000/foo
```
The `--open` option can also be abbreviated to `-o`:
```bash
rsbuild dev -o
```
:::tip
When using both [server.open](/config/server/open) and `--open`, the `--open` option takes precedence.
:::
## rsbuild build
The `rsbuild build` command builds production outputs in the `dist/` directory by default.
```bash
Usage: rsbuild build [options]
Options:
-w, --watch Enable watch mode to automatically rebuild on file changes
```
## rsbuild preview
The `rsbuild preview` command previews production build outputs locally. You must run `rsbuild build` first to generate the outputs.
```bash
Usage: rsbuild preview [options]
Options:
-o, --open [url] Open the page in browser on startup
--port <port> Set a port number for Rsbuild server to listen
--host <host> Set the host that the Rsbuild server listens to
```
:::tip
The preview command is only used for local preview. Do not use it for production servers, as it is not designed for that.
:::
## rsbuild inspect
The `rsbuild inspect` command displays the project's Rsbuild and Rspack configurations.
```bash
Usage: rsbuild inspect [options]
Options:
--output <output> Set the output path for inspection results (default: ".rsbuild")
--verbose Show complete function definitions in output
```
Running `npx rsbuild inspect` in the project root generates the following files in the `dist/.rsbuild` directory:
- `rsbuild.config.mjs`: Represents the Rsbuild configuration used during the build.
- `rspack.config.web.mjs`: Represents the Rspack configuration used during the build.
```bash
➜ npx rsbuild inspect
config inspection completed, generated files:
- Rsbuild config: /project/dist/.rsbuild/rsbuild.config.mjs
- Rspack config (web): /project/dist/.rsbuild/rspack.config.web.mjs
```
### Setting mode
By default, the inspect command outputs configuration for development mode. To output production mode configuration, add the `--mode production` option:
```bash
rsbuild inspect --mode production
```
### Verbose content
By default, the inspect command omits function content in the configuration object. To output complete function content, add the `--verbose` option:
```bash
rsbuild inspect --verbose
```
### Multiple targets
If the current project has multiple build targets (such as building both browser and Node.js bundles), multiple Rspack configuration files will be generated in the `dist/.rsbuild` directory.
```bash
➜ npx rsbuild inspect
config inspection completed, generated files:
- Rsbuild config (web): /project/dist/.rsbuild/rsbuild.config.web.mjs
- Rsbuild config (node): /project/dist/.rsbuild/rsbuild.config.node.mjs
- Rspack config (web): /project/dist/.rsbuild/rspack.config.web.mjs
- Rspack config (node): /project/dist/.rsbuild/rspack.config.node.mjs
```
---
url: /guide/basic/server.md
---
# Dev server
Rsbuild includes a built-in dev server that enhances the development experience. When you run `rsbuild dev` or `rsbuild preview`, the server starts and provides features like page preview, routing, and hot module replacement.
## Base path
By default, the Rsbuild server's base path is `/`. You can access output files like `index.html` and [public folder](/guide/basic/static-assets#public-folder) assets at `http://localhost:3000/`.
To change the server's base path, use [server.base](/config/server/base). For example, to access files at `http://localhost:3000/foo/`:
```ts title="rsbuild.config.ts"
export default {
server: {
base: '/foo',
},
};
```
## View static assets
After starting the dev server, visit `/rsbuild-dev-server` to view all static assets generated during the current build.
For example, open `http://localhost:3000/rsbuild-dev-server` in your browser:
<img
src="https://assets.rspack.rs/rsbuild/assets/assets-report-page.png"
alt="rsbuild-dev-server"
width="600"
/>
## Page routing
The Rsbuild server provides default routing conventions and allows customization through configuration.
### Default behavior
The Rsbuild server generates page routes based on the [server.base](/config/server/base) and [source.entry](/config/source/entry) configurations.
When the entry is `index`, access the page at `/`. When the entry is `foo`, access the page at `/foo`.
When `server.base` is `/base`, access the index page at `/base`, and the foo page at `/base/foo`.
```ts title="rsbuild.config.ts"
export default {
source: {
entry: {
index: './src/index.ts',
foo: './src/pages/foo/index.ts',
},
},
};
```
### Fallback behavior
If a request meets the following conditions but no corresponding static asset exists, [server.htmlFallback](/config/server/html-fallback) triggers and falls back to `index.html` by default:
- The request method is `GET` or `HEAD`
- The `Accept` header contains `text/html` (for example, `text/html` or `*/*`)
### Custom fallback behavior
If Rsbuild's default [server.htmlFallback](/config/server/html-fallback) configuration doesn't meet your needs (for example, serving `main.html` when accessing `/`), use [server.historyApiFallback](/config/server/history-api-fallback) instead.
```ts title="rsbuild.config.ts"
export default {
source: {
entry: {
main: './src/index.ts',
},
},
server: {
historyApiFallback: {
index: '/main.html',
},
},
};
```
### HTML output path
Normally, `/` points to the dist root directory, and HTML files are output there. In this case, access HTML pages at `/some-path`.
If you output HTML files to other subdirectories using [output.distPath.html](/config/output/dist-path), access HTML pages at `/[htmlPath]/some-path` instead.
For example, if you set HTML files to output to the `HTML` directory, access index.html at `/html/`, and foo.html at `/html/foo`.
```ts
export default {
source: {
entry: {
index: './src/index.ts',
foo: './src/pages/foo/index.ts',
},
},
output: {
distPath: {
html: 'html',
},
},
};
```
## Rspack dev server
Rsbuild includes its own lightweight dev server, which differs from the servers in Rspack CLI and webpack CLI and offers its own configuration options.
### Comparison
Compared to the dev server in Rspack CLI, Rsbuild's dev server has the following differences:
- **Configuration**: Rsbuild provides richer server configuration options.
- **Log Format**: The log format of Rspack CLI is largely consistent with webpack CLI, while Rsbuild's logs are clearer and more readable.
- **Dependencies**: Rsbuild is built on lightweight libraries like `connect`, which has fewer dependencies and faster startup than `express` used by `@rspack/dev-server`.
### Configuration
Rsbuild doesn't support Rspack's [devServer](https://rspack.rs/config/dev-server) config. Use Rsbuild's `dev` and `server` configs instead.
In Rsbuild, the `dev` config contains settings that only apply in development mode, while the `server` config applies to both dev and preview servers.
Below are the Rsbuild configuration options that correspond to Rspack CLI's `devServer` config:
| Rspack CLI | Rsbuild |
| ------------------------------------------------------------------------------------------------- | ---------------------------------------------------------------- |
| [devServer.client](https://rspack.rs/config/dev-server#devserverclient) | [dev.client](/config/dev/client) |
| [devServer.compress](https://rspack.rs/config/dev-server#devservercompress) | [server.compress](/config/server/compress) |
| [devServer.devMiddleware.writeToDisk](https://rspack.rs/config/dev-server#devserverdevmiddleware) | [dev.writeToDisk](/config/dev/write-to-disk) |
| [devServer.headers](https://rspack.rs/config/dev-server#devserverheaders) | [server.headers](/config/server/headers) |
| [devServer.historyApiFallback](https://rspack.rs/config/dev-server#devserverhistoryapifallback) | [server.historyApiFallback](/config/server/history-api-fallback) |
| [devServer.host](https://rspack.rs/config/dev-server#devserverhost) | [server.host](/config/server/host) |
| [devServer.hot](https://rspack.rs/config/dev-server#devserverhot) | [dev.hmr](/config/dev/hmr) |
| [devServer.liveReload](https://rspack.rs/config/dev-server#devserverlivereload) | [dev.liveReload](/config/dev/live-reload) |
| [devServer.open](https://rspack.rs/config/dev-server#devserveropen) | [server.open](/config/server/open) |
| [devServer.port](https://rspack.rs/config/dev-server#devserverport) | [server.port](/config/server/port) |
| [devServer.proxy](https://rspack.rs/config/dev-server#devserverproxy) | [server.proxy](/config/server/proxy) |
| [devServer.setupMiddlewares](https://rspack.rs/config/dev-server#devserversetupmiddlewares) | [dev.setupMiddlewares](/config/dev/setup-middlewares) |
| [devServer.static](https://rspack.rs/config/dev-server#devserverstatic) | [server.publicDir](/config/server/public-dir) |
| [devServer.watchFiles](https://rspack.rs/config/dev-server#devserverwatchfiles) | [dev.watchFiles](/config/dev/watch-files) |
> For more configurations, refer to [Config Overview](/config/index).
## Middleware
Rsbuild's middleware implementation is built on [connect](https://github.com/senchalabs/connect), a lightweight HTTP server framework, and uses the standard Node.js `request` and `response` objects for handling HTTP interactions.
### Register middleware
Rsbuild provides three ways to register middleware:
1. Use the [dev.setupMiddlewares](/config/dev/setup-middlewares) configuration.
```ts title="rsbuild.config.ts"
export default {
dev: {
setupMiddlewares: (middlewares) => {
middlewares.push((req, res, next) => {
next();
});
},
},
};
```
2. In the Rsbuild plugin, you can register middleware through the [onBeforeStartDevServer](/plugins/dev/hooks#onbeforestartdevserver) hook.
```ts
const myPlugin = () => ({
setup(api) {
api.onBeforeStartDevServer(({ server }) => {
server.middlewares.use((req, res, next) => {
next();
});
});
},
});
```
3. When using the Rsbuild JavaScript API, you can create a dev server instance through the [rsbuild.createDevServer](/api/javascript-api/instance#rsbuildcreatedevserver) method and use the `use` method to register middleware.
```ts
const server = await rsbuild.createDevServer();
server.middlewares.use((req, res, next) => {
next();
});
```
### Integrate third-party server frameworks
When migrating from other server frameworks like Express, the original middleware may not work directly in Rsbuild. For example, Express-specific properties like `req.params`, `req.path`, `req.search`, and `req.query` aren't available in Rsbuild middleware.
To reuse existing middleware in Rsbuild, integrate your entire server application as middleware:
```ts title="rsbuild.config.ts"
import express from 'express';
import expressMiddleware from 'my-express-middleware';
// Initialize Express app
const app = express();
app.use(expressMiddleware);
export default {
dev: {
setupMiddlewares: (middlewares) => {
middlewares.unshift(app);
},
},
};
```
## Custom server
To integrate Rsbuild's dev server into a custom server, use the `createDevServer` method to get the Rsbuild dev server instance and call its methods as needed.
For details, refer to [Rsbuild - createDevServer](/api/javascript-api/instance#rsbuildcreatedevserver).
---
url: /guide/basic/output-files.md
---
# Output files
This section covers the output file directory structure and how to control output directories for different file types.
To learn about deploying Rsbuild build outputs as a static site, see [Deploy Static Site](/guide/basic/static-deploy).
## Default directory structure
The default output directory structure is shown below. Output files are written to the `dist` directory at your project root.
```bash
dist
├── static
│ ├── css
│ │ ├── [name].[hash].css
│ │ └── [name].[hash].css.map
│ │
│ └── js
│ ├── [name].[hash].js
│ ├── [name].[hash].js.LICENSE.txt
│ └── [name].[hash].js.map
│
└── [name].html
```
The most common output files are HTML, JS, and CSS files:
- HTML files: written to the root of the dist directory by default.
- JS files: written to the `static/js` directory by default.
- CSS files: written to the `static/css` directory by default.
Additional files may be generated alongside JS and CSS files:
- License files: contain open-source license information, written to the same directory as JS files with a `.LICENSE.txt` suffix.
- Source map files: contain source mapping information, written to the same directory as JS and CSS files with a `.map` suffix.
In the filename, `[name]` represents the entry name for this file, such as `index` or `main`. `[hash]` is a hash value generated based on the file content.
## Development mode output
In development mode, Rsbuild stores build outputs in memory on the dev server by default rather than writing them to disk. This reduces file system overhead. See [View static assets](/guide/basic/server#view-static-assets) to view all static assets generated during the current build.
To write output files to disk (useful for inspecting build artifacts or configuring proxy rules), set [dev.writeToDisk](/config/dev/write-to-disk) to `true`:
```ts
export default {
dev: {
writeToDisk: true,
},
};
```
## Modify the output directory
Rsbuild provides several options to customize output directories or filenames:
- Use [output.filename](/config/output/filename) to modify the filename.
- Use [output.distPath](/config/output/dist-path) to modify the output path.
- Use [output.legalComments](/config/output/legal-comments) to modify the license file output.
- Use [output.sourceMap](/config/output/source-map) to modify source map output.
- Use [html.outputStructure](/config/html/output-structure) to modify the output structure of HTML files.
## Static assets
Static assets imported in your code (images, SVG, fonts, media, etc.) are written to the `dist/static` directory and automatically organized by file type:
```bash
dist
└── static
├── image
│ └── foo.[hash].png
│
├── svg
│ └── bar.[hash].svg
│
├── font
│ └── baz.[hash].woff2
│
└── media
└── qux.[hash].mp4
```
Configure [output.distPath](/config/output/dist-path) to write static assets to a single directory. For example, to place them all in an `assets` directory:
```ts
export default {
output: {
distPath: {
image: 'assets',
svg: 'assets',
font: 'assets',
media: 'assets',
},
},
};
```
This configuration generates the following directory structure:
```bash
dist
└── assets
├── foo.[hash].png
├── bar.[hash].svg
├── baz.[hash].woff2
└── qux.[hash].mp4
```
## Node.js output directory
With [output.target](/config/output/target) set to `'node'`, Rsbuild generates output files for Node.js:
```bash
dist
├── static
└── [name].js
```
Node.js outputs typically contain only JS files, without HTML or CSS. JS filenames do not include hash values.
You can modify the output path for Node.js files using the [environments](/config/environments) configuration.
For example, to write Node.js files to the `server` directory:
```ts
export default {
environments: {
web: {
output: {
target: 'web',
},
},
node: {
output: {
target: 'node',
distPath: {
root: 'dist/server',
},
},
},
},
};
```
## Flatten directories
To create a flatter directory structure, set any directory path to an empty string.
For example:
```ts
export default {
output: {
distPath: {
js: '',
css: '',
},
},
};
```
This configuration generates the following directory structure:
```bash
dist
├── [name].[hash].css
├── [name].[hash].css.map
├── [name].[hash].js
├── [name].[hash].js.map
└── [name].html
```
---
url: /guide/basic/static-assets.md
---
# Static assets
Rsbuild supports importing static assets, including images, fonts, audio, and video.
:::tip What are static assets
Static assets are files that are part of a web application and don't change during use. Examples include images, fonts, media files, stylesheets, and JavaScript files. These assets are typically stored on a web server or CDN and delivered to the user's browser when they access the application. Because they don't change, static assets can be cached by the browser, improving application performance.
:::
## Asset formats
Rsbuild supports these formats by default:
- **Images**: png, jpg, jpeg, gif, svg, bmp, webp, ico, apng, avif, tif, tiff, jfif, pjpeg, pjp, cur.
- **Fonts**: woff, woff2, eot, ttf, otf, ttc.
- **Audio**: mp3, wav, flac, aac, m4a, opus.
- **Video**: mp4, webm, ogg, mov.
To import assets in other formats, refer to [Extend Asset Types](#extend-asset-types).
:::tip SVG images
SVG images are a special case. Rsbuild supports converting SVG to React components, so SVG files are processed separately. For details, see [SVGR Plugin](/plugins/list/plugin-svgr).
:::
## Importing assets in JavaScript files
In JavaScript files, import static assets using relative paths:
```tsx
// Import the logo.png image in the static directory
import logo from './static/logo.png';
console.log(logo); // "/static/logo.[hash].png"
export default () => <img src={logo} />;
```
Importing with [alias](/guide/advanced/alias) is also supported:
```tsx
import logo from '@/static/logo.png';
console.log(logo); // "/static/logo.[hash].png"
export default () => <img src={logo} />;
```
### URL assets
Rsbuild supports using JavaScript's native [URL](https://developer.mozilla.org/docs/Web/API/URL) and [import.meta.url](https://developer.mozilla.org/docs/Web/JavaScript/Reference/Operators/import.meta) to import static assets.
```tsx
const logo = new URL('./static/logo.png', import.meta.url).href;
console.log(logo); // "/static/logo.[hash].png"
export default () => <img src={logo} />;
```
When using `new URL()` to reference `.js` or `.ts` files, they're treated as URL assets and aren't processed by Rsbuild's built-in SWC loader.
```tsx
// foo.ts will remain the original content and be output to the dist directory
const fooTs = new URL('./foo.ts', import.meta.url).href;
console.log(fooTs); // "/static/foo.[hash].ts"
```
Similarly, when using `new URL()` to reference `.css` or `.scss` files, they're treated as URL assets and aren't processed by Rsbuild's built-in CSS loaders.
```tsx
// foo.css will remain the original content and be output to the dist directory
const fooCss = new URL('./foo.css', import.meta.url).href;
console.log(fooCss); // "/static/foo.[hash].css"
```
## Importing assets in CSS files
In CSS files, you can reference static assets using relative paths:
```css
.logo {
background-image: url('../static/logo.png');
}
```
Importing with [alias](/guide/advanced/alias) is also supported:
```css
.logo {
background-image: url('@/static/logo.png');
}
```
If you want to reference static assets using absolute paths in CSS files:
```css
@font-face {
font-family: DingTalk;
src: url('/image/font/foo.ttf');
}
```
By default, Rsbuild's built-in `css-loader` will resolve absolute paths in `url()` and look for the specified modules. To skip resolving absolute paths, you can configure [`tools.cssLoader`](/config/tools/css-loader#toolscssloader) to filter out specific paths. Filtered paths will remain unchanged in the code.
```ts
export default {
tools: {
cssLoader: {
url: {
filter: (url) => {
if (/\/image\/font/.test(url)) {
return false;
}
return true;
},
},
},
},
};
```
## Inline assets
The result of importing static assets depends on the file size:
- If the file size is less than 4KiB, it will be converted to a base64 string and inlined in the code.
- If the file size is larger than 4KiB, a URL will be returned and the file will be emitted to the output directory.
```js
import largeImage from './static/largeImage.png';
import smallImage from './static/smallImage.png';
console.log(largeImage); // "/static/largeImage.[hash].png"
console.log(smallImage); // "data:image/png;base64,iVBORw0KGgo..."
```
Adding the `?url` query parameter ensures the asset is always loaded as a separate file and returns a URL:
```js
import image from './static/image.png?url';
console.log(image); // "/static/image.[hash].png"
```
Adding the `?inline` query parameter ensures the asset is always inlined in the code, regardless of file size:
```js
import image from './static/image.png?inline';
console.log(image); // "data:image/png;base64,iVBORw0KGgo..."
```
For a more detailed introduction to asset inlining, refer to the [Static Asset Inlining](/guide/optimization/inline-assets) section.
## Importing as string
Rsbuild supports using the `?raw` query parameter to import the raw content of static assets as a string in JavaScript.
```ts
import rawSvg from './static/logo.svg?raw';
console.log(rawSvg); // The raw content of the SVG file
```
Rsbuild also supports importing the raw content of JavaScript, TypeScript, and JSX files through the `?raw` query parameter.
```ts
import rawJs from './script1.js?raw';
import rawTs from './script2.ts?raw';
import rawJsx from './script3.jsx?raw';
import rawTsx from './script4.tsx?raw';
console.log(rawJs); // The raw content of the JS file
console.log(rawTs); // The raw content of the TS file
console.log(rawJsx); // The raw content of the JSX file
console.log(rawTsx); // The raw content of the TSX file
```
You can also use the `?raw` query parameter to import the raw content of CSS files, see [CSS](/guide/styling/css-usage#raw).
:::tip
Rsbuild >= 1.3.0 supports the `?raw` query parameter, and >= 1.4.0 supports importing the raw content of JS and TS files.
:::
## Output files
When static assets are imported, they will be output to the dist directory. You can:
- Use [output.filename](/config/output/filename) to modify the output filename.
- Use [output.distPath](/config/output/dist-path) to modify the output path.
Read [Output Files](/guide/basic/output-files) for details.
## URL prefix
The URL returned after importing an asset will automatically include the path prefix:
- In development, use [dev.assetPrefix](/config/dev/asset-prefix) to set the path prefix.
- In production, use [output.assetPrefix](/config/output/asset-prefix) to set the path prefix.
- When either `dev.assetPrefix` or `output.assetPrefix` is not configured, the value of [server.base](/config/server/base) will be automatically used as the default prefix.
For example, you can set `output.assetPrefix` to `https://example.com`:
```ts title="rsbuild.config.ts"
export default {
output: {
assetPrefix: 'https://example.com',
},
};
```
```js
import logo from './static/logo.png';
console.log(logo); // "https://example.com/static/logo.[hash].png"
```
## Public folder
The public folder at the project root can be used to place static assets. These assets won't be built by Rsbuild and can be directly referenced via URL.
- When you start the dev server, these assets will be served under the [server.base](/config/server/base) path (default `/`).
- When you perform a production build, these assets will be copied to the [dist directory](/guide/basic/output-files).
For example, you can place files such as `robots.txt`, `manifest.json`, or `favicon.ico` in the public folder.
### How to reference
You can reference files in the `public` directory via URL.
For example, in an HTML template, the `./public/favicon.ico` file can be referenced as `/favicon.ico`. [BASE_URL](/guide/advanced/env-vars#processenvpublic_base_path) is the base path of the server.
```html title="index.html"
<link rel="icon" href="<%= process.env.BASE_URL %>/favicon.ico" />
```
### Notes
Keep these points in mind when using the `public` folder:
- When referencing assets in the public folder via URL, use absolute paths instead of relative paths to ensure assets can be accessed correctly after deployment.
```html title="src/index.html"
<!-- Wrong -->
<link rel="icon" href="../public/favicon.ico" />
<!-- Correct -->
<link rel="icon" href="/favicon.ico" />
```
- Avoid importing files from the public directory into your source code. The correct approach is to reference them by URL. You can place static assets that need to be imported into source code in the `/src/assets` directory.
```js title="src/index.js"
// Wrong
import logo from '../public/logo.png';
// Correct
import logo from './assets/logo.png';
```
- During the production build, files in the public folder are copied to the output folder (default is `dist`). Be careful to avoid name conflicts with output files. When files in the `public` folder have the same name as outputs, the outputs have higher priority and will overwrite the conflicting public folder files. This feature can be disabled by setting [server.publicDir.copyOnBuild](/config/server/public-dir) to `false`.
### Custom behavior
Rsbuild provides the [server.publicDir](/config/server/public-dir) option which can be used to customize the name and behavior of the public folder, as well as to disable it.
```ts title="rsbuild.config.ts"
export default {
server: {
publicDir: false,
},
};
```
## Type declaration
When you import static assets in TypeScript code, TypeScript may prompt that the module is missing a type definition:
```
TS2307: Cannot find module './logo.png' or its corresponding type declarations.
```
To fix this, you need to add a type declaration file for the static assets, please create a `src/env.d.ts` file, and add the corresponding type declaration.
- Method 1: If the `@rsbuild/core` package is installed, you can reference the [preset types](/guide/basic/typescript#preset-types) provided by `@rsbuild/core`:
```ts
/// <reference types="@rsbuild/core/types" />
```
- Method 2: Manually add the required type declarations:
```ts title="src/env.d.ts"
// Taking png images as an example
declare module '*.png' {
const content: string;
export default content;
}
```
After adding the type declaration, if the type error still exists, you can try to restart the current IDE, or adjust the directory where `env.d.ts` is located, making sure that TypeScript can correctly identify the type definition.
## Extend asset types
If the built-in asset types in Rsbuild cannot meet your requirements, you can extend additional static asset types in the following ways.
### Use `source.assetsInclude`
By using the [source.assetsInclude](/config/source/assets-include) config, you can specify additional file types to be treated as static assets.
```ts title="rsbuild.config.ts"
export default {
source: {
assetsInclude: /\.pdf$/,
},
};
```
After adding the above configuration, you can import `*.pdf` files in your code, for example:
```js
import myFile from './static/myFile.pdf';
console.log(myFile); // "/static/myFile.[hash].pdf"
```
### Use `tools.rspack`
You can modify the built-in Rspack configuration and add custom static assets handling rules via [tools.rspack](/config/tools/rspack).
For example, to treat `*.pdf` files as assets and output them to the dist directory, you can add the following configuration:
```ts title="rsbuild.config.ts"
export default {
tools: {
rspack(config, { addRules }) {
addRules([
{
test: /\.pdf$/,
// converts asset to a separate file and exports the URL address.
type: 'asset/resource',
},
]);
},
},
};
```
For more information about asset modules, please refer to [Rspack - Asset modules](https://rspack.rs/guide/features/asset-module).
### Related configurations
Extended static asset types will be affected by the following configurations:
- [output.filename.assets](/config/output/filename): Set the name of extended static assets.
- [output.distPath.assets](/config/output/dist-path): Set the output directory of extended static assets.
- [output.dataUriLimit.assets](/config/output/data-uri-limit): Set the threshold of inlining for extended static assets.
## Custom rules
In some scenarios, you may need to bypass the built-in assets processing rules of Rsbuild and add some custom rules.
Taking PNG image as an example, you need to:
1. Modify the built-in Rspack config via [tools.bundlerChain](/config/tools/bundler-chain) to exclude `.png` files using the `exclude` method.
2. Add custom asset processing rules via [tools.rspack](/config/tools/rspack).
```ts title="rsbuild.config.ts"
export default {
tools: {
bundlerChain(chain, { CHAIN_ID }) {
chain.module
// Use `CHAIN_ID.RULE.IMAGE` to locate the built-in image rule
.rule(CHAIN_ID.RULE.IMAGE)
.exclude.add(/\.png$/);
},
rspack(config, { addRules }) {
addRules([
{
test: /\.png$/,
// Add a custom loader to handle png images
loader: 'custom-png-loader',
},
]);
},
},
};
```
## Image format
When using image assets, you can choose an appropriate image format according to the pros and cons in the table below.
| Format | Pros | Cons | Scenarios |
| ------ | --------------------------------------------------------------------------------------------------------- | ----------------------------------------------------------------------------------- | ------------------------------------------------------------------------------------------------------------------------------------------------------ |
| PNG | Lossless compression, no loss of picture details, no distortion, support for translucency | Not suitable for pictures with complex color tables | Suitable for pictures with few colors and well-defined borders, suitable for logos, icons, transparent images and other scenes |
| JPG | Rich colors | Lossy compression, which will cause image distortion, does not support transparency | Suitable for pictures with a large number of colors, gradients, and overly complex pictures, suitable for portrait photos, landscapes and other scenes |
| WebP | Supports both lossy and lossless compression, supports transparency, and is much smaller than PNG and JPG | iOS compatibility is not good | Pixel images of almost any scene, and the hosting environment that supports WebP, should prefer WebP image format |
| SVG | Lossless format, no distortion, supports transparency | Not suitable for complex graphics | Suitable for vector graphics, suitable for icons |
---
url: /guide/basic/html-template.md
---
# HTML
During the build process, Rsbuild compiles HTML templates and template parameters to generate HTML files.
Rsbuild provides several configuration options for HTML templates. This section explains the basic usage of these options.
## HTML generation
Rsbuild generates an HTML file for each entry defined in [source.entry](/config/source/entry).
```ts title="rsbuild.config.ts"
export default {
source: {
entry: {
foo: './src/pages/foo/index.ts', // generate foo.html
bar: './src/pages/bar/index.ts', // generate bar.html
},
},
};
```
See [source.entry - HTML generation](/config/source/entry#html-generation) for more details on how to control HTML generation.
## Set template
Use [html.template](/config/html/template) to define the path to a custom HTML template.
```ts title="rsbuild.config.ts"
export default {
html: {
template: './static/index.html',
},
};
```
When `html.template` is not set, Rsbuild uses this built-in HTML template:
```html title="defaultTemplate.html"
<!doctype html>
<html>
<head></head>
<body>
<div id="<%= mountId %>"></div>
</body>
</html>
```
In the default template, `id="<%= mountId %>"` is replaced with `id="root"`. Modify this value using the [html.mountId](/config/html/mount-id) option.
## Set page title
You can set the HTML `<title>` tag using the [html.title](/config/html/title) config.
When your project has only one page, set `html.title` directly:
```ts title="rsbuild.config.ts"
export default {
html: {
title: 'example',
},
};
```
When your project has multiple pages, you can set different titles for each page based on the entry name.
```ts title="rsbuild.config.ts"
export default {
html: {
title({ entryName }) {
const titles = {
foo: 'Foo',
bar: 'Bar',
};
return titles[entryName];
},
},
};
```
:::tip
For single-page applications (SPA), Rsbuild includes an initial title in the HTML page, but you typically need to dynamically update the page title when routes change, for example using routing libraries or libraries like [React Helmet](https://github.com/nfl/react-helmet).
:::
## Set page icon
Rsbuild supports setting both the [favicon](https://developer.mozilla.org/en-US/docs/Glossary/Favicon) and the web application icon.
By default, Rsbuild automatically looks for favicon files in the [public directory](/config/server/public-dir). If you want to customize the favicon, use the [html.favicon](/config/html/favicon) option:
```ts title="rsbuild.config.ts"
export default {
html: {
favicon: './src/assets/icon.png',
},
};
```
You can also use the [html.appIcon](/config/html/app-icon) option to define web application icons, which are displayed when users add your site to their mobile device's home screen:
```ts title="rsbuild.config.ts"
export default {
html: {
appIcon: {
name: 'My Website',
icons: [
{ src: './src/assets/logo-192.png', size: 192 },
{ src: './src/assets/logo-512.png', size: 512 },
],
},
},
};
```
## Set meta tags
You can set meta tags using the [html.meta](/config/html/meta) config.
Rsbuild defaults to setting the charset and viewport meta tags:
```html
<meta charset="UTF-8" />
<meta name="viewport" content="width=device-width, initial-scale=1.0" />
```
You can also add custom meta tags, like a description:
```ts title="rsbuild.config.ts"
export default {
html: {
meta: {
description: 'a description of the page',
},
},
};
```
The generated meta tag in HTML is:
```html
<meta name="description" content="a description of the page" />
```
## Default template engine
Rsbuild has a built-in default template engine for processing HTML template files. Its syntax resembles a subset of EJS, with some differences. When an HTML template file has a `.html` extension, Rsbuild uses the built-in template engine to parse it.
For example, if a `text` parameter is defined in the template with the value `'world'`, Rsbuild automatically replaces `<%= text %>` with the specified value during the build.
```html
<!-- Input -->
<div>hello <%= text %>!</div>
<!-- Output -->
<div>hello world!</div>
```
### Template parameters
In HTML templates, you can use a variety of template parameters. Rsbuild injects the following default template parameters:
```ts
type DefaultParameters = {
mountId: string; // the value of `html.mountId` config
entryName: string; // entry name
assetPrefix: string; // the value of dev.assetPrefix or output.assetPrefix configs
compilation: Compilation; // Compilation object of Rspack
rspackConfig: Rspack.Configuration; // Rspack config object
// generated by html-rspack-plugin
htmlPlugin: {
tags: {
headTags: HtmlTagObject[];
bodyTags: HtmlTagObject[];
};
files: {
publicPath: string;
js: string[];
css: string[];
favicon?: string;
};
};
};
```
You can use the [html.templateParameters](/config/html/template-parameters) config to pass custom template parameters. For example:
```ts title="rsbuild.config.ts"
export default {
html: {
templateParameters: {
text: 'world',
},
},
};
```
Then you can read parameters in the HTML template with `<%= text %>`:
```html title="index.html"
<div>hello <%= text %>!</div>
```
The compiled HTML code will be:
```html title="dist/index.html"
<div>hello world!</div>
```
### Parameter escaping
When using `<%= text %>`, the parameters will not be escaped. You can use `<%- text %>` to escape parameters.
For example, if the value of the parameter `text` is `'<script>'`, it will be escaped to `<script>`:
```html
<!-- Input -->
<div>hello <%- text %>!</div>
<!-- Output -->
<div>hello <script>!</div>
```
:::tip
Note that Rsbuild's default escape syntax is different from EJS. In EJS, the default escape syntax is `<%= text %>`, whereas Rsbuild's default escape syntax is `<%- text %>`.
:::
### Conditional statements
- if condition:
```ts title="rsbuild.config.ts"
export default {
html: {
templateParameters: {
show: true,
},
},
};
```
```ejs
<% if (show) { %>
<p>show is true</p>
<% } %>
```
- if/else condition:
```ejs
<% if (show) { %>
<p>show is true</p>
<% } else { %>
<p>show is false</p>
<% } %>
```
- else if condition:
```ts title="rsbuild.config.ts"
export default {
html: {
templateParameters: {
count: 7,
},
},
};
```
```ejs
<% if (count > 10) { %>
<p>count > 10</p>
<% } else if (count > 5) { %>
<p>count > 5</p>
<% } else { %>
<p>count ≤ 5</p>
<% } %>
```
- Nested conditions:
```ts title="rsbuild.config.ts"
export default {
html: {
templateParameters: {
parent: true,
child: true,
},
},
};
```
```ejs
<% if (parent) { %>
<p>parent is true</p>
<% if (child) { %>
<p>child is true</p>
<% } %>
<% } %>
```
- Ternary operator:
```ts title="rsbuild.config.ts"
export default {
html: {
templateParameters: {
show: true,
value: 'success',
},
},
};
```
```ejs
<p>result: <%= show ? value : 'none' %></p>
```
### Loop statements
- for loop:
```ts title="rsbuild.config.ts"
export default {
html: {
templateParameters: {
items: ['Item 1', 'Item 2', 'Item 3'],
},
},
};
```
```ejs title="index.html"
<ul>
<% for (let i = 0; i < items.length; i++) { %>
<li><%= items[i] %></li>
<% } %>
</ul>
```
- forEach loop:
```ejs title="index.html"
<ul>
<% items.forEach(function(item, index) { %>
<li><%= item %> <%= index %></li>
<% }); %>
</ul>
```
- for...of loop:
```ejs title="index.html"
<ul>
<% for (let item of items) { %>
<li><%= item %></li>
<% } %>
</ul>
```
## Other template engines
Rsbuild also supports using other template engines via plugins, such as [EJS](https://ejs.co/) and [Pug](https://pugjs.org/).
### EJS
Rsbuild's built-in template syntax has some differences from [EJS](https://ejs.co/). To use the full EJS syntax, you can use a plugin. See [rsbuild-plugin-ejs](https://github.com/rspack-contrib/rsbuild-plugin-ejs) for more details.
### Pug
Rsbuild supports the [Pug](https://pugjs.org/) template engine via a plugin. See [@rsbuild/plugin-pug](https://github.com/rspack-contrib/rsbuild-plugin-pug) for more details.
## Injecting tags
You can insert any tags into the HTML files generated by Rsbuild by configuring [html.tags](/config/html/tags).
In the HTML template, the `htmlPlugin.tags` variable provides access to all tags inserted into the HTML:
```html title="index.html"
<html>
<head>
<%= htmlPlugin.tags.headTags %>
</head>
<body>
<div id="root"></div>
<%= htmlPlugin.tags.bodyTags %>
</body>
</html>
```
The `html.tags` config allows you to modify HTML tags by updating these tag variables. Here is a basic example:
```ts title="rsbuild.config.ts"
export default {
html: {
tags: [
{ tag: 'script', attrs: { src: 'https://cdn.example.com/my-script.js' } },
],
},
};
```
- The generated HTML file looks like this:
```html
<html>
<head>
<script src="https://cdn.example.com/my-script.js"></script>
<!-- some other headTags... -->
</head>
<body>
<!-- some other bodyTags... -->
</body>
</html>
```
> For more usage, please refer to: [html.tags](/config/html/tags).
:::tip
Typically, you do not need to manually use the `htmlPlugin.tags.headTags` and `htmlPlugin.tags.bodyTags` template parameters because Rsbuild automatically injects these tags. See [html.inject](/config/html/inject) for more details on adjusting the injection location.
:::
## HTML plugin
Rsbuild internally implements HTML-related features based on [html-rspack-plugin](https://github.com/rspack-contrib/html-rspack-plugin). It is a fork of [html-webpack-plugin](https://github.com/jantimon/html-webpack-plugin), with the same features and options.
You can modify the html-rspack-plugin options via [tools.htmlPlugin](/config/tools/html-plugin), or disable the default html-rspack-plugin.
For example:
```ts title="rsbuild.config.ts"
export default {
tools: {
htmlPlugin(config, { entryName }) {
if (process.env.NODE_ENV === 'production') {
config.filename = `${entryName}.[contenthash:8].html`;
}
},
},
};
```
## HTML minification
Rsbuild currently does not minify HTML files. If you need to minify HTML files, you can use the [rsbuild-plugin-html-minifier-terser plugin](https://github.com/rspack-contrib/rsbuild-plugin-html-minifier-terser).
---
url: /guide/basic/json-files.md
---
# JSON
Rsbuild supports importing JSON files in code, and also supports importing [YAML](https://yaml.org/) and [TOML](https://toml.io/en/) files, converting them to JSON format.
## JSON file
You can import JSON files directly in JavaScript files.
### Example
```json title="example.json"
{
"name": "foo",
"items": [1, 2]
}
```
```js title="index.js"
import example from './example.json';
console.log(example.name); // 'foo';
console.log(example.items); // [1, 2];
```
### Named import
Rsbuild also supports importing JSON files using named imports:
```js
import { name } from './example.json';
console.log(name); // 'foo';
```
## YAML file
[YAML](https://yaml.org/) is a data serialization language commonly used for writing configuration files.
Rsbuild provides the [@rsbuild/plugin-yaml](https://github.com/rspack-contrib/rsbuild-plugin-yaml). After registering the plugin, you can import `.yaml` or `.yml` files in JavaScript and they will be automatically converted to JavaScript objects.
```ts title="rsbuild.config.ts"
import { pluginYaml } from '@rsbuild/plugin-yaml';
export default {
plugins: [pluginYaml()],
};
```
### Example
```yaml title="example.yaml"
---
hello: world
foo:
bar: baz
```
```js
import example from './example.yaml';
console.log(example.hello); // 'world';
console.log(example.foo); // { bar: 'baz' };
```
## TOML file
[TOML](https://toml.io/) is a semantically explicit, easy-to-read configuration file format.
Rsbuild provides the [@rsbuild/plugin-toml](https://github.com/rspack-contrib/rsbuild-plugin-toml). After registering the plugin, you can import `.toml` files in JavaScript and it will be automatically converted to JavaScript objects.
```ts title="rsbuild.config.ts"
import { pluginToml } from '@rsbuild/plugin-toml';
export default {
plugins: [pluginToml()],
};
```
### Example
```toml title="example.toml"
hello = "world"
[foo]
bar = "baz"
```
```js
import example from './example.toml';
console.log(example.hello); // 'world';
console.log(example.foo); // { bar: 'baz' };
```
## Type declaration
When you import YAML or TOML files in TypeScript code, please create a `src/env.d.ts` file in your project and add the corresponding type declarations.
- Method 1: If the `@rsbuild/core` package is installed, you can reference the [preset types](/guide/basic/typescript#preset-types) provided by `@rsbuild/core`:
```ts title="src/env.d.ts"
/// <reference types="@rsbuild/core/types" />
```
- Method 2: Manually add the required type declarations:
```ts title="src/env.d.ts"
declare module '*.yaml' {
const content: Record<string, any>;
export default content;
}
declare module '*.yml' {
const content: Record<string, any>;
export default content;
}
declare module '*.toml' {
const content: Record<string, any>;
export default content;
}
```
---
url: /guide/basic/wasm-assets.md
---
# Wasm
Rsbuild provides native support for WebAssembly (WASM) modules, allowing you to import and use `.wasm` files directly in your project.
:::tip What is WebAssembly
WebAssembly (Wasm) is a portable, high-performance binary format designed to execute CPU-intensive computing tasks in modern web browsers, bringing near-native performance and reliability to the web platform.
:::
## Import
You can reference a WebAssembly module in a JavaScript file using named imports:
```js title="index.js"
import { add } from './add.wasm';
console.log(add); // [native code]
console.log(add(1, 2)); // 3
```
WebAssembly modules can also be imported via dynamic import:
```js title="index.js"
import('./add.wasm').then(({ add }) => {
console.log('---- Async Wasm Module');
console.log(add); // [native code]
console.log(add(1, 2)); // 3
});
```
You can also get the path of a WebAssembly module using the `new URL` syntax:
```js title="index.js"
const wasmURL = new URL('./add.wasm', import.meta.url);
console.log(wasmURL.pathname); // "/static/wasm/[contenthash:8].module.wasm"
```
## Output directory
When you import a `.wasm` asset, Rsbuild outputs it to the `dist/static/wasm` directory by default.
You can change the output directory for `.wasm` files using the [output.distPath](/config/output/dist-path) configuration:
```ts
export default {
output: {
distPath: {
wasm: 'resource/wasm',
},
},
};
```
## Type declaration
When you import a WebAssembly file in TypeScript code, you usually need to add the corresponding type declaration.
For example, if the `add.wasm` file exports an `add()` method, you can create an `add.wasm.d.ts` file in the same directory and add the corresponding type declaration:
```ts title="add.wasm.d.ts"
export const add: (num1: number, num2: number) => number;
```
---
url: /guide/basic/typescript.md
---
# TypeScript
Rsbuild supports TypeScript by default, allowing you to directly use `.ts` and `.tsx` files in your project.
## TypeScript transformation
Rsbuild uses [SWC](/guide/configuration/swc) by default for transforming TypeScript code to JavaScript, and also supports switching to [Babel](/plugins/list/plugin-babel) for transformation.
### Isolated modules
Unlike the native TypeScript compiler, tools like SWC and Babel compile each file separately and cannot determine whether an imported name is a type or value. When using TypeScript in Rsbuild, enable the [verbatimModuleSyntax](https://www.typescriptlang.org/tsconfig/#verbatimModuleSyntax) or [isolatedModules](https://typescriptlang.org/tsconfig/#isolatedModules) option in `tsconfig.json`:
- For TypeScript >= 5.0.0, use the `verbatimModuleSyntax` option, which enables the `isolatedModules` option by default:
```json title="tsconfig.json"
{
"compilerOptions": {
"verbatimModuleSyntax": true
}
}
```
- For TypeScript < 5.0.0, use the `isolatedModules` option:
```json title="tsconfig.json"
{
"compilerOptions": {
"isolatedModules": true
}
}
```
The `isolatedModules` option prevents syntax that SWC and Babel cannot compile correctly, such as cross-file type references. It guides you toward correct usage:
```ts
// Wrong
export { SomeType } from './types';
// Correct
export type { SomeType } from './types';
```
> See [SWC - Migrating from tsc](https://swc.rs/docs/migrating-from-tsc) for more details about the differences between SWC and tsc.
## Preset types
`@rsbuild/core` provides preset type definitions, including CSS files, CSS Modules, static assets, `import.meta`, and other types.
Create a `src/env.d.ts` file to reference these types:
```ts title="src/env.d.ts"
/// <reference types="@rsbuild/core/types" />
```
> See [types.d.ts](https://github.com/web-infra-dev/rsbuild/blob/main/packages/core/types.d.ts) for the complete preset type definitions that Rsbuild includes.
## Type checking
When transpiling TypeScript code using tools like SWC and Babel, type checking isn't performed.
### Type check plugin
To enable type checking, you can use the [@rsbuild/plugin-type-check](https://github.com/rspack-contrib/rsbuild-plugin-type-check) plugin. This plugin runs TypeScript type checking in a separate process and internally integrates [ts-checker-rspack-plugin](https://github.com/rspack-contrib/ts-checker-rspack-plugin).
The plugin supports type checking in both dev and build modes, helping you catch type errors early in development.
Refer to [@rsbuild/plugin-type-check](https://github.com/rspack-contrib/rsbuild-plugin-type-check) for usage instructions.
### Using tsc
You can also use [tsc](https://www.typescriptlang.org/docs/handbook/compiler-options.html) directly for type checking by adding a `type-check` step to your `build` script. This approach only performs type checking after the build and doesn't run during dev mode.
```json title="package.json"
{
"scripts": {
"build": "rsbuild build && npm run type-check",
"type-check": "tsc --noEmit"
},
"devDependencies": {
"typescript": "^5.0.0"
}
}
```
For Vue applications, use [vue-tsc](https://github.com/vuejs/language-tools/tree/master/packages/tsc) instead of `tsc`. It supports Vue SFCs in addition to TypeScript files.
```json title="package.json"
{
"scripts": {
"build": "rsbuild build && npm run type-check",
"type-check": "vue-tsc --noEmit"
},
"devDependencies": {
"typescript": "^5.0.0",
"vue-tsc": "^3.0.0"
}
}
```
## tsconfig.json Path
Rsbuild reads the `tsconfig.json` file from the root directory by default. Use [source.tsconfigPath](/config/source/tsconfig-path) to configure a custom tsconfig.json file path.
```ts
export default {
source: {
tsconfigPath: './tsconfig.custom.json',
},
};
```
## Path extensions
When importing another module in a TypeScript module, TypeScript allows using the `.js` file extension:
```ts title="src/index.ts"
// The actual referenced module could be `./some-module.ts` or `./some-module.tsx`
import { someFn } from './some-module.js';
```
Rsbuild supports this feature through Rspack's [extensionAlias](https://rspack.rs/config/resolve#resolveextensionalias) configuration. In TypeScript projects, Rsbuild adds the following configuration by default:
```js
const rspackConfig = {
resolve: {
extensionAlias: {
'.js': ['.js', '.ts', '.tsx'],
'.jsx': ['.jsx', '.tsx'],
},
},
};
```
This means:
- You can use the `.js` extension to import `.ts` or `.tsx` files.
- You can use the `.jsx` extension to import `.tsx` files.
## Decorators version
Rsbuild does not read the `experimentalDecorators` option in `tsconfig.json`, instead, it provides the [decorators.version](/config/source/decorators#decoratorsversion) configuration to specify the decorator version.
By default, Rsbuild uses the `2022-03` version of the decorators, you can also set it to `legacy` to use the legacy decorators:
```ts title="rsbuild.config.ts"
export default {
source: {
decorators: {
version: 'legacy',
},
},
};
```
---
url: /guide/basic/web-workers.md
---
# Web Workers
This page explains how to configure and use [Web Workers](https://developer.mozilla.org/en-US/docs/Web/API/Web_Workers_API/Using_web_workers) in an Rsbuild project.
:::tip Web Workers
Web Workers are a type of JavaScript program that runs in the background, independently of other scripts, without affecting the performance of the page. This makes it possible to run long-running scripts, such as ones that handle complex calculations or access remote resources, without blocking the user interface or other scripts. Web workers provide an easy way to run tasks in the background and improve the overall performance of web applications.
:::
## Use Web Workers
### Import with constructors
Rspack provides built-in support for Web Workers, so you can use them directly in Rsbuild projects without adding extra loaders.
For example, create a file called `worker.js`:
```js title="worker.js"
self.onmessage = (event) => {
const result = event.data * 2;
self.postMessage(result);
};
```
Then use this worker in the main thread:
```js title="index.js"
const worker = new Worker(new URL('./worker.js', import.meta.url));
worker.onmessage = (event) => {
console.log('The results from Workers:', event.data);
};
worker.postMessage(10);
```
Rspack supports multiple Worker syntaxes by default. See [Rspack - Web Workers](https://rspack.rs/guide/features/web-workers) for more information.
### Using worker-loader
If your project already uses `worker-loader`, or you want to use the `inline` and other features provided by `worker-loader`, you can use [worker-rspack-loader](https://github.com/rspack-contrib/worker-rspack-loader) as an alternative to `worker-loader` in Rsbuild projects.
```ts title="rsbuild.config.ts"
export default {
tools: {
rspack: {
resolveLoader: {
alias: {
// Modify the resolution of worker-loader in the inline loader
// such as `worker-loader!pdfjs-dist/es5/build/pdf.worker.js`
'worker-loader': require.resolve('worker-rspack-loader'),
},
},
module: {
rules: [
{
test: /\.worker\.js$/,
loader: 'worker-rspack-loader',
},
],
},
},
},
};
```
When using `worker-rspack-loader`, load the Web Worker file with `import` instead of `new Worker('/path/to/worker.js')`.
```js
import Worker from './file.worker.js';
const worker = new Worker();
worker.postMessage({ a: 1 });
```
> `worker-loader` is no longer maintained. If you don't need to inline Web Workers, we recommend using the `new Worker()` syntax.
### Loading scripts from remote URLs
By default, the worker script is emitted as a separate chunk. You can upload this file to a CDN, but it must follow the [same-origin policy](https://developer.mozilla.org/en-US/docs/Web/Security/Same-origin_policy).
If you want your worker scripts to be accessible across domains, a common solution is to load them via [importScripts](https://developer.mozilla.org/en-US/docs/Web/API/WorkerGlobalScope/importScripts) (not subject to CORS). You can refer to the following code:
```js title="index.js"
// https://github.com/jantimon/remote-web-worker
import 'remote-web-worker';
const worker = new Worker(new URL('./worker.js', import.meta.url), {
type: 'classic',
});
worker.onmessage = (event) => {
console.log('The results from Workers:', event.data);
};
worker.postMessage(10);
```
For detailed discussions on cross-domain issues, please refer to [Discussions - webpack 5 web worker support for CORS?](https://github.com/webpack/webpack/discussions/14648)
### Browser compatibility
When your application includes both main-thread code and Web Workers created with `new Worker`, note that Web Workers run in isolated threads and do not share the main-thread environment. As a result, Rsbuild’s polyfill [entry mode](/guide/advanced/browser-compatibility#entry-mode) does not apply to Web Workers. In this case, it’s recommended to use the [usage mode](/guide/advanced/browser-compatibility#usage-mode) to inject the required polyfills directly into each Web Worker.
```ts title="rsbuild.config.ts"
export default {
output: {
polyfill: 'usage',
},
};
```
## Standalone build
Rsbuild supports standalone building of Web Workers bundles. When you need to configure independent build options for Web Workers or provide Web Workers for use by other applications, you can use the following methods.
Set Rsbuild's [output.target](/config/output/target) configuration option to `'web-worker'` to generate build artifacts that run in Worker threads.
```ts title="rsbuild.config.ts"
export default {
output: {
target: 'web-worker',
},
};
```
Use [environments](/config/environments) to build both Web Workers and the main application simultaneously:
```ts title="rsbuild.config.ts"
export default {
environments: {
web: {
// Build configuration for the main application
},
webWorker: {
// Build configuration for Web Workers
output: {
target: 'web-worker',
},
},
},
};
```
---
url: /guide/basic/static-deploy.md
---
# Deploy static site
This section explains how to deploy Rsbuild build outputs as a static site.
## Background information
Before starting the deployment, you should understand the following:
- The CLI commands used for building and previewing outputs.
- The directory structure of the build outputs.
- The URL prefix of static assets.
### Build commands
The build commands provided by Rsbuild are:
- [build command](/guide/basic/cli#rsbuild-build), used to generate the build outputs for production deployment.
- [preview command](/guide/basic/cli#rsbuild-preview), used to preview the production build outputs locally. Note that you must first execute the `rsbuild build` command to generate the build outputs.
```json title="package.json"
{
"scripts": {
"build": "rsbuild build",
"preview": "rsbuild preview"
}
}
```
:::tip
The preview command is only used for local preview. Do not use it for production servers, as it is not designed for that.
:::
### Output directory
Rsbuild's build outputs typically include HTML, JS, CSS, and other assets, and are output to the `dist` directory by default. You can change the name and structure of the dist directory with configuration options. See the [Output Files](/guide/basic/output-files) section for more information.
```bash
dist
├── static
│ ├── image
│ ├── css
│ └── js
└── [name].html
```
### Asset prefix
We can divide the build output into two parts: **HTML files** and **static assets**:
- HTML files refer to files with the `.html` suffix in the output directory, which usually need to be deployed on the server.
- Static assets are located in the `static` directory of the output folder, which contains assets such as JavaScript, CSS, and images. They can be deployed either on the server or on a CDN.
If you deploy static assets to a subdirectory on the server, set [output.assetPrefix](/config/output/asset-prefix) as the base path:
```ts title="rsbuild.config.ts"
import { defineConfig } from '@rsbuild/core';
export default defineConfig({
output: {
assetPrefix: '/some-base-folder/',
},
});
```
If you prefer to serve static assets from a CDN for better performance instead of alongside the HTML on your server, set [output.assetPrefix](/config/output/asset-prefix) to the CDN address so the application can reference the assets correctly.
```ts title="rsbuild.config.ts"
import { defineConfig } from '@rsbuild/core';
export default defineConfig({
output: {
assetPrefix: 'https://cdn.com/path/',
},
});
```
With this configuration, when referencing static assets in HTML, the specified prefix will be automatically added. For example:
```html
<script src="https://cdn.com/path/static/js/index.some-hash.js"></script>
```
## Deployment platforms
The following sections describe how to deploy on several common platforms.
> Platform names are listed in alphabetical order.
### Cloudflare Pages
[Cloudflare Pages](https://developers.cloudflare.com/pages/) is a static site hosting platform provided by Cloudflare.
You can follow the [Cloudflare Pages - Git integration guide](https://developers.cloudflare.com/pages/get-started/git-integration/) to integrate with Git and deploy your site to Cloudflare Pages.
When configuring, complete the following fields under "Build settings":
- **Build command**: fill in the project's build command, typically `npm run build`.
- **Build output directory**: fill in the project's output directory, which defaults to `dist`.
Then click the **Save and Deploy** button to start the deployment.
### GitHub pages
[GitHub Pages](https://pages.github.com/) is a static site hosting service that takes HTML, CSS, and JavaScript files straight from a repository on GitHub.
The following are step-by-step instructions for deploying to GitHub Pages.
1. Configure the URL prefix for static assets using [output.assetPrefix](/config/output/asset-prefix).
```ts title="rsbuild.config.ts"
import { defineConfig } from '@rsbuild/core';
export default defineConfig({
output: {
// Please replace <REPO_NAME> with the repository name.
// For example, "/my-project/"
assetPrefix: '/<REPO_NAME>/',
},
});
```
2. Open the "Settings" page of your GitHub repository, click "Pages" in the left menu to access the GitHub Pages configuration page.
3. Select "Source" → "GitHub Actions" and click "create your own" to create a GitHub Action configuration file.
4. Paste the following content into the editor and name the file `github-pages.yml` (you can adjust the content and filename as needed).
```yaml title="github-pages.yml"
# Sample workflow for building and deploying a Rsbuild site to GitHub Pages
name: Rsbuild Deployment
on:
# Runs on pushes targeting the default branch
push:
branches: ['main']
# Allows you to run this workflow manually from the actions tab
workflow_dispatch:
# Sets permissions of the GITHUB_TOKEN to allow deployment to GitHub Pages
permissions:
contents: read
pages: write
id-token: write
# Allow only one concurrent deployment
concurrency:
group: 'pages'
cancel-in-progress: false
jobs:
build:
runs-on: ubuntu-latest
steps:
- name: Checkout
uses: actions/checkout@v4
- name: Use Node.js
uses: actions/setup-node@v4
with:
node-version: 22
# If you use other package managers like yarn or pnpm,
# you will need to install them first
- name: Install dependencies
run: npm i
- name: Build
run: npm run build
- name: Setup Pages
uses: actions/configure-pages@v5
- name: Upload artifact
uses: actions/upload-pages-artifact@v3
with:
path: './dist'
- name: Deploy to GitHub Pages
id: deployment
uses: actions/deploy-pages@v4
```
5. Commit and wait for GitHub Actions to execute. Once complete, you can visit `https://<USERNAME>.github.io/<REPO_NAME>/` to view the deployed page.
### Netlify
[Netlify Core](https://netlify.com/) is a frontend cloud solution for developers to build and deploy future-proof digital solutions with modern, composable tooling.
#### Add new site
Netlify provides a detailed guide. You can follow the instructions in [Netlify - Add new site](https://docs.netlify.com/welcome/add-new-site/), configure the basic settings, and start the deployment.
You need to configure the following fields:
- **Build command**: fill in the project's build command, typically `npm run build`.
- **Publish directory**: fill in the project's output directory, which defaults to `dist`.
Then click the **Deploy site** button to start the deployment.
#### Custom domains
If you want to make your sites accessible at custom domain names, you can configure this in Netlify's "Domain management" section.
> Detailed guide: [Netlify - Custom domains](https://docs.netlify.com/domains-https/custom-domains/).
### Vercel
[Vercel](https://vercel.com/) is a platform for developers that provides the tools, workflows, and infrastructure you need to build and deploy your web apps faster, without the need for additional configuration.
#### Add new site
Vercel provides a detailed guide. You can follow [Vercel - Projects](https://vercel.com/docs/projects/overview) to create a project in your dashboard, configure the basic settings, and start the deployment.
Only the following fields under "Build and Output Settings" need to be configured:
- **Output directory**: fill in the project's output directory, which defaults to `dist`.
Then click the **Deploy** button to start the deployment.
#### Configure domains
If you want to make your sites accessible at custom domain names, you can configure this in Vercel's "Domains" section.
> Detailed guide: [Vercel - Domains](https://vercel.com/docs/projects/domains).
### Zephyr Cloud
[Zephyr Cloud](https://zephyr-cloud.io) is a zero-config deployment platform that integrates directly into your build process and provides global edge distribution for federated applications.
#### How to deploy
Follow the steps in [zephyr-rsbuild-plugin](https://www.npmjs.com/package/zephyr-rsbuild-plugin).
During the build process, your application will be automatically deployed and you'll receive a deployment URL. Zephyr Cloud handles asset optimization, global CDN distribution, module federation setup, and provides automatic rollback capabilities.
Start for free today at [zephyr-cloud.io](https://zephyr-cloud.io).
---
url: /guide/basic/upgrade-rsbuild.md
---
# Upgrade Rsbuild
This section explains how to upgrade your project's Rsbuild dependencies to the latest version.
:::tip
- See [Releases](/community/releases/index) to learn about Rsbuild's release strategy.
- See [npm - @rsbuild/core](https://npmjs.com/package/@rsbuild/core) to view the latest version.
:::
## Using taze
We recommend using [Taze](https://github.com/antfu-collective/taze) to upgrade the Rsbuild version. Taze is a CLI tool for updating npm dependencies.
### Usage
Run the following command to upgrade all dependencies that include `rsbuild` in their names:
```bash
npx taze --include /rsbuild/ -w
```
The result will look similar to:
```bash
rsbuild - 3 patch
@rsbuild/core dev ~1mo ^1.0.0 → ^1.2.0
@rsbuild/plugin-react dev ~1mo ^1.0.0 → ^1.2.0
@rsbuild/plugin-type-check dev ~1mo ^1.0.0 → ^1.2.0
ℹ changes written to package.json, run npm i to install updates.
```
You can also adjust the `include` pattern to match specific packages. For example, to upgrade only packages under the `@rsbuild` scope:
```bash
npx taze --include /@rsbuild/ -w
```
### Options
Here are some examples of using Taze options:
- In a monorepo, you can add the `-r` option to upgrade recursively:
```bash
npx taze --include /rsbuild/ -w -r
```
- Add `-l` to upgrade locked versions:
```bash
npx taze --include /rsbuild/ -w -l
```
- To upgrade to a major version:
```bash
npx taze major --include /rsbuild/ -w
```
> For more options, please refer to the [taze documentation](https://github.com/antfu-collective/taze).
---
url: /guide/configuration/rspack.md
---
# Configure Rspack
Rsbuild supports directly modifying the Rspack configuration object, and supports modifying the built-in Rspack configuration of Rsbuild through `rspack-chain`.
:::tip
The built-in Rspack config in Rsbuild may change with iterations, and these changes will not be reflected in semver. Therefore, your custom config may become invalid when you upgrade Rsbuild.
:::
## View Rspack config
Rsbuild provides the [rsbuild inspect](/guide/basic/cli#rsbuild-inspect) command to view the final Rspack config generated by Rsbuild.
You can also view it through [debug mode](/guide/debug/debug-mode).
## Modify config object
You can use the [tools.rspack](/config/tools/rspack) option of Rsbuild to modify the Rspack config object.
For example, registering a built-in Rspack plugin:
```ts title="rsbuild.config.ts"
import { rspack } from '@rsbuild/core';
export default {
tools: {
rspack: {
plugins: [
new rspack.CircularDependencyRspackPlugin({
// options
}),
],
},
},
};
```
Or registering a community webpack plugin:
```ts title="rsbuild.config.ts"
import { sentryWebpackPlugin } from '@sentry/webpack-plugin';
export default {
tools: {
rspack: {
plugins: [
sentryWebpackPlugin({
// options
}),
],
},
},
};
```
Or modify the built-in Rspack config with a function:
```ts title="rsbuild.config.ts"
export default {
tools: {
rspack: (config, { env }) => {
if (env === 'development') {
config.devtool = 'cheap-module-eval-source-map';
}
return config;
},
},
};
```
> Please refer to the [tools.rspack documentation](/config/tools/rspack) for detailed usage.
## Access Rspack API
If you need to access the API or plugins exported by [@rspack/core](https://npmjs.com/package/@rspack/core), you can directly import the [rspack](/api/javascript-api/core#rspack) object from `@rsbuild/core` without installing the `@rspack/core` package separately.
```ts title="rsbuild.config.ts"
import { rspack } from '@rsbuild/core';
export default {
tools: {
rspack: {
plugins: [
new rspack.BannerPlugin({
// ...
}),
],
},
},
};
```
:::tip
- Refer to [Rspack plugins](https://rspack.rs/plugins/) and [Rspack JavaScript API](https://rspack.rs/api/javascript-api/) to learn more about the available Rspack APIs.
- It's not recommended to manually install the `@rspack/core` package, as it may conflict with the version that Rsbuild depends on.
:::
## Use bundler chain
import RspackChain from '@en/shared/rspackChain.mdx';
<RspackChain />
### tools.bundlerChain
Rsbuild provides the [tools.bundlerChain](/config/tools/bundler-chain) config to modify the rspack-chain. Its value is a function that takes two arguments:
- The first argument is an `rspack-chain` instance, which you can use to modify the Rspack config.
- The second argument is an utils object, including `env`, `isProd`, `CHAIN_ID`, etc.
Here is a basic example:
```ts title="rsbuild.config.ts"
export default {
tools: {
bundlerChain: (chain, { env }) => {
if (env === 'development') {
chain.devtool('cheap-module-eval-source-map');
}
},
},
};
```
`tools.bundlerChain` can also be an async function:
```ts title="rsbuild.config.ts"
export default {
tools: {
bundlerChain: (chain, { env }) => {
const value = await fetchValue();
chain.devtool(value);
},
},
};
```
### Basics
Before using the rspack-chain to modify the Rspack configuration, it is recommended to familiarize yourself with some basics.
#### About ID
In short, the rspack-chain requires users to set a unique ID for each rule, loader, plugin, and minimizer. With this ID, you can easily find the desired object from deeply nested objects.
Rsbuild exports all internally defined IDs through the `CHAIN_ID` object, so you can quickly locate the loader or plugin you want to modify using these exported IDs, without the need for complex traversal in the Rspack configuration object.
For example, you can remove the built-in CSS rule using `CHAIN_ID.RULE.CSS`:
```ts title="rsbuild.config.ts"
export default {
tools: {
bundlerChain: (chain, { CHAIN_ID }) => {
chain.module.rules.delete(CHAIN_ID.RULE.CSS);
},
},
};
```
#### ID types
The `CHAIN_ID` object contains various IDs, which correspond to the following configurations:
| CHAIN_ID Field | Corresponding Configuration | Description |
| -------------------- | --------------------------- | ------------------------------------------------------ |
| `CHAIN_ID.PLUGIN` | `plugins[i]` | Corresponds to a plugin in the Rspack configuration |
| `CHAIN_ID.RULE` | `module.rules[i]` | Corresponds to a rule in the Rspack configuration |
| `CHAIN_ID.USE` | `module.rules[i].loader` | Corresponds to a loader in the Rspack configuration |
| `CHAIN_ID.MINIMIZER` | `optimization.minimizer` | Corresponds to a minimizer in the Rspack configuration |
### Examples
#### Custom loader
Here are examples of adding, modifying, and removing Rspack loaders.
- Add a loader to handle `.md` files:
```js title="rsbuild.config.mjs"
export default {
tools: {
bundlerChain: (chain) => {
chain.module
.rule('md')
.test(/\.md$/)
.use('md-loader')
// The package name or module path of the loader
.loader('md-loader');
},
},
};
```
- Modify options of the built-in SWC loader:
```js title="rsbuild.config.mjs"
export default {
tools: {
bundlerChain: (chain, { CHAIN_ID }) => {
chain.module
.rule(CHAIN_ID.RULE.JS)
.use(CHAIN_ID.USE.SWC)
.tap((options) => {
console.log(options);
return options;
});
},
},
};
```
- Remove the built-in SWC loader:
```js title="rsbuild.config.mjs"
export default {
tools: {
bundlerChain: (chain, { CHAIN_ID }) => {
chain.module.rule(CHAIN_ID.RULE.JS).uses.delete(CHAIN_ID.USE.SWC);
},
},
};
```
- Insert a loader after the built-in SWC loader that executes earlier:
```js title="rsbuild.config.mjs"
export default {
tools: {
bundlerChain: (chain, { CHAIN_ID }) => {
chain.module
.rule(CHAIN_ID.RULE.JS)
.use('my-loader')
.after(CHAIN_ID.USE.SWC)
// The package name or module path of the loader
.loader('my-loader')
.options({
// some options
});
},
},
};
```
> Note: Rspack loaders are executed in reverse order.
- Insert a loader before the built-in SWC loader that executes later:
```js title="rsbuild.config.mjs"
export default {
tools: {
bundlerChain: (chain, { CHAIN_ID }) => {
chain.module
.rule(CHAIN_ID.RULE.JS)
// Loader ID, not actually meaningful, just for locating
.use('my-loader')
.before(CHAIN_ID.USE.SWC)
// The package name or module path of the loader
.loader('my-loader')
.options({
// some options
});
},
},
};
```
- Remove the built-in CSS handling rule:
```js title="rsbuild.config.mjs"
export default {
tools: {
bundlerChain: (chain, { CHAIN_ID }) => {
chain.module.rules.delete(CHAIN_ID.RULE.CSS);
},
},
};
```
#### Custom plugin
Here are examples of adding, modifying, and deleting Rspack plugins.
```js title="rsbuild.config.mjs"
export default {
tools: {
bundlerChain: (chain, { bundler, CHAIN_ID }) => {
// Add plugin
chain.plugin('custom-define').use(bundler.DefinePlugin, [
{
'process.env': {
NODE_ENV: JSON.stringify(process.env.NODE_ENV),
},
},
]);
// Modify plugin
chain.plugin(CHAIN_ID.PLUGIN.HMR).tap((options) => {
options[0].fullBuildTimeout = 200;
return options;
});
// Delete plugin
chain.plugins.delete(CHAIN_ID.PLUGIN.HMR);
},
},
};
```
:::tip
In most cases, you should change the plugin options using the configurations provided by Rsbuild, rather than using `CHAIN_ID.PLUGIN`, as this may lead to unexpected behavior.
For example, use [tools.htmlPlugin](/config/tools/html-plugin) to change the options of HtmlPlugin.
:::
#### Modify based on environment
In the `tools.bundlerChain` function, you can access various environment identifiers in the second parameter, such as development/production build, SSR build, Web Worker build, to achieve configuration modifications for different environments.
```js title="rsbuild.config.mjs"
export default {
tools: {
bundlerChain: (chain, { env, isProd, target, isServer, isWebWorker }) => {
if (env === 'development' || env === 'test') {
// ...
}
if (isProd) {
// ...
}
if (target === 'node') {
// ...
}
if (isServer) {
// ...
}
if (isWebWorker) {
// ...
}
},
};
```
The above are some common configuration examples. For the complete rspack-chain API, please refer to the [rspack-chain documentation](https://github.com/rspack-contrib/rspack-chain).
## Configuration modification order
Rsbuild supports modifying the Rspack configuration object through `tools.rspack`, `tools.bundlerChain`, `modifyBundlerChain`, etc.
The order of execution between them is:
- [modifyBundlerChain](/plugins/dev/hooks#modifybundlerchain)
- [tools.bundleChain](/config/tools/bundler-chain)
- [modifyRspackConfig](/plugins/dev/hooks#modifyrspackconfig)
- [tools.rspack](/config/tools/rspack)
---
url: /guide/configuration/rsbuild.md
---
# Configure Rsbuild
Rsbuild provides a wide range of configuration options with sensible defaults for most use cases. In most scenarios, you can use Rsbuild out of the box without any configuration.
When you need to customize build behavior, use these configuration options.
## Configuration structure
The configuration structure of Rsbuild looks like this:
```js title="rsbuild.config.mjs"
export default {
plugins: [
// configure Rsbuild plugins
],
dev: {
// options for local development
},
html: {
// options for HTML generation
},
tools: {
// options for the low-level tools
},
output: {
// options for build outputs
},
resolve: {
// options for module resolution
},
source: {
// options for input source code
},
server: {
// options for the Rsbuild server,
// will take effect during local development and preview
},
security: {
// options for Web security
},
performance: {
// options for build performance and runtime performance
},
moduleFederation: {
// options for module federation
},
environments: {
// define different Rsbuild configurations for each environment
},
};
```
You can find detailed descriptions of all configs on the [Configure Overview](/config/) page.
## Configuration file
When you use the Rsbuild CLI, it automatically reads the configuration file in the root directory of the current project and resolves it in the following order:
- rsbuild.config.mjs
- rsbuild.config.ts
- rsbuild.config.js
- rsbuild.config.cjs
- rsbuild.config.mts
- rsbuild.config.cts
We recommend using `rsbuild.config.ts` and importing the `defineConfig` utility from `@rsbuild/core`. It provides friendly TypeScript type hints and autocompletion, which can help you avoid errors in the configuration.
For example, in `rsbuild.config.ts`, you can define the Rsbuild [resolve.alias](/config/resolve/alias) configuration:
```ts title="rsbuild.config.ts"
import { defineConfig } from '@rsbuild/core';
export default defineConfig({
resolve: {
alias: {
'@common': './src/common',
},
},
});
```
If you are developing a non-TypeScript project, you can use the `.mjs` format for the configuration file:
```js title="rsbuild.config.mjs"
import { defineConfig } from '@rsbuild/core';
export default defineConfig({
resolve: {
alias: (opts) => {
opts['@common'] = './src/common';
},
},
});
```
## Specify config file
Rsbuild CLI uses the `--config` option to specify the config file. It can be set to a relative or absolute path.
For example, if you need to use the `rsbuild.prod.config.mjs` file when running `build`, add the following scripts to `package.json`:
```json title="package.json"
{
"scripts": {
"build": "rsbuild build --config rsbuild.prod.config.mjs"
}
}
```
You can also abbreviate the `--config` option to `-c`:
```bash
rsbuild build -c rsbuild.prod.config.mjs
```
## Specify config loader
Rsbuild provides three ways to load configuration files:
- `auto` (Default): Use Node.js's native loader to load configuration files first, falling back to jiti if it fails.
- `jiti`: Use [jiti](https://github.com/unjs/jiti) to load the configuration file, providing interoperability between ESM and CommonJS. The module resolution behavior differs slightly from Node.js native behavior.
- `native`: Use Node.js native loader to load the configuration file. This ensures that module resolution behavior is consistent with Node.js native behavior and has better performance. This requires your JavaScript runtime to natively support TypeScript.
For example, Node.js v22.6.0+ natively supports TypeScript. You can use the following command with the Node.js native loader to load the configuration file:
```bash
# Node.js >= v22.18.0
# No need to set --experimental-strip-types
npx rsbuild build --config-loader native
# Node.js v22.6.0 - v22.17.1
# Need to set --experimental-strip-types
NODE_OPTIONS="--experimental-strip-types" npx rsbuild build --config-loader native
```
### About Node.js native loader
When using Node.js's native loader, please note the following limitations:
1. When importing JSON files, you need to use import attributes:
```ts
import pkgJson from './package.json' with { type: 'json' }; // ✅ Correct
import pkgJson from './package.json'; // ❌ Incorrect
```
2. When importing TypeScript files, you need to include the `.ts` extension:
```ts
import baseConfig from './rsbuild.base.config.ts'; // ✅ Correct
import baseConfig from './rsbuild.base.config'; // ❌ Incorrect
```
> See [Node.js - Running TypeScript Natively](https://nodejs.org/en/learn/typescript/run-natively#running-typescript-natively) for more details.
## Using environment variables
In the configuration file, you can use Node.js environment variables such as `process.env.NODE_ENV` to dynamically set different configurations:
```ts title="rsbuild.config.ts"
import { defineConfig } from '@rsbuild/core';
export default defineConfig({
resolve: {
alias: {
'@request':
process.env.NODE_ENV === 'development'
? './src/request.dev.js'
: './src/request.prod.js',
},
},
});
```
## Export function
Rsbuild supports exporting a function in the config file, which allows you to dynamically compute the config and return it to Rsbuild.
```js title="rsbuild.config.js"
import { defineConfig } from '@rsbuild/core';
export default defineConfig(({ env, command, envMode }) => ({
resolve: {
alias: {
'@foo': env === 'development' ? './src/foo.dev.ts' : './src/foo.prod.ts',
},
},
}));
```
:::tip
The exported config function must provide a return value. If you do not need to return any config, you can return an empty object.
:::
The function accepts the following parameters:
### env
- **Type:** `string`
- **Default:** `process.env.NODE_ENV`
The current running environment.
- When running `rsbuild dev`, the default value of env is `development`.
- When running `rsbuild build` or `rsbuild preview`, the default value of env is `production`.
### envMode
- **Type:** `string`
- **Default:** `process.env.NODE_ENV`
The current value of the CLI parameter `--env-mode`.
For example, when running `rsbuild build --env-mode test`, the value of `envMode` is `test`.
### command
- **Type:** `string`
The current running CLI command, such as `dev`, `build`, `preview`.
## Export async function
Rsbuild also supports exporting an async function in the config file, which allows you to perform async operations:
```js title="rsbuild.config.js"
import { defineConfig } from '@rsbuild/core';
export default defineConfig(async ({ env, command }) => {
const result = await someAsyncFunction();
return {
html: {
title: result,
},
};
});
```
## Merge configurations
You can use the [mergeRsbuildConfig](/api/javascript-api/core#mergersbuildconfig) function exported by `@rsbuild/core` to merge multiple configurations.
```ts title="rsbuild.config.ts"
import { defineConfig, mergeRsbuildConfig } from '@rsbuild/core';
const config1 = defineConfig({
dev: { port: '3000' },
});
const config2 = defineConfig({
dev: { port: '3001' },
});
// { dev: { port: '3001' }
export default mergeRsbuildConfig(config1, config2);
```
## Debug the config
You can enable Rsbuild's debug mode by adding the `DEBUG=rsbuild` environment variable when executing a build.
```bash
DEBUG=rsbuild pnpm dev
```
In debug mode, Rsbuild will write the Rsbuild config to the dist directory, which is convenient for developers to view and debug.
```
config inspection completed, open the following files to view the content:
- Rsbuild config: /Project/demo/dist/.rsbuild/rsbuild.config.mjs
- Rspack config (web): /Project/demo/dist/.rsbuild/rspack.config.web.mjs
```
Open the generated `/dist/.rsbuild/rsbuild.config.mjs` file to see the complete content of the Rsbuild config.
For a complete introduction to debug mode, see the [Debug Mode](/guide/debug/debug-mode) chapter.
---
url: /guide/configuration/swc.md
---
# Configure SWC
[SWC](https://github.com/swc-project/swc) (Speedy Web Compiler) is a transformer and minimizer for JavaScript and TypeScript based on Rust. SWC provides similar functionality to Babel and Terser, and it is 20x faster than Babel on a single thread and 70x faster on four cores.
Rsbuild enables the following SWC features by default:
- Transform JavaScript and TypeScript code using Rspack's [builtin:swc-loader](https://rspack.rs/guide/features/builtin-swc-loader), which is the Rust version of [swc-loader](https://github.com/swc-project/pkgs/tree/main/packages/swc-loader).
- Minify JavaScript code using Rspack's [SwcJsMinimizerRspackPlugin](https://rspack.rs/plugins/rspack/swc-js-minimizer-rspack-plugin).
## Loader options
The options for `builtin:swc-loader` are the same as those for the JS version of `swc-loader`. Rsbuild exposes some options to configure `builtin:swc-loader`:
- [tools.swc](/config/tools/swc):to configure the options for `builtin:swc-loader`.
- [source.include](/config/source/include):to specify files that need to be compiled by SWC.
- [source.exclude](/config/source/exclude):to exclude files that do not need to be compiled by SWC.
Here are some examples:
### Register SWC plugin
`tools.swc` can be used to register SWC's Wasm plugins, for example, registering [@swc/plugin-styled-components](https://npmjs.com/package/@swc/plugin-styled-components):
```js
export default {
tools: {
swc: {
jsc: {
experimental: {
plugins: [['@swc/plugin-styled-components', {}]],
},
},
},
},
};
```
> You can check out the [awesome-swc](https://github.com/swc-contrib/awesome-swc) repository to see the SWC plugins available in the community.
### SWC plugin version
Please note that the SWC plugin is still an experimental feature, and the SWC Wasm plugin is currently not backward compatible. The version of the SWC plugin is closely tied to the version of `swc_core` that Rspack depends on.
This means that you must choose an SWC plugin that matches the current version of `swc_core` to ensure that it works properly. If the version of the SWC plugin you are using does not match the version of `swc_core` that Rspack depends on, Rspack will throw an error during the build process. Please refer to [Rspack FAQ - SWC Plugin Version Unmatched](https://rspack.rs/errors/swc-plugin-version) for more information.
### Enable Emotion support
Example of enabling the Emotion support using the `builtin:swc-loader`:
```js
export default {
tools: {
swc: {
jsc: {
experimental: {
plugins: [['@swc/plugin-emotion', {}]],
},
},
},
},
};
```
For more options, please refer to [@swc/plugin-emotion](https://npmjs.com/package/@swc/plugin-emotion).
### Enable Relay support
Example of enabling the Relay support using the `builtin:swc-loader`:
```js
export default {
tools: {
swc: {
jsc: {
experimental: {
plugins: [['@swc/plugin-relay', {}]],
},
},
},
},
};
```
For more options, please refer to [@swc/plugin-relay](https://npmjs.com/package/@swc/plugin-relay).
## Minimizer options
Rsbuild provides the [output.minify.js](/config/output/minify) option to configure the SwcJsMinimizerRspackPlugin. Here are some examples:
### Exclude files
You can exclude certain files from being minified using the `exclude` option:
```ts
export default {
output: {
minify: {
jsOptions: {
exclude: /foo\/bar/,
},
},
},
};
```
## Switching minifier
See [output.minify - Switching minifier](/config/output/minify#switching-minifier) to learn how to switch to other JavaScript minifier.
---
url: /guide/styling/css-usage.md
---
# CSS
Rsbuild provides out-of-the-box support for CSS, including PostCSS, CSS Modules, CSS preprocessors, CSS inlining, and CSS compression.
Rsbuild also provides several configurations to customize CSS file processing.
## Lightning CSS
:::tip
[Lightning CSS](https://lightningcss.dev) is a high-performance CSS parser, transformer and minifier written in Rust. It supports parsing and transforming many modern CSS features into syntax supported by target browsers, and delivers better compression ratios.
:::
Rsbuild uses Rspack's built-in [lightningcss-loader](https://rspack.rs/guide/features/builtin-lightningcss-loader) to transform CSS code. It automatically reads the project's [browserslist](/guide/advanced/browserslist) config and converts CSS code to syntax supported by target browsers.
### Features
- Lightning CSS automatically adds vendor prefixes like `-webkit-`, `-moz-`, `-ms-`, etc., so you don't need to manually add prefixes or use the [autoprefixer](https://github.com/postcss/autoprefixer) plugin.
- Lightning CSS automatically downgrades CSS syntax, allowing you to use modern CSS features such as CSS nesting and custom media queries without worrying about browser compatibility.
- Use [tools.lightningcssLoader](/config/tools/lightningcss-loader) to customize `lightningcss-loader` options.
### Disabling Lightning CSS
If Lightning CSS does not meet your needs, you can disable Lightning CSS and use [PostCSS](#using-postcss) to transform your CSS code.
Steps:
1. Set [tools.lightningcssLoader](/config/tools/lightningcss-loader) to `false` to disable the Lightning CSS loader.
2. Use [@rsbuild/plugin-css-minimizer](https://github.com/rspack-contrib/rsbuild-plugin-css-minimizer) to switch the CSS minifier from Lightning CSS to cssnano or another CSS minifier.
```ts title="rsbuild.config.ts"
import { pluginCssMinimizer } from '@rsbuild/plugin-css-minimizer';
export default {
plugins: [pluginCssMinimizer()],
tools: {
lightningcssLoader: false,
},
};
```
3. Refer to [PostCSS](#postcss) to configure the PostCSS plugins you need. Here are some commonly used PostCSS plugins:
- [autoprefixer](https://github.com/postcss/autoprefixer): Adds vendor prefixes.
- [postcss-preset-env](https://github.com/csstools/postcss-plugins/tree/main/plugin-packs/postcss-preset-env): Converts modern CSS into something most browsers can understand.
- [postcss-nesting](https://github.com/csstools/postcss-plugins/tree/main/plugins/postcss-nesting): Supports CSS nesting.
## CSS minification
When building for production, Rsbuild enables Rspack's built-in [LightningCssMinimizerRspackPlugin](https://rspack.rs/plugins/rspack/lightning-css-minimizer-rspack-plugin) plugin to minify CSS assets for better transmission efficiency.
- You can disable CSS minification using the [output.minify](/config/output/minify) option or customize the options for `LightningCssMinimizerRspackPlugin`.
- You can use [@rsbuild/plugin-css-minimizer](https://github.com/rspack-contrib/rsbuild-plugin-css-minimizer) to customize the CSS minimizer, switching to [cssnano](https://github.com/cssnano/cssnano) or another CSS minimizer.
## PostCSS
Rsbuild supports transforming CSS code through [PostCSS](https://postcss.org/). You can configure PostCSS in the following ways:
### Configuration file
Rsbuild uses [postcss-load-config](https://github.com/postcss/postcss-load-config) to load the PostCSS configuration file in the root directory of the current project, such as `postcss.config.js`:
```js title="postcss.config.cjs"
module.exports = {
'postcss-px-to-viewport': {
viewportWidth: 375,
},
};
```
`postcss-load-config` supports multiple file formats, including but not limited to the following file names:
- postcss.config.js
- postcss.config.mjs
- postcss.config.cjs
- postcss.config.ts
- ...
### tools.postcss
You can also configure the postcss-loader through Rsbuild's [tools.postcss](/config/tools/postcss) option, which supports modifying the built-in configuration through a function, for example:
```ts title="rsbuild.config.ts"
export default {
tools: {
postcss: (opts) => {
const viewportPlugin = require('postcss-px-to-viewport')({
viewportWidth: 375,
});
opts.postcssOptions.plugins.push(viewportPlugin);
},
},
};
```
### Configuration priority
- When you configure both the `postcss.config.js` file and the `tools.postcss` option, both will take effect, and the `tools.postcss` option will take precedence.
- If there is no `postcss.config.js` file in the project and the `tools.postcss` option is not configured, Rsbuild will not register `postcss-loader`.
## CSS Modules
Rsbuild supports CSS Modules by default, please read the [CSS Modules](/guide/styling/css-modules) chapter for the complete usage of CSS Modules.
## CSS preprocessors
Rsbuild supports popular CSS preprocessors through plugins, including Sass, Less and Stylus. See how to use them:
- [Sass Plugin](/plugins/list/plugin-sass)
- [Less Plugin](/plugins/list/plugin-less)
- [Stylus Plugin](/plugins/list/plugin-stylus)
## CSS-in-JS
See [CSS-in-JS](/guide/styling/css-in-js) to learn how to use common CSS-in-JS libraries in Rsbuild.
## Inline CSS files
By default, Rsbuild will extract CSS into a separate `.css` file and output it to the dist directory.
To inline styles into your JS file, set [output.injectStyles](/config/output/inject-styles) to true to disable CSS extraction logic. When the JS file is requested by the browser, JS dynamically inserts the `<style>` tag into the Html to load the CSS styles.
```ts
export default {
output: {
injectStyles: true,
},
};
```
This will increase the size of your JS Bundle, so it is usually not recommended to disable the CSS extraction.
## Import from node_modules
Rsbuild supports importing CSS files from `node_modules`.
- Import in a JS file:
```ts title="src/index.js"
/* reference normalize.css */
/* https://github.com/necolas/normalize.css */
import 'normalize.css';
```
- Import in a CSS file:
```css title="src/index.css"
@import 'normalize.css';
body {
/* */
}
```
In Sass and Less files, it is also allowed to add the `~` prefix to resolve style files in `node_modules`. However, this is a **deprecated feature** and it is recommended to remove the `~` prefix from the code.
```scss title="src/index.scss"
@import 'normalize.css';
```
## Query parameters
### inline
Rsbuild supports importing compiled CSS files as strings in JavaScript by using the `?inline` query parameter.
```js
import inlineCss from './style.css?inline';
console.log(inlineCss); // Compiled CSS content
```
Using `import "*.css?inline"` has the following behaviors:
- Get the compiled text content of the CSS file, processed by Lightning CSS, PostCSS and CSS preprocessors
- The content will be inlined into the final JavaScript bundle
- No separate CSS file will be generated
:::tip
- Rsbuild's Sass, Less, and Stylus plugins also support the `?inline` query parameter.
- Rsbuild >= 1.3.0 supports the `?inline` query parameter.
:::
### raw
Rsbuild supports importing raw CSS files as strings in JavaScript by using the `?raw` query parameter.
```ts title="src/index.js"
import rawCss from './style.css?raw';
console.log(rawCss); // Output the raw content of the CSS file
```
Using `import "*.css?raw"` has the following behaviors:
- Get the raw text content of the CSS file, without any preprocessing or compilation
- The content of the CSS file will be inlined into the final JavaScript bundle
- No separate CSS file will be generated
:::tip
- Rsbuild's Sass, Less, and Stylus plugins also support the `?raw` query parameter.
- Rsbuild >= 1.3.0 supports the `?raw` query parameter.
:::
---
url: /guide/styling/css-modules.md
---
# CSS Modules
[CSS Modules](https://github.com/css-modules/css-modules) allows you to write CSS in a modular way, and import these styles in JavaScript files. CSS Modules automatically generates unique class names, isolating styles between modules and avoiding class name conflicts.
Rsbuild supports CSS Modules by default without additional configuration. Our convention is to use the `[name].module.css` filename to enable CSS Modules.
The following style files are considered CSS Modules:
- `*.module.css`
- `*.module.less`
- `*.module.sass`
- `*.module.scss`
- `*.module.styl`
- `*.module.stylus`
## Usage example
Write styles in a `*.module.css` file:
```css title="button.module.css"
.red {
background: red;
}
```
Import styles in a JavaScript file:
```tsx title="Button.tsx"
import styles from './button.module.css';
export default () => {
return <button className={styles.red}>Button</button>;
};
```
After compilation, CSS Modules class names are automatically appended with a hash value to prevent class name conflicts:
```css
/* classnames generated in development mode */
.src-App-module__red-hiQIE4 {
background: red;
}
/* classnames generated in production mode */
.red-hiQIE4 {
background: red;
}
```
:::tip
See [Custom Class Names](#custom-class-names) to modify the class name generation rules.
:::
## Named import
If you prefer to use named imports in CSS Modules, you can enable it through the [output.cssModules.namedExport](/config/output/css-modules#cssmodulesnamedexport) config.
```ts title="rsbuild.config.ts"
export default {
output: {
cssModules: {
namedExport: true,
},
},
};
```
If enabled, you can reference class names using named imports:
```tsx title="Button.tsx"
import { red } from './button.module.css';
export default () => {
return <button className={red}>Button</button>;
};
```
## CSS Modules recognition rules
By default, only files ending with `*.module.css` are recognized as CSS Modules.
If you want to treat other CSS files as CSS Modules, you can configure [output.cssModules.auto](/config/output/css-modules#cssmodulesauto).
For example:
```ts
export default {
output: {
cssModules: {
auto: (resource) => {
return resource.includes('.module.') || resource.includes('shared/');
},
},
},
};
```
After this configuration, the following two files will be recognized as CSS Modules:
```ts
import styles1 from './foo.module.css';
import styles2 from './shared/bar.css';
```
## Custom class names
Customizing class names generated by CSS Modules is a commonly used feature. You can configure this using [output.cssModules.localIdentName](/config/output/css-modules#cssmoduleslocalidentname).
```ts
export default {
output: {
cssModules: {
localIdentName: '[hash:base64:4]',
},
},
};
```
If you need to customize other configs of CSS Modules, you can set them via [output.cssModules](/config/output/css-modules).
## Global styles
In some cases, you may need to use global styles in CSS Modules, such as overriding the styles of third-party libraries or setting global styles for specific elements.
CSS Modules provides the `:global()` pseudo-class selector for this purpose. Selectors inside `:global()` retain their original class names, allowing them to correctly match global elements.
```css title="styles.module.css"
/* Local selectors, will be hashed */
.container {
padding: 20px;
}
/* Global selectors, will not be hashed */
:global(.foo) {
color: red;
}
/* Use local and global selectors together, only .wrapper will be hashed */
.wrapper :global(.bar) {
margin: 10px;
}
```
You can also nest `:global()`:
```css title="card.module.css"
.card {
/* Only affects .btn elements inside .card */
:global(.btn) {
background: blue;
}
}
```
## Type declaration
When you import CSS Modules in TypeScript code, TypeScript may prompt that the module is missing a type definition:
```
TS2307: Cannot find module './index.module.css' or its corresponding type declarations.
```
To fix this, you need to add a type declaration file for CSS Modules. Create a `src/env.d.ts` file and add the corresponding type declaration.
- Method 1: If the `@rsbuild/core` package is installed, you can reference the [preset types](/guide/basic/typescript#preset-types) provided by `@rsbuild/core`:
```ts
/// <reference types="@rsbuild/core/types" />
```
- Method 2: Manually add the required type declarations:
```ts title="src/env.d.ts"
declare module '*.module.css' {
const classes: { readonly [key: string]: string };
export default classes;
}
declare module '*.module.scss' {
const classes: { readonly [key: string]: string };
export default classes;
}
declare module '*.module.sass' {
const classes: { readonly [key: string]: string };
export default classes;
}
declare module '*.module.less' {
const classes: { readonly [key: string]: string };
export default classes;
}
declare module '*.module.styl' {
const classes: { readonly [key: string]: string };
export default classes;
}
declare module '*.module.stylus' {
const classes: { readonly [key: string]: string };
export default classes;
}
```
- Method 3: If you need to use **named imports** to reference class names, you can use a looser type declaration:
```ts title="src/env.d.ts"
declare module '*.module.css';
declare module '*.module.scss';
declare module '*.module.sass';
declare module '*.module.less';
declare module '*.module.styl';
declare module '*.module.stylus';
```
After adding the type declaration, if the type error persists, try restarting your IDE or adjusting the directory where `env.d.ts` is located to ensure TypeScript can correctly identify the type definition.
## Type generation
The above method provides types for CSS Modules, but cannot accurately indicate which class names are exported by a specific CSS file.
Rsbuild supports generating accurate type declarations for CSS Modules. Register the [@rsbuild/plugin-typed-css-modules](https://github.com/rspack-contrib/rsbuild-plugin-typed-css-modules) plugin and run the build to generate type declaration files for all CSS Modules.
```ts title="rsbuild.config.ts"
import { pluginTypedCSSModules } from '@rsbuild/plugin-typed-css-modules';
export default {
plugins: [pluginTypedCSSModules()],
};
```
### Example
For example, create two files named `src/index.ts` and `src/index.module.css`:
```tsx title="src/index.ts"
import styles from './index.module.css';
console.log(styles.pageHeader);
```
```css title="src/index.module.css"
.page-header {
color: black;
}
```
After building, Rsbuild will generate a `src/index.module.css.d.ts` type declaration file:
```ts title="src/index.module.css.d.ts"
interface CssExports {
'page-header': string;
pageHeader: string;
}
declare const cssExports: CssExports;
export default cssExports;
```
Now when you open the `src/index.ts` file, you'll see that the `styles` object has accurate types.
---
url: /guide/styling/css-in-js.md
---
# CSS-in-JS
This document outlines how to use common CSS-in-JS libraries in Rsbuild.
Although the examples are based on React, some CSS-in-JS libraries (such as [vanilla-extract](#vanilla-extract)) also support other frameworks.
### Use Emotion
Rsbuild supports compiling [Emotion](https://github.com/emotion-js/emotion). Add the following configuration to enable it:
- [swcReactOptions.importSource](/plugins/list/plugin-react#swcreactoptions)
- [@swc/plugin-emotion](https://npmjs.com/package/@swc/plugin-emotion)
```ts title="rsbuild.config.ts"
import { defineConfig } from '@rsbuild/core';
import { pluginReact } from '@rsbuild/plugin-react';
export default defineConfig({
plugins: [
pluginReact({
swcReactOptions: {
importSource: '@emotion/react',
},
}),
],
tools: {
swc: {
jsc: {
experimental: {
plugins: [['@swc/plugin-emotion', {}]],
},
},
},
},
});
```
> Refer to this example: [emotion](https://github.com/rspack-contrib/rstack-examples/tree/main/rsbuild/emotion).
### Use styled-jsx
You can use [styled-jsx](https://github.com/vercel/styled-jsx) through [@swc/plugin-styled-jsx](https://npmjs.com/package/@swc/plugin-styled-jsx):
```ts title="rsbuild.config.ts"
import { defineConfig } from '@rsbuild/core';
import { pluginReact } from '@rsbuild/plugin-react';
export default defineConfig({
plugins: [pluginReact()],
tools: {
swc: {
jsc: {
experimental: {
plugins: [['@swc/plugin-styled-jsx', {}]],
},
},
},
},
});
```
Make sure to choose the SWC plugin version that matches your current `@swc/core` version so SWC can run correctly. See [tools.swc](/config/tools/swc).
> Refer to this example: [styled-jsx](https://github.com/rspack-contrib/rstack-examples/tree/main/rsbuild/styled-jsx).
### Use vanilla-extract
Rsbuild supports [@vanilla-extract/webpack-plugin](https://npmjs.com/package/@vanilla-extract/webpack-plugin). Add the following config to use [vanilla-extract](https://github.com/vanilla-extract-css/vanilla-extract):
Currently, Rspack has an [HMR issue](https://github.com/web-infra-dev/rsbuild/issues/6049) when `splitChunks` is used with `@vanilla-extract/webpack-plugin`. In development mode, you can use a dedicated `splitChunks` configuration to avoid the issue.
```ts title="rsbuild.config.ts"
import { defineConfig } from '@rsbuild/core';
import { pluginReact } from '@rsbuild/plugin-react';
import { VanillaExtractPlugin } from '@vanilla-extract/webpack-plugin';
export default defineConfig({
plugins: [
pluginReact({
reactRefreshOptions: {
exclude: [/\.css\.ts$/],
},
}),
],
performance: {
chunkSplit: {
override: {
cacheGroups: {
vanilla: {
test: /@vanilla-extract\/webpack-plugin/,
// make sure the chunk contains modules created by @vanilla-extract/webpack-plugin has stable id in development mode to avoid HMR issues
name: process.env.NODE_ENV === 'development' && 'vanilla',
chunks: 'all',
},
},
},
},
},
tools: {
rspack: {
plugins: [new VanillaExtractPlugin()],
},
},
});
```
> Refer to this example: [vanilla-extract](https://github.com/rspack-contrib/rstack-examples/tree/main/rsbuild/vanilla-extract).
#### Static assets
When importing static assets, use import syntax:
```ts title="src/App.css.ts"
import { style } from '@vanilla-extract/css';
import logoUrl from './logo.png';
export const containerStyle = style({
backgroundImage: `url(${logoUrl})`,
});
```
Since `logoUrl` already resolves to the dist directory, `css-loader` doesn't need to process it again. Disable CSS URL processing via [tools.cssLoader.url](/config/tools/css-loader) to avoid module resolution errors:
```ts title="rsbuild.config.ts"
export default defineConfig({
// ... other config
tools: {
cssLoader: {
url: false,
},
},
});
```
> Reference: [#6215](https://github.com/web-infra-dev/rsbuild/issues/6215).
### Use StyleX
You can use [StyleX](https://github.com/facebook/stylex) via [unplugin-stylex](https://github.com/eryue0220/unplugin-stylex):
```ts title="rsbuild.config.ts"
import { defineConfig } from '@rsbuild/core';
import { pluginReact } from '@rsbuild/plugin-react';
import stylexPlugin from 'unplugin-stylex/rspack';
export default defineConfig({
plugins: [pluginReact()],
tools: {
rspack: {
plugins: [stylexPlugin()],
},
},
});
```
> Refer to this example: [stylex](https://github.com/rspack-contrib/rstack-examples/tree/main/rsbuild/stylex).
### Use styled-components
[styled-components](https://github.com/styled-components/styled-components) is a runtime library, so you can use it directly without additional configuration.
Rsbuild supports compiling styled-components, improving the debugging experience and adding SSR support to styled-components.
To use styled-components, we recommend using the [@rsbuild/plugin-styled-components](https://github.com/rsbuild-contrib/rsbuild-plugin-styled-components).
```ts title="rsbuild.config.ts"
import { defineConfig } from '@rsbuild/core';
import { pluginStyledComponents } from '@rsbuild/plugin-styled-components';
export default defineConfig({
plugins: [pluginStyledComponents()],
});
```
> Refer to this example: [styled-components](https://github.com/rspack-contrib/rstack-examples/tree/main/rsbuild/styled-components).
:::tip
styled-components is no longer recommended for new projects as it is in [maintenance mode](https://opencollective.com/styled-components/updates/thank-you).
:::
---
url: /guide/styling/tailwindcss.md
---
# Tailwind CSS v4
[Tailwind CSS](https://tailwindcss.com/) is a CSS framework and design system based on utility classes, which can quickly add common styles to components and supports flexible extension of theme styles.
You can integrate Tailwind CSS in Rsbuild via PostCSS plugins.
## Choosing Tailwind CSS version
This document introduces the integration of Tailwind CSS v4.
Please note that Tailwind CSS v4 uses many modern CSS features, such as [Cascade Layers](https://developer.mozilla.org/en-US/docs/Learn_web_development/Core/Styling_basics/Cascade_layers), if your target browser does not support these features, please use Tailwind CSS v3 first, see [Using Tailwind CSS v3](/guide/styling/tailwindcss-v3) for more details.
More information can be found in [Tailwind CSS - Compatibility](https://tailwindcss.com/docs/compatibility).
## Installing Tailwind CSS
Rsbuild has built-in support for PostCSS, you can install `tailwindcss` and `@tailwindcss/postcss` packages to integrate Tailwind CSS:
import { PackageManagerTabs } from '@theme';
<PackageManagerTabs command="add tailwindcss @tailwindcss/postcss -D" />
## Configuring PostCSS
You can register the Tailwind CSS PostCSS plugin through [postcss.config.cjs](https://npmjs.com/package/postcss-loader#config) or [tools.postcss](/config/tools/postcss).
```js title="postcss.config.mjs"
export default {
plugins: {
'@tailwindcss/postcss': {},
},
};
```
## Importing CSS
Add an `@import` to your CSS entry file that imports Tailwind CSS.
```css title="src/index.css"
@import 'tailwindcss';
```
:::tip
Tailwind CSS v4 cannot be used with CSS preprocessors like Sass, Less, or Stylus. You need to place the `@tailwind` directive at the beginning of your `.css` file, see [Tailwind CSS - Compatibility](https://tailwindcss.com/docs/compatibility#sass-less-and-stylus) for more details.
:::
## Done
You have now completed all the steps to integrate Tailwind CSS in Rsbuild!
You can use Tailwind's utility classes in any component or HTML, such as:
```html
<h1 class="text-3xl font-bold underline">Hello world!</h1>
```
For more usage details, refer to the [Tailwind CSS documentation](https://tailwindcss.com/).
## VS Code extension
Tailwind CSS provides a [Tailwind CSS IntelliSense](https://github.com/tailwindlabs/tailwindcss-intellisense) plugin for VS Code to automatically complete Tailwind CSS class names, CSS functions, and directives.
You can install this plugin in VS Code to enable the autocompletion feature.
---
url: /guide/styling/tailwindcss-v3.md
---
# Tailwind CSS v3
[Tailwind CSS](https://v3.tailwindcss.com/) is a CSS framework and design system based on utility classes, which can quickly add common styles to components and supports flexible extension of theme styles.
You can integrate Tailwind CSS in Rsbuild via PostCSS plugins.
## Installing Tailwind CSS
Rsbuild has built-in support for PostCSS, you can install `tailwindcss` package to integrate Tailwind CSS:
import { PackageManagerTabs } from '@theme';
<PackageManagerTabs command="add tailwindcss@^3 -D" />
## Configuring PostCSS
You can register the `tailwindcss` PostCSS plugin through [postcss.config.cjs](https://npmjs.com/package/postcss-loader#config) or [tools.postcss](/config/tools/postcss).
```js title="postcss.config.cjs"
module.exports = {
plugins: {
tailwindcss: {},
},
};
```
## Configuring Tailwind CSS
Create a `tailwind.config.js` file in the root directory of your project and add the following content:
```js title="tailwind.config.js"
/** @type {import('tailwindcss').Config} */
module.exports = {
content: ['./src/**/*.{html,js,ts,jsx,tsx}'],
theme: {
extend: {},
},
plugins: [],
};
```
:::tip
The above configuration is for reference only and can be modified to suit the needs of your project. For example, non-TypeScript projects do not need to include ts and tsx files.
:::
Note that the `content` option should include the paths to all source files that contain Tailwind class names. For details, see [tailwindcss - Content Configuration](https://v3.tailwindcss.com/docs/content-configuration).
```js title="tailwind.config.js"
/** @type {import('tailwindcss').Config} */
module.exports = {
content: [
'./src/**/*.{html,js,ts,jsx,tsx}',
'../../lib1/src/**/*.{js,ts,jsx,tsx}',
],
theme: {
extend: {},
},
plugins: [],
};
```
### Other configuration methods
- You can directly pass the Tailwind CSS configuration to `postcss.config.cjs`:
```js title="postcss.config.cjs"
module.exports = {
plugins: {
tailwindcss: {
content: ['./src/**/*.{html,js,ts,jsx,tsx}'],
// ...other options
},
},
};
```
- You can also set the Tailwind CSS configuration through [tools.postcss](/config/tools/postcss):
```js title="rsbuild.config.js"
import tailwindcss from 'tailwindcss';
export default {
tools: {
postcss: {
postcssOptions: {
plugins: [
tailwindcss({
content: ['./src/**/*.{html,js,ts,jsx,tsx}'],
// ...other options
}),
],
},
},
},
};
```
But we recommend placing the Tailwind CSS configuration in `tailwind.config.*` because other methods may cause the Tailwind CSS build performance to degrade, refer to [tailwindcss/issues/14229](https://github.com/tailwindlabs/tailwindcss/issues/14229).
## Importing CSS
Add the `@tailwind` directives in your CSS entry file:
```css title="main.css"
@tailwind base;
@tailwind components;
@tailwind utilities;
```
Depending on your needs, you can selectively import the CSS styles provided by Tailwind CSS. Please refer to the [@tailwind documentation](https://v3.tailwindcss.com/docs/functions-and-directives#tailwind) for detailed usage of the `@tailwind` directives.
## Done
You have now completed all the steps to integrate Tailwind CSS in Rsbuild!
You can use Tailwind's utility classes in any component or HTML, such as:
```html
<h1 class="text-3xl font-bold underline">Hello world!</h1>
```
For more usage details, refer to the [Tailwind CSS documentation](https://v3.tailwindcss.com/).
## VS Code extension
Tailwind CSS provides a [Tailwind CSS IntelliSense](https://github.com/tailwindlabs/tailwindcss-intellisense) plugin for VS Code to automatically complete Tailwind CSS class names, CSS functions, and directives.
You can install this plugin in VS Code to enable the autocompletion feature.
## Optimize build performance
When using Tailwind CSS, if the `content` field in `tailwind.config.js` is not correctly configured, this can lead to poor build performance and HMR performance. This is because Tailwind CSS internally matches files based on the glob defined in `content`. The more files it matches, the greater the performance overhead.
Therefore, we recommend that you specify the paths to be scanned accurately to avoid unnecessary performance overhead. For example, only include HTML or JS files in the project source code that actually contain Tailwind class names, and avoid including irrelevant files or directories, especially the `node_modules` directory.
Here is a bad example of scanning the `node_modules`:
```js title="tailwind.config.js"
/** @type {import('tailwindcss').Config} */
module.exports = {
content: [
'./src/**/*.{html,js,ts,jsx,tsx}',
// Scanning a large number of files, leading to performance degradation
'./node_modules/**/*.js',
],
};
```
Sometimes, you may accidentally scan the `node_modules` directory, for example, when scanning files in a monorepo:
```js title="tailwind.config.js"
module.exports = {
content: [
'./src/**/*.{html,js,ts,jsx,tsx}',
// Incorrectly includes the `packages/ui/node_modules` directory
// Should be '../../packages/ui/src/**/*.{html,js,ts,jsx,tsx}'
'../../packages/ui/**/*.{html,js,ts,jsx,tsx}',
],
};
```
## Optimize CSS size
To optimize the size of Tailwind CSS styles, you can try [rsbuild-plugin-tailwindcss](https://github.com/rspack-contrib/rsbuild-plugin-tailwindcss).
This plugin reads the module graph information of Rspack, automatically sets the accurate `content` configuration to generate minimal Tailwind CSS styles.
```ts title="rsbuild.config.ts"
import { pluginTailwindCSS } from 'rsbuild-plugin-tailwindcss';
export default {
plugins: [pluginTailwindCSS()],
};
```
> See [rsbuild-plugin-tailwindcss](https://github.com/rspack-contrib/rsbuild-plugin-tailwindcss) for more information.
---
url: /guide/styling/unocss.md
---
# UnoCSS
[UnoCSS](https://unocss.dev/) is the instant atomic CSS engine, which is designed to be flexible and extensible. The core is un-opinionated, and all the CSS utilities are provided via presets.
You can integrate UnoCSS in Rsbuild via PostCSS plugins.
## Installing UnoCSS
You need to install `unocss` and `@unocss/postcss` first.
import { PackageManagerTabs } from '@theme';
<PackageManagerTabs command="add unocss @unocss/postcss -D" />
## Configuring PostCSS
You can register the `unocss` PostCSS plugin through [postcss.config.mjs](https://www.npmjs.com/package/postcss-loader#config) or [tools.postcss](/config/tools/postcss).
```js title="postcss.config.mjs"
import UnoCSS from '@unocss/postcss';
export default {
plugins: [UnoCSS()],
};
```
Rsbuild has integrated [autoprefixer](https://github.com/postcss/autoprefixer), so you only need to register the `UnoCSS` plugin.
## Configuring UnoCSS
Create a `uno.config.ts` file in the root directory of your project and add the following content:
```js title="uno.config.ts"
import { defineConfig, presetUno } from 'unocss';
export default defineConfig({
content: {
filesystem: ['./src/**/*.{html,js,ts,jsx,tsx}'],
},
presets: [presetUno()],
});
```
:::tip
The above configuration is for reference only and can be modified to suit the needs of your project.
:::
## Importing CSS
Add the `@unocss` directives in your CSS entry file:
```css title="main.css"
@unocss preflights;
@unocss default;
```
Depending on your needs, you can selectively import the CSS styles provided by UnoCSS. Please refer to the [unocss documentation](https://unocss.dev/integrations/postcss#usage) for detailed usage of the UnoCSS.
## Done
You have now completed all the steps to integrate UnoCSS in Rsbuild!
You can use UnoCSS's utility classes in any component or HTML, such as:
```html
<h1 class="px-2 items-center justify-between">Hello world!</h1>
```
For more usage details, refer to the [UnoCSS documentation](https://unocss.dev/).
## VS Code extension
UnoCSS provides a [VS Code Extension](https://unocss.dev/integrations/vscode) plugin for VS Code to decoration and tooltip for matched utilities.
You can install this plugin in VS Code to enable more intelligent features.
---
url: /guide/advanced/alias.md
---
# Path aliases
Path aliases allow developers to define aliases for modules, making it easier to reference them in code. This can be useful when you want to use a short, easy-to-remember name for a module instead of a long, complex path.
For example, if you frequently reference the `src/common/request.ts` module in your project, you can define an alias for it as `@request` and then use `import request from '@request'` in your code instead of writing the full relative path every time. This also allows you to move the module to a different location without needing to update all the import statements in your code.
```ts title="src/index.ts"
import request from '@request'; // resolve to `src/common/request.ts`
```
In Rsbuild, there are several ways to set up path aliases:
- Use the [`paths` field](#typescript-paths-field) in tsconfig.json or jsconfig.json.
- Use the [`imports` field](#nodejs-imports-field) in package.json.
- Use Rsbuild's [resolve.alias](#alias-configuration) configuration.
## TypeScript `paths` field
You can configure aliases through the `paths` configuration in [tsconfig.json](https://typescriptlang.org/docs/handbook/tsconfig-json.html), which is the recommended approach in TypeScript projects as it also resolves the TS type issues related to path aliases.
For example:
```json title="tsconfig.json"
{
"compilerOptions": {
"paths": {
"@common/*": ["./src/common/*"]
}
}
}
```
After configuring, if you reference `@common/Foo.tsx` in your code, it will be mapped to the `<project>/src/common/Foo.tsx` path.
:::tip
You can refer to the [TypeScript - paths](https://typescriptlang.org/tsconfig#paths) documentation for more details.
:::
### jsconfig.json
In non-TypeScript projects, if you need to set path aliases through the `paths` field in [jsconfig.json](https://code.visualstudio.com/docs/languages/jsconfig), you can use the [source.tsconfigPath](/config/source/tsconfig-path) option to set it.
After adding the following configuration, Rsbuild will recognize the `paths` field in `jsconfig.json`.
```js title="rsbuild.config.mjs"
export default {
source: {
tsconfigPath: './jsconfig.json',
},
};
```
## Node.js `imports` field
You can also use the Node.js [`imports` field](https://nodejs.org/api/packages.html#imports) to define aliases with the `#` prefix. This works out of the box and does not require additional Rsbuild configuration.
```json title="package.json"
{
"type": "module",
"imports": {
"#app/*": "./src/*"
}
}
```
```js title="src/index.js"
import { message } from '#app/foo';
```
For TypeScript projects, enable [`resolvePackageJsonImports`](https://www.typescriptlang.org/tsconfig/#resolvePackageJsonImports) so the TypeScript language service and compiler can understand these aliases.
## Alias configuration
Rsbuild provides the [resolve.alias](/config/resolve/alias) configuration option, which corresponds to the webpack/Rspack native [resolve.alias](https://rspack.rs/config/resolve#resolvealias) configuration. You can configure this option using an object or a function.
### Use cases
Since the `paths` configuration in `tsconfig.json` is written in a static JSON file, it lacks dynamism.
The `resolve.alias` configuration can address this limitation by allowing you to dynamically set the `resolve.alias` using JavaScript code, such as based on environment variables.
### Object usage
You can configure `resolve.alias` using an object, where the relative paths will be automatically resolved to absolute paths.
For example:
```js
export default {
resolve: {
alias: {
'@common': './src/common',
},
},
};
```
After configuring, if you reference `@common/Foo.tsx` in your code, it will be mapped to the `<project>/src/common/Foo.tsx` path.
### Function usage
You can also configure `resolve.alias` as a function, which receives the built-in `alias` object and allows you to modify it.
For example:
```js
export default {
resolve: {
alias: (alias) => {
alias['@common'] = './src/common';
return alias;
},
},
};
```
### Priority
The `paths` configuration in `tsconfig.json` takes precedence over the `resolve.alias` configuration. When a path matches the rules defined in both `paths` and `resolve.alias`, the value defined in `paths` will be used.
You can adjust the priority of these two options using [resolve.aliasStrategy](/config/resolve/alias-strategy).
---
url: /guide/advanced/env-vars.md
---
# Environment variables
Rsbuild supports injecting environment variables or expressions into your code during the build. This helps you distinguish between environments or replace constants.
This chapter explains how to use environment variables in Rsbuild.
## Default variables
By default, Rsbuild uses [source.define](#using-define) to inject environment variables into your code, replacing them with their values during the build:
`import.meta.env` contains these environment variables:
- [import.meta.env.MODE](#importmetaenvmode)
- [import.meta.env.DEV](#importmetaenvdev)
- [import.meta.env.PROD](#importmetaenvprod)
- [import.meta.env.BASE_URL](#importmetaenvbase_url)
- [import.meta.env.ASSET_PREFIX](#importmetaenvasset_prefix)
`process.env` contains these environment variables:
- [process.env.BASE_URL](#processenvbase_url)
- [process.env.ASSET_PREFIX](#processenvasset_prefix)
- [process.env.NODE_ENV](#processenvnode_env)
### import.meta.env.MODE
- **Type:** `'production' | 'development' | 'none'`
- **Scope:** Available in source code, replaced at build time via [define](/guide/advanced/env-vars#using-define)
Use `import.meta.env.MODE` in client code to read the [mode](/config/mode) configuration value.
```ts
if (import.meta.env.MODE === 'development') {
console.log('this is development mode');
}
```
In development mode, the above code will be compiled to:
```js
if (true) {
console.log('this is development mode');
}
```
In production mode, the above code will be compiled to:
```js
if (false) {
console.log('this is development mode');
}
```
During code minification, `if (false) { ... }` will be recognized as dead code and automatically removed.
### import.meta.env.DEV
- **Type:** `boolean`
- **Scope:** Available in source code, replaced at build time via [define](/guide/advanced/env-vars#using-define)
If [mode](/config/mode) is `'development'`, the value is `true`; otherwise, it is `false`.
```ts
if (import.meta.env.DEV) {
console.log('this is development mode');
}
```
### import.meta.env.PROD
- **Type:** `boolean`
- **Scope:** Available in source code, replaced at build time via [define](/guide/advanced/env-vars#using-define)
If [mode](/config/mode) is `'production'`, the value is `true`; otherwise, it is `false`.
```ts
if (import.meta.env.PROD) {
console.log('this is production mode');
}
```
### import.meta.env.BASE_URL
- **Type:** `string`
- **Scope:** Available in source code, replaced at build time via [define](/guide/advanced/env-vars#using-define)
You can use `import.meta.env.BASE_URL` in client code to access the [base path](/guide/basic/server#base-path) of the server. This base path is determined by the [server.base](/config/server/base) configuration and is useful for referencing assets from the [public folder](/guide/basic/static-assets#public-folder) in your code.
For example, set the server's base path to `/foo` using the [server.base](/config/server/base) configuration:
```ts
export default {
server: {
base: '/foo',
},
};
```
Then, the URL for the `favicon.ico` file in the public directory becomes `http://localhost:3000/foo/favicon.ico`. You can use `import.meta.env.BASE_URL` to construct the URL in JavaScript files:
```js title="index.js"
const image = new Image();
// Equivalent to "/foo/favicon.ico"
image.src = `${import.meta.env.BASE_URL}/favicon.ico`;
```
### import.meta.env.ASSET_PREFIX
- **Type:** `string`
- **Scope:** Available in source code, replaced at build time via [define](/guide/advanced/env-vars#using-define)
You can use `import.meta.env.ASSET_PREFIX` in client code to access the URL prefix of static assets.
- In development, it is equivalent to the value set by [dev.assetPrefix](/config/dev/asset-prefix).
- In production, it is equivalent to the value set by [output.assetPrefix](/config/output/asset-prefix).
- Rsbuild will automatically remove the trailing slash from `assetPrefix` to make string concatenation easier.
For example, copy the `static/icon.png` image to the `dist` directory using the [output.copy](/config/output/copy) configuration:
```ts
export default {
dev: {
assetPrefix: '/',
},
output: {
copy: [{ from: './static', to: 'static' }],
assetPrefix: 'https://example.com',
},
};
```
Then you can access the image URL in client code:
```jsx
const Image = <img src={`${import.meta.env.ASSET_PREFIX}/static/icon.png`} />;
```
In development mode, the above code will be compiled to:
```jsx
const Image = <img src={`/static/icon.png`} />;
```
In production mode, the above code will be compiled to:
```jsx
const Image = <img src={`https://example.com/static/icon.png`} />;
```
### process.env.BASE_URL
- **Type:** `string`
- **Scope:** Available in source code, replaced at build time via [define](/guide/advanced/env-vars#using-define)
Rsbuild also supports using `process.env.BASE_URL`, which is an alias for [import.meta.env.BASE_URL](#importmetaenvbase_url).
For example, in the HTML template, you can use `process.env.BASE_URL` to concatenate the URL:
```html title="index.html"
<!-- Equivalent to "/foo/favicon.ico" -->
<link rel="icon" href="<%= process.env.BASE_URL %>/favicon.ico" />
```
### process.env.ASSET_PREFIX
- **Type:** `string`
- **Scope:** Available in source code, replaced at build time via [define](/guide/advanced/env-vars#using-define)
Rsbuild also supports using `process.env.ASSET_PREFIX`, which is an alias for [import.meta.env.ASSET_PREFIX](#importmetaenvasset_prefix).
For example, in the HTML template, you can use `process.env.ASSET_PREFIX` to concatenate the URL:
```html title="index.html"
<!-- Equivalent to "https://example.com/static/icon.png" -->
<link rel="icon" href="<%= process.env.ASSET_PREFIX %>/static/icon.png" />
```
### process.env.NODE_ENV
- **Type:** `string`
- **Scope:** Available in both Node.js process and source code
By default, Rsbuild sets the `process.env.NODE_ENV` environment variable to `'development'` in development mode and `'production'` in production mode.
You can use `process.env.NODE_ENV` directly in Node.js and in client code.
```ts
if (process.env.NODE_ENV === 'development') {
console.log('this is a development log');
}
```
In development mode, the above code will be compiled to:
```js
if (true) {
console.log('this is a development log');
}
```
In production mode, the above code will be compiled to:
```js
if (false) {
console.log('this is a development log');
}
```
During code minification, `if (false) { ... }` is recognized as dead code and removed automatically.
#### Custom NODE_ENV
`process.env.NODE_ENV` is injected by Rspack by default. To disable the injection or customize the value, use Rspack's [optimization.nodeEnv](https://rspack.rs/config/optimization#optimizationnodeenv) option:
```ts title="rsbuild.config.ts"
export default {
tools: {
rspack: { optimization: { nodeEnv: false } },
},
};
```
## `.env` file
When a `.env` file exists in the project root directory, Rsbuild CLI automatically uses [dotenv](https://npmjs.com/package/dotenv) to load these environment variables and add them to the current Node.js process. [Public variables](#public-variables) are then exposed in client code.
You can access these environment variables through `import.meta.env.[name]` or `process.env.[name]`.
### File types
Rsbuild supports reading the following types of env files:
| File Name | Description |
| ------------------------ | ------------------------------------------------------------------------ |
| `.env` | Loaded by default in all scenarios. |
| `.env.local` | Local overrides for `.env`, should be added to `.gitignore`. |
| `.env.development` | Read when `process.env.NODE_ENV` is `'development'`. |
| `.env.production` | Read when `process.env.NODE_ENV` is `'production'`. |
| `.env.development.local` | Local overrides for `.env.development`, should be added to `.gitignore`. |
| `.env.production.local` | Local overrides for `.env.production`, should be added to `.gitignore`. |
If multiple of the above files exist, they will all be loaded. Files listed lower in the table have higher priority.
### Env mode
Rsbuild also supports reading `.env.[mode]` and `.env.[mode].local` files. You can specify the env mode using the `--env-mode <mode>` flag.
For example, set the env mode as `test`:
```bash
npx rsbuild dev --env-mode test
```
Rsbuild will read these files in the following order and merge their contents. If the same environment variable is defined in multiple files, files loaded later will override those loaded earlier:
- .env
- .env.local
- .env.test
- .env.test.local
:::tip
The `--env-mode` option takes precedence over `process.env.NODE_ENV`.
We recommend using `--env-mode` to set the env mode instead of modifying `process.env.NODE_ENV`.
:::
#### Accessing in client code
By default, Rsbuild does not inject the env mode into client code. You can manually define a global identifier using [source.define](#using-define) to make it available in the client code:
```js title="rsbuild.config.js"
export default ({ envMode }) => ({
source: {
define: {
ENV_MODE: JSON.stringify(envMode),
},
},
});
```
Then you can access it in client code:
```js title="src/index.js"
if (ENV_MODE === 'my-mode') {
// ...
}
```
### Env directory
By default, the `.env` file is located in the root directory of the project. You can specify the env directory by using the `--env-dir <dir>` option in the CLI.
For example, to specify the env directory as `config`:
```bash
npx rsbuild dev --env-dir config
```
Rsbuild will then read `./config/.env` and other env files from that directory.
### Example
For example, create a `.env` file and add the following contents:
```shell title=".env"
FOO=hello
BAR=1
```
Then, in the `rsbuild.config.ts` file, you can access the environment variables using `import.meta.env.[name]` or `process.env.[name]`:
```ts title="rsbuild.config.ts"
console.log(import.meta.env.FOO); // 'hello'
console.log(import.meta.env.BAR); // '1'
console.log(process.env.FOO); // 'hello'
console.log(process.env.BAR); // '1'
```
Now, create a `.env.local` file and add the following contents:
```shell title=".env.local"
BAR=2
```
The value of `BAR` is overridden to `'2'`:
```ts title="rsbuild.config.ts"
console.log(import.meta.env.BAR); // '2'
console.log(process.env.BAR); // '2'
```
### Manually load env
If you are not using the Rsbuild CLI and instead use the [JavaScript API](/api/start/index), you need to manually call the [loadEnv](/api/javascript-api/core#loadenv) method to read environment variables and inject them via the [source.define](/config/source/define) config.
```ts
import { loadEnv, mergeRsbuildConfig } from '@rsbuild/core';
// By default, `publicVars` are variables prefixed with `PUBLIC_`
const { parsed, publicVars } = loadEnv();
const mergedConfig = mergeRsbuildConfig(
{
source: {
define: publicVars,
},
},
userConfig,
);
```
### Disable loading
You can disable loading `.env` files by using the `--no-env` flag in the CLI.
```bash
npx rsbuild dev --no-env
```
When using the `--no-env` flag, Rsbuild CLI will not read any `.env` files. You can then manage environment variables using other tools, such as [dotenvx](https://dotenvx.com/).
## Public variables
All environment variables starting with `PUBLIC_` can be accessed in client code. For example, if the following variables are defined:
```bash title=".env"
PUBLIC_NAME=jack
PASSWORD=123
```
In client code, you can access these environment variables through `import.meta.env.PUBLIC_*` or `process.env.PUBLIC_*`. Rsbuild will match the identifiers and replace them with their corresponding values.
```ts title="src/index.ts"
console.log(import.meta.env.PUBLIC_NAME); // -> 'jack'
console.log(import.meta.env.PASSWORD); // -> undefined
console.log(process.env.PUBLIC_NAME); // -> 'jack'
console.log(process.env.PASSWORD); // -> undefined
```
:::tip
- The content of public variables will be exposed to your client code, so please avoid including sensitive information in public variables.
- Public variables are replaced through [source.define](/config/source/define). Read ["Using define"](#using-define) to understand the principles and caveats of define.
:::
### Replacement scope
Public variables will replace identifiers in client code. The replacement scope includes:
- JavaScript files and files that can be converted to JavaScript code, such as `.js`, `.ts`, `.tsx`, etc.
- HTML template files, for example:
```xml title="template.html"
<div><%= process.env.PUBLIC_NAME %></div>
```
Note that public variables will not replace identifiers in the following files:
- CSS files, such as `.css`, `.scss`, `.less`, etc.
### Custom prefix
Rsbuild provides the [loadEnv](/api/javascript-api/core#loadenv) method, which can inject environment variables with any prefix into client code.
For example, when migrating a Create React App project to Rsbuild, you can read environment variables starting with `REACT_APP_` and inject them through the [source.define](/config/source/define) config as follows:
```ts title="rsbuild.config.ts"
import { defineConfig, loadEnv } from '@rsbuild/core';
const { publicVars } = loadEnv({ prefixes: ['REACT_APP_'] });
export default defineConfig({
source: {
define: publicVars,
},
});
```
## Using define
By using [source.define](/config/source/define), you can replace global identifiers with expressions or values at compile time.
`define` is similar to macro definition capabilities in other languages. It is often used to inject environment variables and other information into code during build time.
### Replace identifiers
The most basic use case for `define` is to replace global identifiers at compile time.
The value of the environment variable `NODE_ENV` affects the behavior of many vendor packages. Usually, we need to set it to `production`.
```js
export default {
source: {
define: {
'process.env.NODE_ENV': JSON.stringify(process.env.NODE_ENV),
},
},
};
```
Note that the value provided here must be a JSON string, e.g. `process.env.NODE_ENV` with a value of `"production"` should be passed in as `"\"production\""` to be processed correctly.
Similarly, `{ foo: "bar" }` should be converted to `"{\"foo\":\"bar\"}"`. If you pass the object directly, it means replacing the identifier `process.env.NODE_ENV.foo` with the identifier `bar`.
For more about `source.define`, refer to the [API References](/config/source/define).
:::tip
The `NODE_ENV` environment variable shown in the example above is already injected by Rsbuild, so you usually don't need to configure it manually.
:::
### Identifier matching
Note that `source.define` can only match complete global identifiers. You can think of it as performing text replacement.
If the identifier in the code doesn't exactly match the key defined in `define`, Rsbuild will not replace it.
```js
// Good
console.log(process.env.NODE_ENV); // 'production'
// Bad
console.log(process.env['NODE_ENV']); // process is not defined!
// Bad
console.log(process.env?.NODE_ENV); // process is not defined!
// Bad
const { NODE_ENV } = process.env;
console.log(NODE_ENV); // process is not defined!
// Bad
const env = process.env;
console.log(env.NODE_ENV); // process is not defined!
```
### process.env Replacement
When using `source.define`, avoid replacing the entire `process.env` object. For example, the following usage is not recommended:
```js
export default {
source: {
define: {
'process.env': JSON.stringify(process.env),
},
},
};
```
If you use the above approach, it will cause the following problems:
1. Unused environment variables are injected unnecessarily, causing the dev server's environment variables to leak into the frontend code.
2. Every `process.env` reference will be replaced with the complete environment variable object, increasing bundle size and reducing performance.
Therefore, only inject the specific environment variables you need on `process.env`, and avoid replacing it entirely.
## Type declarations
### Public variables
When you access a public environment variable in a TypeScript file, TypeScript may report that the variable is missing a type definition. You'll need to add the corresponding type declaration.
For example, if you reference a `PUBLIC_FOO` variable, TypeScript will display the following error:
```
TS2304: Cannot find name 'PUBLIC_FOO'.
```
To fix this, you can create a `src/env.d.ts` file in your project and add the following content:
```ts title="src/env.d.ts"
declare const PUBLIC_FOO: string;
```
### import.meta.env
Rsbuild provides default TypeScript type definitions for `import.meta.env` through [Preset types](/guide/basic/typescript#preset-types).
```ts title="src/env.d.ts"
/// <reference types="@rsbuild/core/types" />
```
If you have customized environment variables starting with `import.meta.env`, you can extend the `ImportMetaEnv` interface:
```ts title="src/env.d.ts"
interface ImportMetaEnv {
// import.meta.env.PUBLIC_FOO
readonly PUBLIC_FOO: string;
}
interface ImportMeta {
readonly env: ImportMetaEnv;
}
```
By default, Rsbuild's preset types allow you to access any property on `import.meta.env` without TypeScript type errors.
For stricter type safety, you can enable the `strictImportMetaEnv` option by extending the `RsbuildTypeOptions` interface. When this option is enabled, only properties predefined by Rsbuild or explicitly declared in your project can be accessed. Accessing any other property will cause a TypeScript type error.
You can add the following code to your `src/env.d.ts` file:
```ts title="src/env.d.ts"
/// <reference types="@rsbuild/core/types" />
interface RsbuildTypeOptions {
strictImportMetaEnv: true;
}
```
### process.env
If types for `process.env` are missing, install [@types/node](https://npmjs.com/package/@types/node):
import { PackageManagerTabs } from '@theme';
<PackageManagerTabs command="add @types/node -D" />
Then extend the type of `process.env`:
```ts title="src/env.d.ts"
declare namespace NodeJS {
interface ProcessEnv {
// process.env.PUBLIC_FOO
PUBLIC_FOO: string;
}
}
```
## Tree shaking
`define` can also be used to mark dead code and assist Rspack with tree shaking optimization.
Build different artifacts for different languages by replacing `import.meta.env.LANGUAGE` with specific values. For example:
```ts title="rsbuild.config.ts"
export default {
source: {
define: {
'import.meta.env.LANGUAGE': JSON.stringify(import.meta.env.LANGUAGE),
},
},
};
```
For internationalized code:
```js
const App = () => {
if (import.meta.env.LANGUAGE === 'en') {
return <EntryFoo />;
} else if (import.meta.env.LANGUAGE === 'zh') {
return <EntryBar />;
}
};
```
Specifying the environment variable `LANGUAGE=zh` and running the build will eliminate dead code:
```js
const App = () => {
if (false) {
} else if (true) {
return <EntryBar />;
}
};
```
Unused components will not be bundled, and their dependencies will be removed accordingly, resulting in a smaller build output.
---
url: /guide/advanced/hmr.md
---
# Hot module replacement
Hot Module Replacement (HMR) exchanges, adds, or removes modules while an application is running, without a full page reload. This significantly speeds up development in several ways:
- Preserves application state that would be lost during a full reload.
- Saves valuable development time by updating only what changed.
- Instantly updates the browser when modifying CSS/JS in source code, similar to changing styles directly in the browser's dev tools.
## HMR toggle
Rsbuild has built-in support for HMR, which is enabled by default in development mode.
If you don't need HMR, set [dev.hmr](/config/dev/hmr) to `false`. This disables HMR and React Refresh, and Rsbuild falls back to [dev.liveReload](/config/dev/live-reload).
```ts title="rsbuild.config.ts"
export default {
dev: {
hmr: false,
},
};
```
To disable both HMR and live reload, set [dev.hmr](/config/dev/hmr) and [dev.liveReload](/config/dev/live-reload) to `false`. This prevents WebSocket requests to the dev server, and the page won't refresh automatically when files change.
```ts title="rsbuild.config.ts"
export default {
dev: {
hmr: false,
liveReload: false,
},
};
```
## Specify HMR URL
By default, Rsbuild uses the host and port number of the current page to construct the WebSocket URL for HMR.
If the HMR connection fails, specify the WebSocket URL using the [dev.client](/config/dev/client) config.
```ts title="rsbuild.config.ts"
export default {
dev: {
client: {
host: 'localhost',
protocol: 'ws',
},
},
};
```
## File watching
By default, Rsbuild doesn't watch files in the `.git/` and `node_modules/` directories. Changes to these files won't trigger a rebuild, which reduces memory usage and improves build performance.
To watch these directories, configure Rspack's [watchOptions.ignored](https://rspack.rs/config/watch#watchoptionsignored) to override the default behavior.
For example, to watch the `node_modules/` directory while ignoring `.git/`:
```ts title="rsbuild.config.ts"
export default {
tools: {
rspack: {
watchOptions: {
ignored: /\.git/,
},
},
},
};
```
## FAQ
Refer to [HMR FAQ](/guide/faq/hmr).
---
url: /guide/advanced/browserslist.md
---
# Browserslist
Rsbuild supports using [Browserslist](https://browsersl.ist/) to specify which browsers should be supported in your web application.
## What is browserslist
Since different browsers support ECMAScript and CSS features differently, developers need to specify the correct browser range for web applications.
[Browserslist](https://browsersl.ist/) lets you specify which browsers your web application can run in. It provides a configuration for specifying browser ranges. Browserslist has become an industry standard, used by libraries such as SWC, Lightning CSS, Babel, ESLint, PostCSS, and webpack.
When you specify a browser range through Browserslist, Rsbuild compiles JavaScript and CSS code to match the specified syntax.
## Polyfill injection
If you enable [output.polyfill](/config/output/polyfill), Rsbuild will also inject the corresponding polyfill code based on browserslist. **When you only need to support more modern browsers, the build process will introduce less compatibility code and polyfills, reducing the bundle size.**
```ts title="rsbuild.config.ts"
export default {
output: {
polyfill: 'usage',
},
};
```
For example, when you need to be compatible with IE11, Rsbuild will compile the code to ES5 and inject the polyfills required by IE11 through [core-js](https://github.com/zloirock/core-js).
> Please refer to [Browser compatibility](/guide/advanced/browser-compatibility) for more information.
## Default values
Rsbuild sets different default Browserslist values according to [output.target](/config/output/target). You can also explicitly set Browserslist in your project to make the compatibility scope clearer.
### Web target
If `output.target` is `web`, Rsbuild will use the following Browserslist by default:
```yaml title=".browserslistrc"
chrome >= 87
edge >= 88
firefox >= 78
safari >= 14
```
With this browser range, the build output will be compatible with browsers that support [native ES Modules](https://developer.mozilla.org/en-US/docs/Web/JavaScript/Guide/Modules).
### Node target
If `output.target` is `node`, Rsbuild will default to outputting bundles that run on Node.js 16.0 or later.
```yaml title=".browserslistrc"
node >= 16
```
### Web Workers target
If `output.target` is `web-worker`, Rsbuild will default to using the following Browserslist (consistent with the `web` target):
```yaml title=".browserslistrc"
chrome >= 87
edge >= 88
firefox >= 78
safari >= 14
```
## Set browserslist
You can set the Browserslist value in the `package.json` or `.browserslistrc` file in the root directory of the current project.
### Example
Set via `browserslist` in `package.json`:
```json title="package.json"
{
"browserslist": [
"iOS >= 9",
"Android >= 4.4",
"last 2 versions",
"> 0.2%",
"not dead"
]
}
```
Set via a separate `.browserslistrc` file:
```yaml title=".browserslistrc"
iOS >= 9
Android >= 4.4
last 2 versions
> 0.2%
not dead
```
### Effective scope
By default, the `.browserslistrc` file only applies to browser-side bundles, including the `web` and `web-worker` target types.
When building multiple targets simultaneously, for example if the targets contain both `web` and `node`, only the `web` bundles will be affected by the `.browserslistrc` file. To make changes to the `node` bundles, you can use the `output.overrideBrowserslist` configuration below.
### Set by env
You can set different browserslist configurations based on `NODE_ENV` to specify different browser ranges for development and production.
For example, set values based on keys in the `package.json`:
```json title="package.json"
{
"browserslist": {
"production": [
"chrome >= 87",
"edge >= 88",
"firefox >= 78",
"safari >= 14"
],
"development": [
"last 1 chrome version",
"last 1 firefox version",
"last 1 safari version"
]
}
}
```
Or in `.browserslistrc`:
```yaml title=".browserslistrc"
[production]
chrome >= 87
edge >= 88
firefox >= 78
safari >= 14
[development]
last 1 chrome version
last 1 firefox version
last 1 safari version
```
### Override via config
In addition to the standard usage above, Rsbuild also provides [output.overrideBrowserslist](/config/output/override-browserslist) config, which can also set the Browserslist value.
`overrideBrowserslist` can be set to an array with the same syntax as `browserslistrc`, but it has a higher priority than `browserslistrc`.
```ts title="rsbuild.config.ts"
export default {
output: {
overrideBrowserslist: [
'iOS >= 9',
'Android >= 4.4',
'last 2 versions',
'> 0.2%',
'not dead',
],
},
};
```
In most cases, we recommend using the `.browserslistrc` file rather than the `overrideBrowserslist` config. The `.browserslistrc` file is the standard config file, making it more general and recognizable by other libraries in the community.
## Commonly used browserslist
The following are some commonly used Browserslist configurations. Choose according to your project type.
### Desktop web application
For desktop web applications, if you need to be compatible with IE 11 browsers, you can set Browserslist to:
```yaml title=".browserslistrc"
> 0.5%
not dead
IE 11
```
The above Browserslist will compile the code to ES5. For the specific browser list, please check [browserslist.dev](https://browserslist.dev/?q=PiAwLjUlLCBub3QgZGVhZCwgSUUgMTE%3D).
If you don't need to be compatible with IE 11, you can adjust browserslist for more performant output, such as:
- Set to browsers that support native ES Modules (recommended):
```yaml title=".browserslistrc"
chrome >= 87
edge >= 88
firefox >= 78
safari >= 14
```
- Set to browsers that support ES6:
```yaml title=".browserslistrc"
chrome >= 51
edge >= 15
firefox >= 54
safari >= 10
ios_saf >= 10
```
### Mobile web application
For mobile web applications, mainly compatible with `iOS` and `Android` systems, we usually set browserslist as:
```yaml title=".browserslistrc"
iOS >= 9
Android >= 4.4
last 2 versions
> 0.2%
not dead
```
The above browserslist will compile the code to ES5, which is compatible with most mobile scenarios on the market. For the detailed browser list, please check [browserslist.dev](https://browserslist.dev/?q=aU9TID49IDksIEFuZHJvaWQgPj0gNC40LCBsYXN0IDIgdmVyc2lvbnMsID4gMC4yJSwgbm90IGRlYWQ%3D).
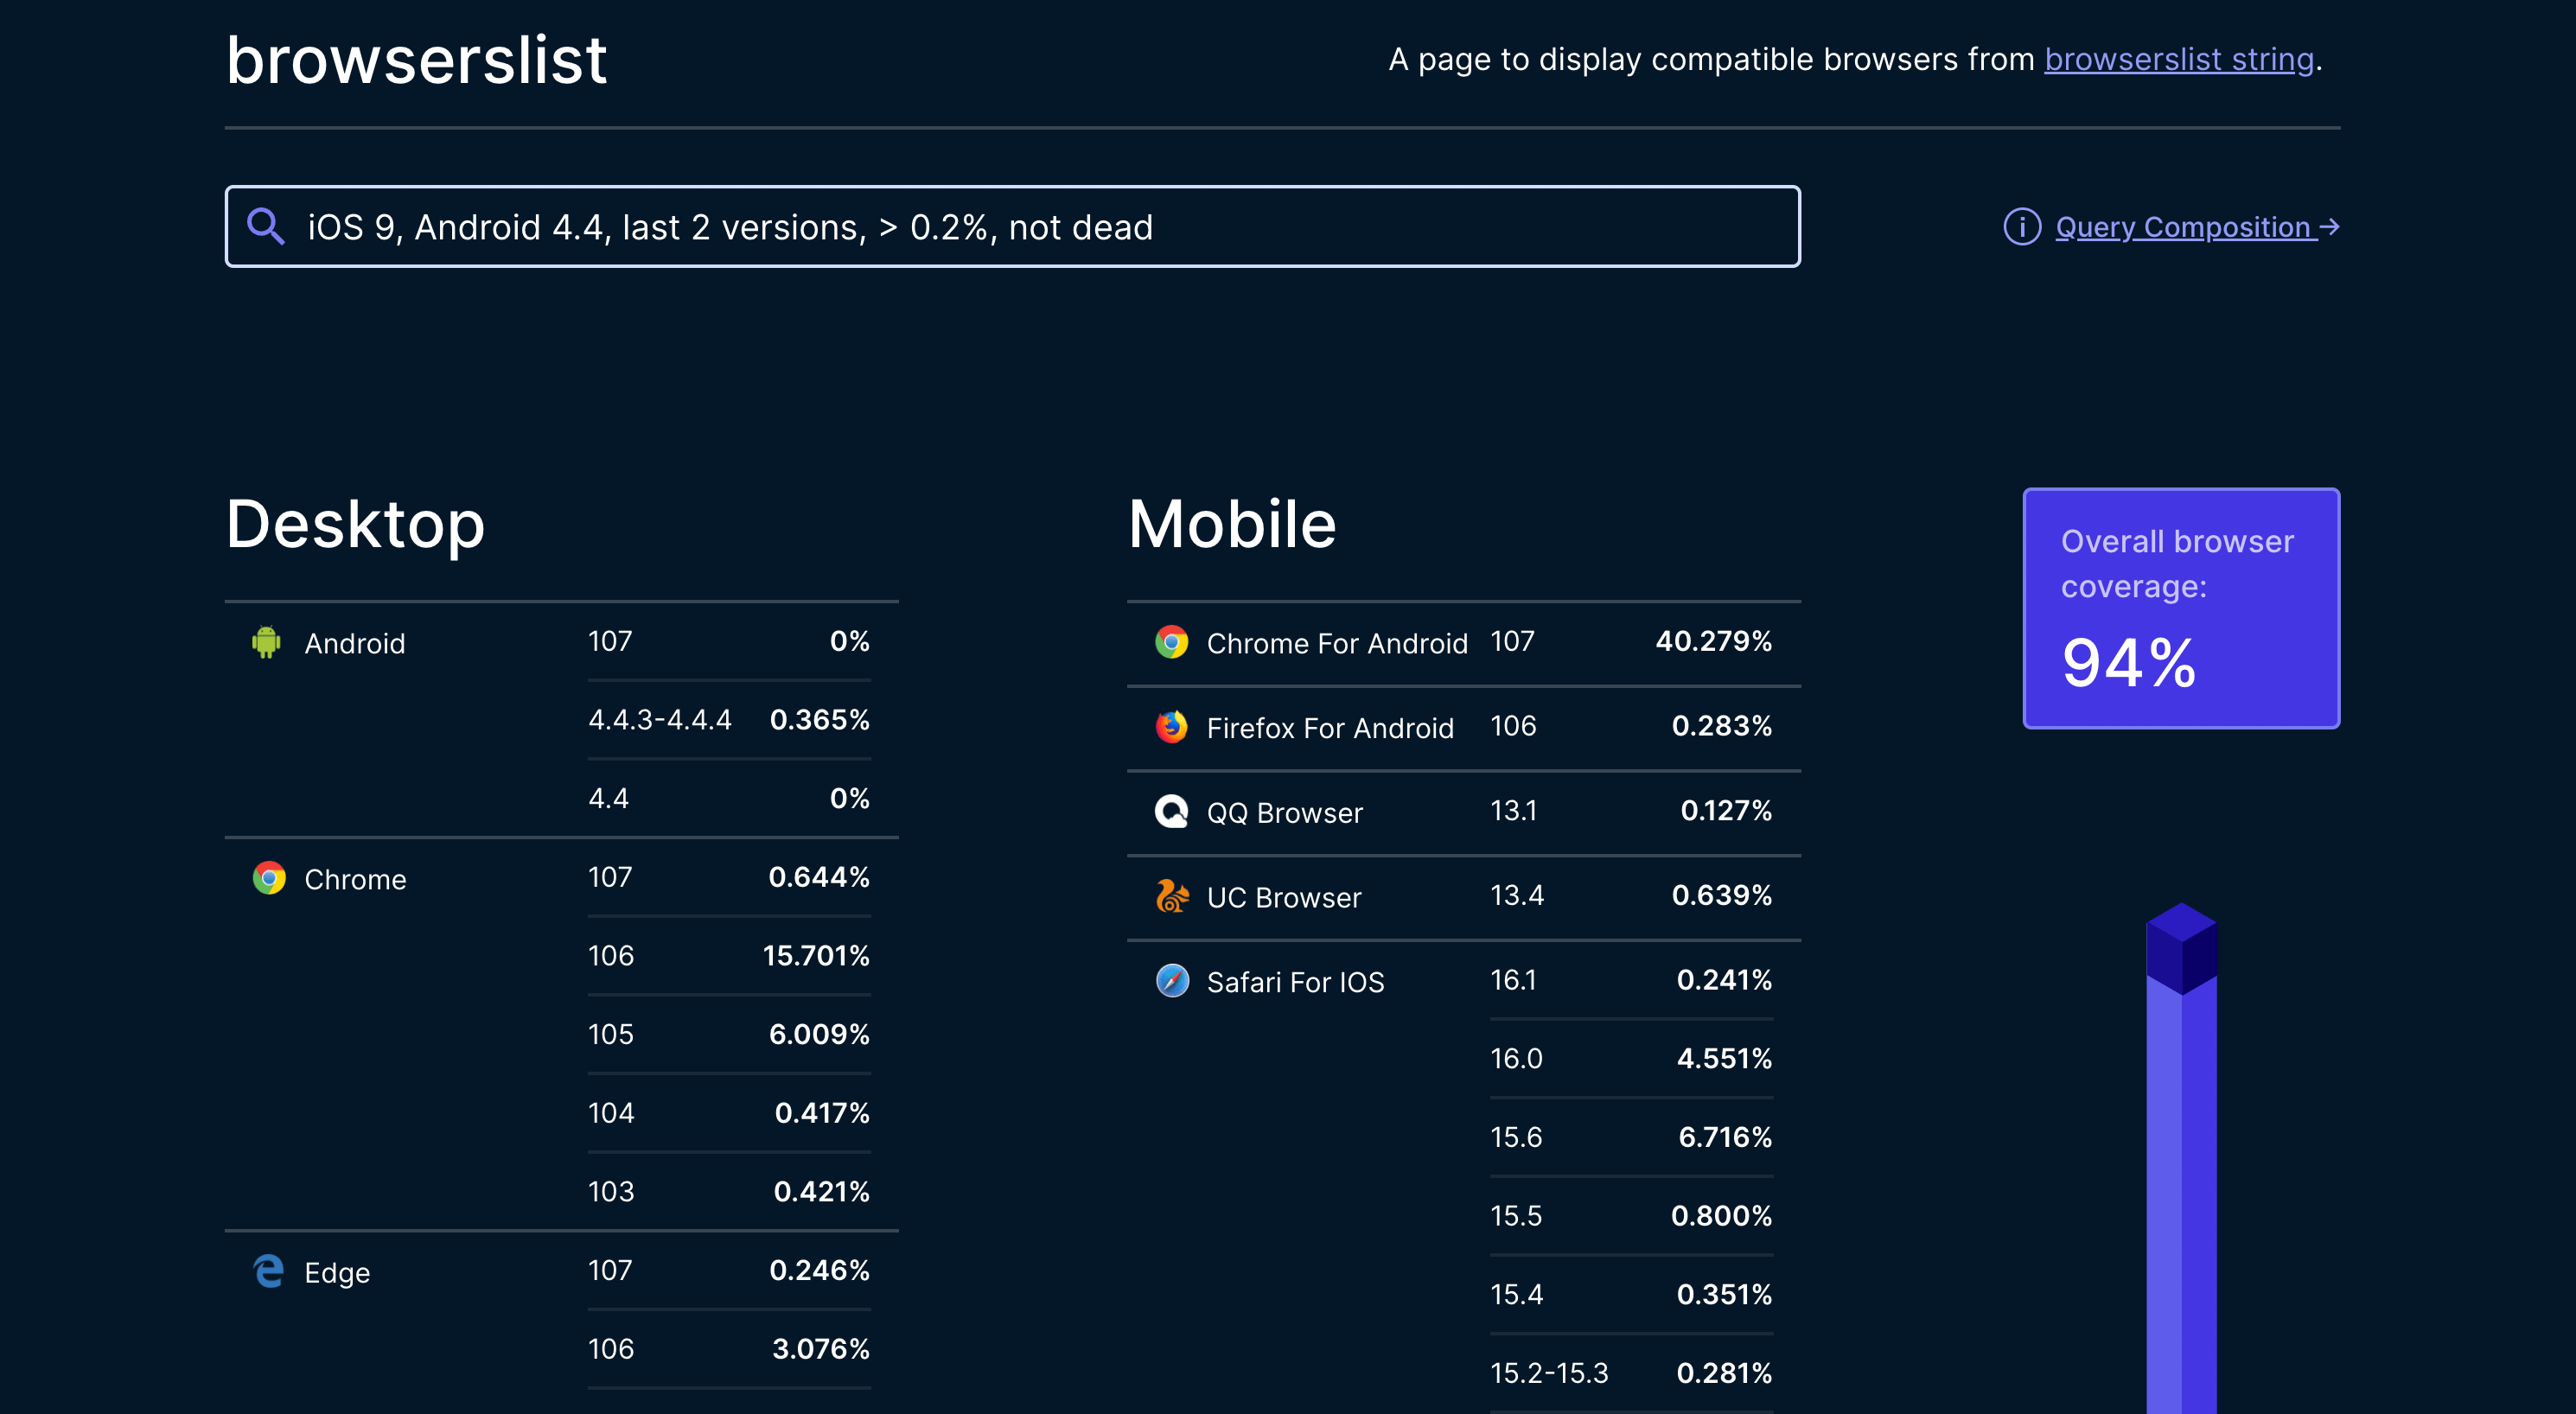
You can also choose to use ES6 or higher, which will make the page perform better. The corresponding Browserslist is as follows:
```yaml title=".browserslistrc"
iOS >= 10
Chrome >= 51
> 0.5%
not dead
not op_mini all
```
## Query browser support
When developing, we need to know the browser support for certain features or APIs. You can check on the [caniuse](https://caniuse.com/) website.
For example, to check browser support for `Promise`, just enter `Promise` in [caniuse](https://caniuse.com/), and you can see the following results:
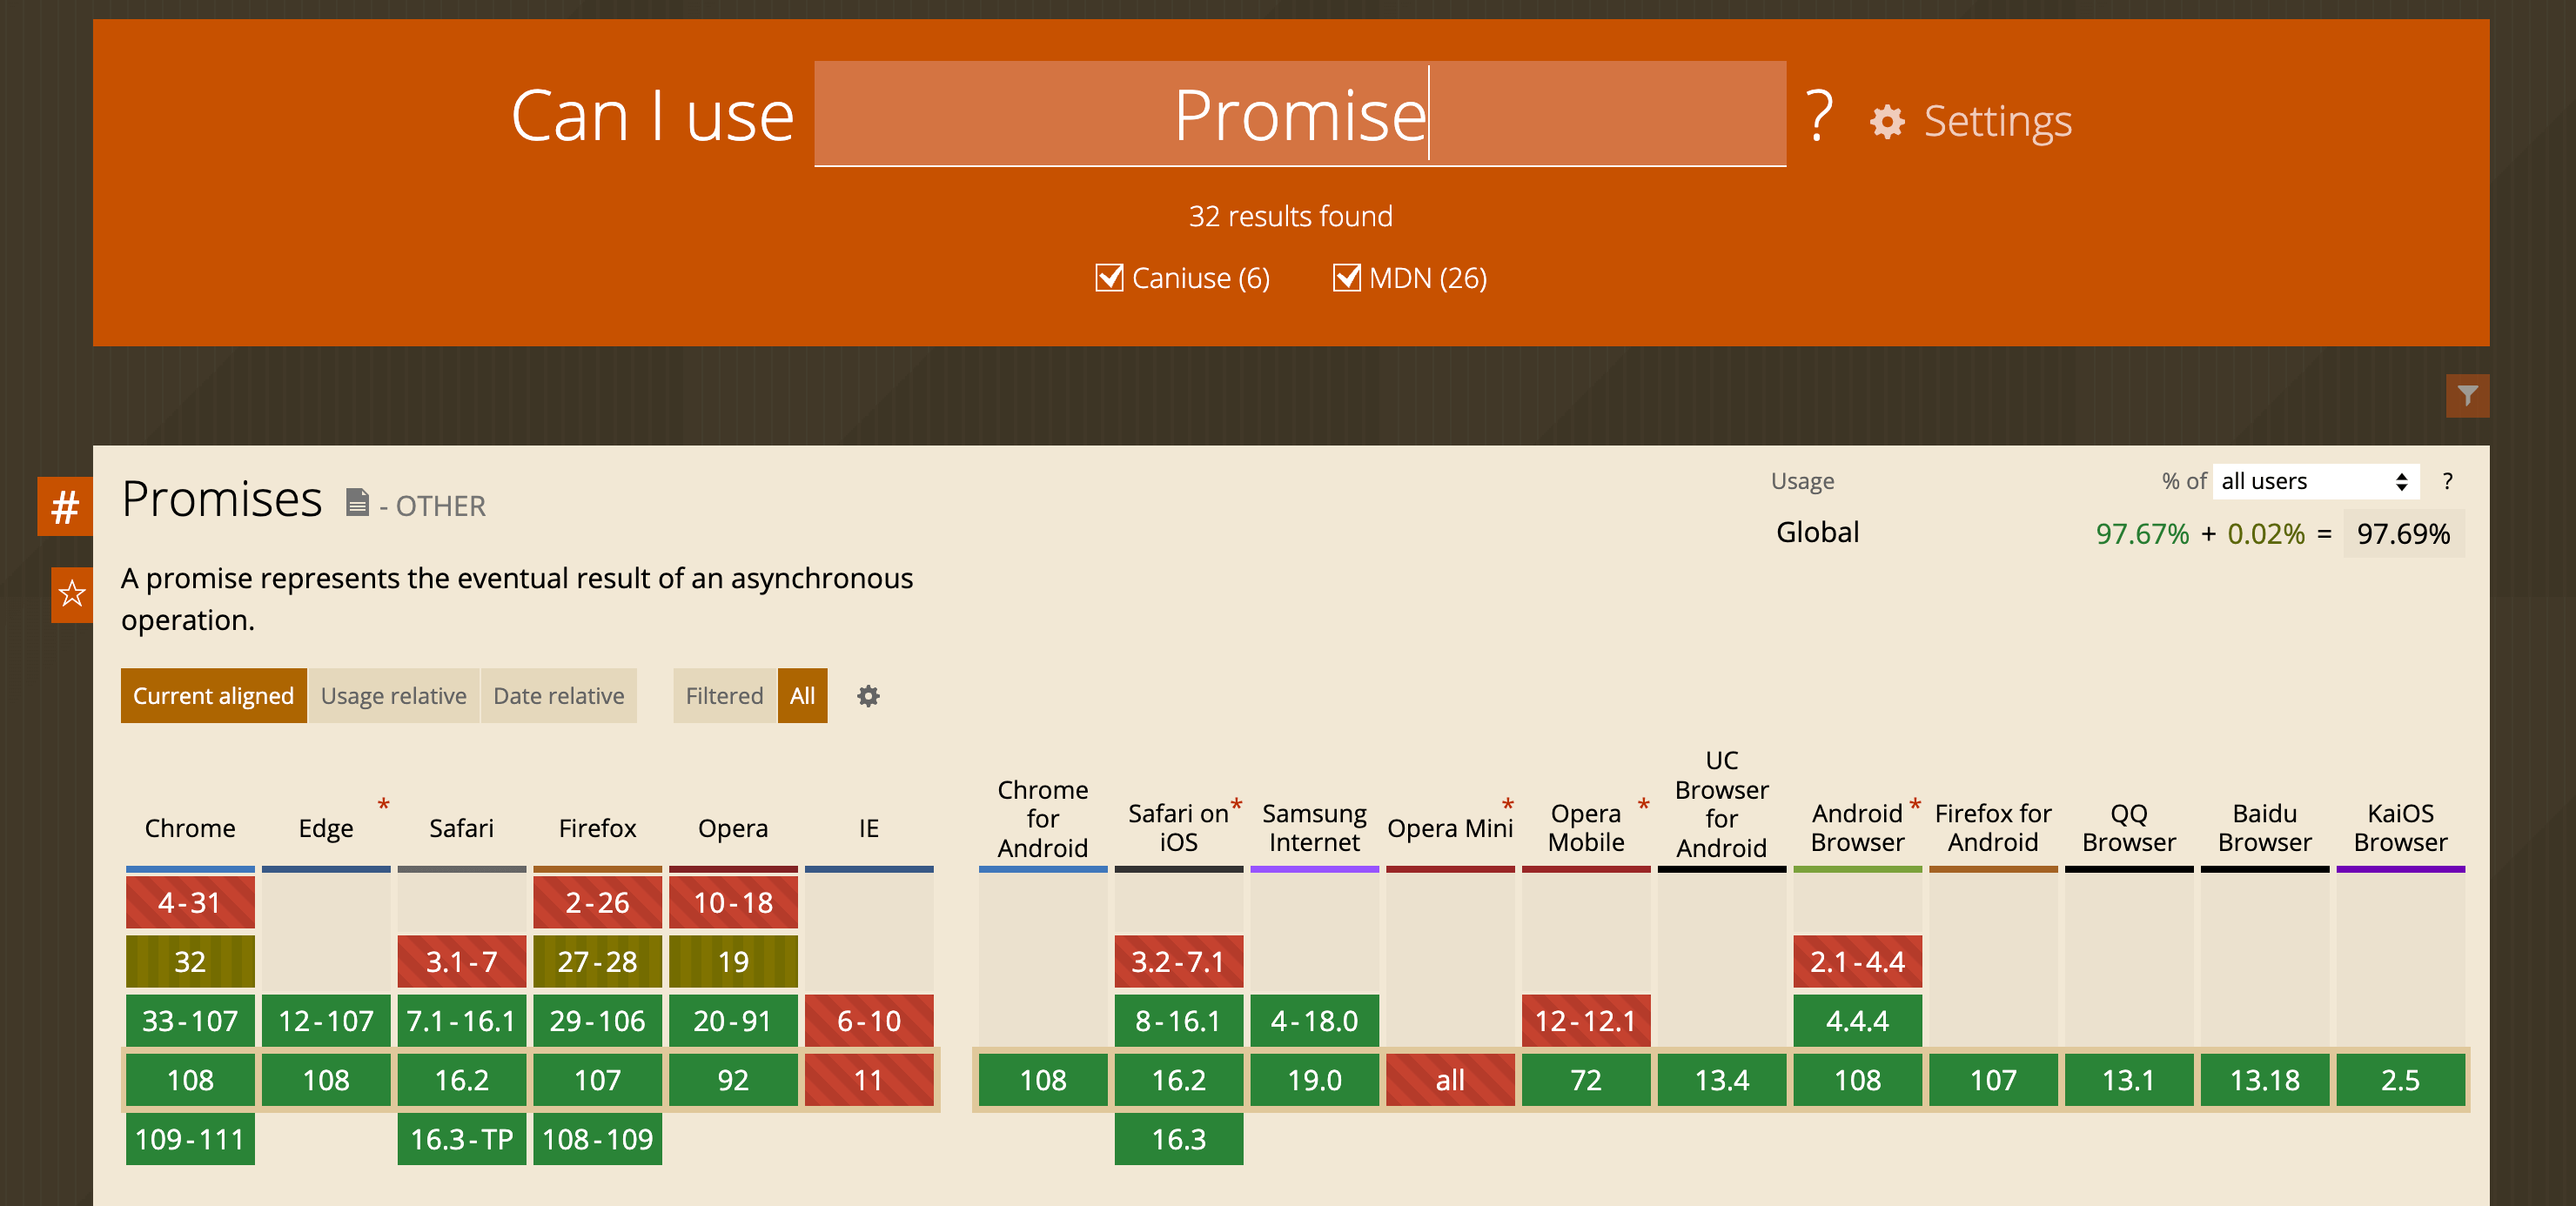
As can be seen from the above table, `Promise` is natively supported in Chrome 33 and iOS 8, but not in IE 11.
---
url: /guide/advanced/browser-compatibility.md
---
# Browser compatibility
Rsbuild supports [modern browsers](/guide/advanced/browserslist#default-browserslist) by default and provides syntax and API downgrade capabilities to ensure compatibility with legacy browsers that support ES5 (such as IE11).
This chapter explains how to use Rsbuild's features to handle browser compatibility issues.
## Set browserslist
Before addressing compatibility issues, decide which browsers your project needs to support and add the corresponding browserslist config.
- If you haven't set browserslist yet, please read the [Browserslist](/guide/advanced/browserslist) chapter first.
- If you have set a browserslist, Rsbuild automatically compiles code to match that scope, downgrades JavaScript and CSS syntax, and injects required polyfills. In most cases, you can safely use modern ECMAScript features without worrying about compatibility.
After setting the browserslist, if you still encounter compatibility issues, continue reading to find solutions.
:::tip What is polyfill
A polyfill is code that provides newer features to older browsers that don't support them natively. It fills gaps in older implementations of web standards, letting developers use modern features without worrying about whether they'll work in legacy browsers. For example, if a browser doesn't support the `Array.prototype.flat()` method, a polyfill can add that functionality so code using `Array.prototype.flat()` still runs. Polyfills are commonly used to keep web applications working across a wide range of browsers, including older ones.
:::
## Background knowledge
Before you tackle compatibility issues, review the following background so you can address them effectively.
### Syntax downgrade and API downgrade
When you use higher-version syntax and APIs in your project, you need to downgrade two parts to make the compiled code run reliably in older browsers: syntax and APIs.
**Rsbuild downgrades syntax through transpilation and downgrades APIs through polyfill injection.**
> Syntax and APIs are not tightly coupled. Browser vendors ship syntax or APIs at different times based on specifications and their own priorities, so browsers released in the same period may not support the same syntax or APIs. In practice, syntax and APIs are handled separately.
### Syntax transpilation
**Syntax is a set of rules for how a programming language organizes code**. Code that doesn't follow these rules cannot be correctly recognized by the programming language's engine and therefore cannot run. In JavaScript, the following are examples of syntax rules:
- In `const foo = 1`, `const` means to declare an immutable constant.
- In `foo?.bar?.baz`, `?.` indicates optional chaining of access properties.
- In `async function () {}`, `async` means to declare an asynchronous function.
Because different browser parsers support different syntax, and older engines support even less, certain syntax can trigger errors when older browsers try to parse the AST.
For example, the following code will cause an error in IE or an older version of Node.js:
```js
const foo = {};
foo?.bar();
```
When this code runs in an older version of Node.js, the following error message appears:
```bash
SyntaxError: Unexpected token.
at Object.exports.runInThisContext (vm.js:73:16)
at Object.<anonymous> ([eval]-wrapper:6:22)
at Module._compile (module.js:460:26)
at evalScript (node.js:431:25)
at startup (node.js:90:7)
at node.js:814:3
```
The error makes it clear that this is a syntax issue, meaning older versions of the engine do not support this syntax.
**Syntax cannot be supported by polyfills or shims**. To run syntax that's not originally supported in an older browser, you need to transpile the code into syntax the older engine can support.
Transpile the above code into the following to run in older engines:
```js
var foo = {};
foo === null || foo === void 0 ? void 0 : foo.bar();
```
After transpilation, the syntax of the code has changed, and syntax the older engine cannot understand has been replaced with syntax it can understand, **but the meaning of the code itself hasn't changed**.
If the engine encounters unrecognized syntax when converting to AST, it will report a syntax error and abort execution. In this case, if your project doesn't use capabilities like SSR or SSG, the page will be blank and unusable.
If the code is successfully converted to AST, the engine will convert it into executable code and run it normally.
### API polyfill
JavaScript is an interpreted scripting language, unlike compiled languages like Rust. Rust checks function calls during compilation, but JavaScript doesn't know whether a function exists until it runs that line of code, so some errors only appear at runtime.
For example:
```js
var str = 'Hello world!';
console.log(str.notExistedMethod());
```
The above code uses valid syntax and can be converted to an AST during the first stage of engine runtime, but when it actually runs, the method `notExistedMethod` does not exist on `String.prototype`, so an error is reported:
```bash
Uncaught TypeError: str.notExistedMethod is not a function
at <anonymous>:2:17
```
With ECMAScript iterations, new methods are added to built-in objects. For example, `String.prototype.replaceAll` was introduced in ES2021. The `replaceAll` method doesn't exist in `String.prototype` of most browser engines before 2021, so the following code works in the latest Chrome but not in earlier versions:
```js
'abc'.replaceAll('abc', 'xyz');
```
To address the lack of `replaceAll` in older browsers, we can extend the `String.prototype` object and add the `replaceAll` method to it. For example:
```js
// The implementation of this polyfill does not necessarily conform to the standard, it is only used as an example.
if (!String.prototype.replaceAll) {
String.prototype.replaceAll = function (str, newStr) {
// If a regex pattern
if (
Object.prototype.toString.call(str).toLowerCase() === '[object regexp]'
) {
return this.replace(str, newStr);
}
// If a string
return this.replace(new RegExp(str, 'g'), newStr);
};
}
```
> This technique of providing implementations for legacy environments to align new APIs is called polyfill.
## Compilation scope
By default, Rsbuild uses [SWC](/guide/configuration/swc) to compile all JavaScript and TypeScript modules, excluding JavaScript modules in the `node_modules` directory.
This approach is designed to avoid impacting build performance when downgrading all third-party dependencies while also preventing potential issues from redundantly downgrading pre-compiled third-party dependencies.
### Source code
The source code of the current project will be downgraded by default, so you don't need to add additional config, just make sure that the browserslist config is set correctly.
### Third-party dependencies
When you find that a third-party dependency causes compatibility issues, you can add this dependency to Rsbuild's [source.include](/config/source/include) config. This makes Rsbuild perform extra compilation for that dependency.
Taking the npm package `query-string` as an example, you can add the following config:
```ts title="rsbuild.config.ts"
import path from 'node:path';
export default {
source: {
include: [/node_modules[\\/]query-string[\\/]/],
},
};
```
See [source.include](/config/source/include) for detailed usage.
## Polyfills
Rsbuild compiles JavaScript code using SWC and supports injecting polyfills such as [core-js](https://github.com/zloirock/core-js) and [@swc/helpers](https://npmjs.com/package/@swc/helpers).
In different usage scenarios, you may need different polyfill solutions. Rsbuild provides [output.polyfill](/config/output/polyfill) config to switch between different polyfill modes.
### Default behavior
Rsbuild does not inject any polyfills by default:
```ts
export default {
output: {
polyfill: 'off',
},
};
```
### Usage mode
When you enable usage mode, Rsbuild will analyze the source code in the project and determine which polyfills need to be injected.
For example, the code uses the `Map` object:
```js
var b = new Map();
```
After compilation, only the polyfills for `Map` will be injected into this file:
```js
import 'core-js/modules/es.map';
var b = new Map();
```
The advantage of this method is smaller injected polyfill size, which is suitable for projects with higher requirements on bundle size. The disadvantage is that polyfills may not be fully injected because third-party dependencies won't be compiled and downgraded by default, so the polyfills required by third-party dependencies won't be analyzed. If you need to analyze a third-party dependency, you also need to add it to [source.include](/config/source/include) config.
The config of usage mode is:
```ts
export default {
output: {
polyfill: 'usage',
},
};
```
### Entry mode
When using entry mode, Rsbuild will analyze which `core-js` methods need to be injected according to the browserslist set for the current project and inject them into the entry file of each page. Polyfills injected this way are more comprehensive, eliminating concerns about polyfill issues in project source code and third-party dependencies. However, because some unused polyfill code is included, the bundle size may increase.
The config of entry mode is:
```ts
export default {
output: {
polyfill: 'entry',
},
};
```
### UA polyfill
Cloudflare provides a [polyfill service](https://cdnjs.cloudflare.com/polyfill/) that automatically generates polyfill bundles based on the user's browser User-Agent.
You can use the [html.tags](/config/html/tags) config of Rsbuild to inject scripts. For example, to inject a `<script>` tag at the beginning of the `<head>` tag:
```ts
export default {
html: {
tags: [
{
tag: 'script',
attrs: {
defer: true,
src: 'https://cdnjs.cloudflare.com/polyfill/v3/polyfill.min.js?features=default',
},
append: false,
},
],
},
};
```
### Missing polyfills
It should be noted that core-js cannot provide polyfills for all JavaScript APIs. Some APIs cannot be fully simulated through polyfills due to the complexity of their underlying implementation or performance considerations.
The most typical example is the `Proxy` object. Since `Proxy` requires engine-level support to implement object operation interception, its behavior cannot be fully simulated through pure JavaScript code, so core-js doesn't provide a polyfill for `Proxy`.
See [core-js - Missing polyfills](https://github.com/zloirock/core-js?tab=readme-ov-file#missing-polyfills) to understand which APIs core-js cannot provide polyfills for.
---
url: /guide/advanced/module-federation.md
---
# Module Federation
Module Federation is an architectural pattern for decomposing JavaScript applications. Similar to server-side microservices, it lets multiple JavaScript applications (or micro-frontends) share code and resources.
The Rspack team works closely with the Module Federation maintainers to deliver first-class support.
## Use cases
Module Federation has several typical use cases, including:
- Allowing independent applications (called "micro-frontends" in micro-frontend architecture) to share modules without recompiling the entire application.
- Enabling different teams to work on different parts of the same application without needing to recompile the entire application.
- Providing dynamic code loading and sharing between applications at runtime.
Module Federation can help you:
- Reduce code duplication
- Improve code maintainability
- Reduce the overall size of applications
- Improve application performance
## How to use
Module Federation (MF) currently offers multiple major versions; choose the one that fits your needs.
The key characteristics of each version are:
| Version | Description | Features | Use Cases |
| ------- | ---------------------------------------------------------------------- | ------------------------------------------------------------------------------------------------------------------------------------------------------------------------------------------------------------------------------------------------------------------------- | --------------------------------------------------------- |
| MF v2.0 | Enhanced version of Module Federation, built on Module Federation v1.5 | - Provides additional out-of-the-box features such as dynamic TS type hints, Chrome DevTools, preloading, etc.<br />- Better suited for micro-frontend architecture supporting large-scale web applications <br />- Includes all features of Module Federation 1.5 <br /> | Projects that need MF 2.0's advanced capabilities |
| MF v1.5 | Version built into Rspack | - Supports module export, module loading, dependency sharing capabilities of Module Federation v1.0<br />- Added runtime plugin functionality, enabling users to extend the behavior and functionality of module federation <br /> | Projects that don't need the extra capabilities of MF 2.0 |
### Module Federation v2.0
[Module Federation 2.0](https://module-federation.io/blog/announcement.html) provides additional out-of-the-box features based on Module Federation, such as dynamic TS type hints, Chrome DevTools, Runtime plugins, and preloading, making it better suited for large-scale micro-frontend architectures.
You need to install the additional [@module-federation/rsbuild-plugin](https://npmjs.com/package/@module-federation/rsbuild-plugin) plugin to use Module Federation v2.0.
```ts title="rsbuild.config.ts"
import { pluginModuleFederation } from '@module-federation/rsbuild-plugin';
export default defineConfig({
plugins: {
pluginModuleFederation({
name: 'remote',
// other options
}),
},
});
```
Please refer to the [Module Federation v2.0 official documentation](https://module-federation.io/) for detailed usage.
### Module Federation v1.5
This is the version built into Rspack. In addition to supporting Module Federation v1.0's capabilities such as module export, module loading, and dependency sharing, it also adds runtime plugin functionality, letting you extend the behavior and functionality of module federation.
You can enable it through Rsbuild's [moduleFederation.options](/config/module-federation/options) without installing additional plugins.
```ts title="rsbuild.config.ts"
export default defineConfig({
moduleFederation: {
options: {
name: 'remote',
// other options
},
},
});
```
## Example repositories
Rsbuild provides Module Federation example projects you can explore:
- [Module Federation v2.0 Example](https://github.com/rspack-contrib/rstack-examples/tree/main/rsbuild/module-federation-enhanced)
- [Module Federation v1.5 Example](https://github.com/rspack-contrib/rstack-examples/tree/main/rsbuild/module-federation)
---
url: /guide/advanced/environments.md
---
# Multi-environment builds
Rsbuild can build outputs for multiple environments in a single run. Use [environments](/config/environments) to build them in parallel and set a separate Rsbuild config for each one.
## What is an environment
The `environment` refers to the runtime environment for build output. Common environments include browsers, Node.js, and Workers. Rsbuild allows you to define custom environment names and set build options for each environment individually.
A typical scenario is server-side rendering (SSR). You can define two environments, `web` and `node`, where the build targets ([output.target](/config/output/target)) are `web` and `node`. These are used for client-side rendering (CSR) and server-side rendering (SSR) scenarios.
You can also define different environments for the same build target, for example:
- Define `rsc` and `ssr` environments, both targeting `node`, used separately for React Server Components and SSR.
- Define `desktop` and `mobile` environments, both targeting `web`, used separately for desktop and mobile browsers.
Without the `environments` configuration, you would need to define multiple configurations for these scenarios and run multiple independent Rsbuild builds. With `environments`, you can build every output in a single Rsbuild run (Rsbuild achieves this using Rspack's [MultiCompiler](https://rspack.rs/api/javascript-api/compiler#multicompiler)).
In Rsbuild, each `environment` is associated with an Rsbuild configuration, an Rspack configuration, and a set of build outputs. Plugin authors can tailor the build for a specific environment—modifying configs, registering or removing plugins, adjusting Rspack rules, or inspecting asset information—based on the environment name.
## Environment configs
Rsbuild supports defining different Rsbuild configurations for each environment through [environments](/config/environments).
For example, if your project needs SSR support, you need to define different configurations for the client and server. You can define web and node environments.
```ts title="rsbuild.config.ts"
export default {
environments: {
// Configure the web environment for browsers
web: {
source: {
entry: {
index: './src/index.client.js',
},
},
output: {
// Use 'web' target for the browser outputs
target: 'web',
},
resolve: {
alias: {
'@common': './src/client/common',
},
},
},
// Configure the node environment for SSR
node: {
source: {
entry: {
index: './src/index.server.js',
},
},
output: {
// Use 'node' target for the Node.js outputs
target: 'node',
},
resolve: {
alias: {
'@common': './src/server/common',
},
},
},
},
};
```
### Config merging
If you configure `environments`, Rsbuild will merge the config in `environments` with the outer base config. When merging, the config in `environments` has higher priority.
In the example above, after merging the configs, Rsbuild generates two standalone environment configs for building web and node environments.
- **web environments config**: Generated by merging base config with `environments.web`
- **node environments config**: Generated by merging base config with `environments.node`
Then, Rsbuild will use these environment configurations to internally generate two Rspack configs and execute a single build using Rspack’s MultiCompiler.
### Debug config
When you execute the command `npx rsbuild inspect` in the project root directory, you will see the following output:
- `rsbuild.config.[name].mjs`: The Rsbuild config used for a certain environment during build.
- `rspack.config.[name].mjs`: The Rspack config corresponding to a certain environment when building.
```bash
➜ npx rsbuild inspect
config inspection completed, generated files:
- Rsbuild config (web): /project/dist/.rsbuild/rsbuild.config.web.mjs
- Rsbuild config (node): /project/dist/.rsbuild/rsbuild.config.node.mjs
- Rspack config (web): /project/dist/.rsbuild/rspack.config.web.mjs
- Rspack config (node): /project/dist/.rsbuild/rspack.config.node.mjs
```
## Default environment
When `environments` is not specified, Rsbuild creates an environment by default with the same name as the current target type (the value of [output.target](/config/output/target)).
```ts title="rsbuild.config.ts"
export default {
output: {
target: 'web',
},
};
```
The above config is equivalent to a simplification of the following config:
```ts title="rsbuild.config.ts"
export default {
environments: {
web: {
output: {
target: 'web',
},
},
},
};
```
## Build a specific environment
By default, Rsbuild will build all environments in the Rsbuild configuration when you execute `rsbuild dev` or `rsbuild build`. You can build only the specified environments with `--environment <name>`.
```bash
# Build for all environments by default
rsbuild dev
# Build for the web environment
rsbuild dev --environment web
# Build for the web and ssr environments
rsbuild dev --environment web --environment node
# Building multiple environments can be shortened to:
rsbuild dev --environment web,node
```
## Add plugins for specified environment
Plugins configured through the [plugins](/config/plugins) field support running in all environments. If you want a plugin to run only in a specified environment, you can configure the plugin in the specified `environment`.
For example, enable the React plugin only in the web environment:
```ts title="rsbuild.config.ts"
import { pluginReact } from '@rsbuild/plugin-react';
export default {
environments: {
web: {
output: {
target: 'web',
},
plugins: [pluginReact()],
},
node: {
output: {
target: 'node',
},
},
},
};
```
If you are a plugin developer, you can view [Developing environment plugins](/plugins/dev/index#environment-plugin) for details.
## Configuring output directories
When building for multiple environments, it's recommended to configure different output directories for each environment to prevent dist files with the same name from overwriting each other.
You can use [output.distPath.root](/config/output/dist-path) to set independent output root directories for each environment.
For example, output the web bundles to the default `dist` directory, and the node bundles to `dist/server`:
```ts title="rsbuild.config.ts"
export default {
environments: {
web: {
source: {
entry: {
index: './src/index.client.js',
},
},
},
node: {
source: {
entry: {
index: './src/index.server.js',
},
},
output: {
target: 'node',
distPath: {
root: 'dist/server',
},
},
},
},
};
```
## Plugin API
### Update environment config
Rsbuild supports modifying or adding environment config through the [modifyRsbuildConfig](/plugins/dev/hooks#modifyrsbuildconfig) hook.
```ts
const myPlugin = () => ({
setup(api) {
api.modifyRsbuildConfig((config, { mergeRsbuildConfig }) => {
return mergeRsbuildConfig(config, {
environments: {
web1: {
source: {
entry: {
index: './src/web1/index',
},
},
},
},
});
});
},
});
```
### Configuring a specific environment
Rsbuild supports modifying the Rsbuild config of a specific environment through the [modifyEnvironmentConfig](/plugins/dev/hooks#modifyenvironmentconfig) hook.
```ts
const myPlugin = () => ({
setup(api) {
api.modifyEnvironmentConfig((config, { name }) => {
if (name !== 'web') {
return config;
}
config.html.title = 'My Default Title';
});
},
});
```
## Environment context
[Environment context](/api/javascript-api/environment-api#environment-context) is a read-only object that provides some context infos about the current environment. Rsbuild supports obtaining environment context information in plugin hooks.
For some plugin hooks related to the build environment (such as [modifyRspackConfig](/plugins/dev/hooks#modifyrspackconfig) and [modifyBundlerChain](/plugins/dev/hooks#modifybundlerchain)), Rsbuild supports obtaining the current environment context through the `environment` parameter.
```ts
const myPlugin = () => ({
setup(api) {
api.modifyRspackConfig((rspackConfig, { environment }) => {
if (environment.name === 'node') {
// do some thing
}
});
},
});
```
For some global plugin hooks (such as [onAfterDevCompile](/plugins/dev/hooks#onafterdevcompile), [onBeforeStartDevServer](/plugins/dev/hooks#onbeforestartdevserver), etc.), Rsbuild supports obtaining the context of all environments through the `environments` parameter.
```ts
const myPlugin = () => ({
setup(api) {
api.onAfterDevCompile(({ environments }) => {
environments.forEach((environment) => {
console.log('environment', environment);
});
});
},
});
```
## Environment API
Rsbuild server provides a series of APIs related to the build environment. Users can operate the build artifacts in a specific environment on the server side through the Rsbuild [environment API](/api/javascript-api/environment-api#environment-api).
You can use the environment API in [Rsbuild DevMiddleware](/config/dev/setup-middlewares) or [Custom Server](/api/javascript-api/instance#rsbuildcreatedevserver).
For example, you can quickly implement an SSR function through the Rsbuild environment API in development mode:
```ts
import express from 'express';
import { createRsbuild, loadConfig } from '@rsbuild/core';
const serverRender =
({ environments }) =>
async (_req, res) => {
const bundle = await environments.node.loadBundle('index');
const rendered = bundle.render();
const template = await environments.web.getTransformedHtml('index');
const html = template.replace('<!--app-content-->', rendered);
res.writeHead(200, {
'Content-Type': 'text/html',
});
res.end(html);
};
export async function startDevServer() {
const { content } = await loadConfig();
// Init Rsbuild
const rsbuild = await createRsbuild({
config: content,
});
const app = express();
// Create Rsbuild dev server instance
const rsbuildServer = await rsbuild.createDevServer();
const serverRenderMiddleware = serverRender(rsbuildServer);
app.get('/', async (req, res, next) => {
try {
await serverRenderMiddleware(req, res, next);
} catch (err) {
logger.error('SSR render error, downgrade to CSR...');
logger.error(err);
next();
}
});
// Apply Rsbuild’s built-in middleware
app.use(rsbuildServer.middlewares);
// ...
}
```
For detailed usage, please refer to: [SSR + Express Example](https://github.com/rspack-contrib/rstack-examples/tree/main/rsbuild/ssr-express).
## Build order
By default, Rsbuild builds all environments in parallel.
To control the build order between different environments, you can set build dependencies through Rspack's [dependencies](https://rspack.rs/config/other-options#dependencies) configuration.
For example, if you need to build the `web` environment first, then build the `node` environment, you can add the following configuration:
```ts title="rsbuild.config.ts"
export default {
environments: {
web: {
tools: {
rspack: {
name: 'foo',
},
},
},
node: {
tools: {
rspack: {
dependencies: ['foo'],
},
},
},
},
};
```
We can use a simple plugin to test the build order of multiple environments:
```ts
const testPlugin: RsbuildPlugin = {
name: 'test-plugin',
setup(api) {
api.onBeforeEnvironmentCompile(({ environment }) => {
console.log('build start:', environment.name);
});
api.onAfterEnvironmentCompile(({ stats, environment }) => {
console.log('build done:', environment.name);
console.log('stats', stats);
});
},
};
// The plugin will output:
// - build start: web
// - build done: web
// - stats: { ... }
// - build start: node
// - build done: node
// - stats: { ... }
```
---
url: /guide/advanced/ssr.md
---
# Server-side rendering (SSR)
This chapter introduces how to implement SSR functionality using Rsbuild.
Rsbuild does not ship with SSR by default. Instead, it offers low-level APIs and configurations so framework developers can build SSR support. If you need SSR that works out of the box, consider a full-stack framework built on Rsbuild, such as [Modern.js](https://github.com/web-infra-dev/modern.js).
## What is SSR
SSR stands for "Server-Side Rendering". It means that the server generates the page's HTML and sends it to the client, rather than sending only an empty HTML shell and relying on JavaScript to generate the page content.
In traditional client-side rendering, the server sends an empty HTML shell and some JavaScript scripts to the client, which then fetches data from the server's API and fills the page with dynamic content. This leads to slow initial page loading times and negatively impacts user experience and SEO.
With SSR, the server generates HTML that already contains dynamic content and sends it to the client. This makes initial page loading faster and more SEO-friendly, as search engines can crawl the rendered page.
## File structure
A typical SSR application will have the following files:
```
- index.html
- server.js # main application server
- src/
- App.js # exports app code
- index.client.js # client entry, mounts the app to a DOM element
- index.server.js # server entry, renders the app using the framework's SSR API
```
The `index.html` will need to include a placeholder where the server-rendered content should be injected:
```html
<div id="root"><!--app-content--></div>
```
## Create SSR configuration
In SSR scenarios, you need to generate web and node outputs at the same time for client-side rendering (CSR) and server-side rendering (SSR).
You can then use Rsbuild's [multi-environment builds](/guide/advanced/environments) capability to define the following configuration:
```ts title="rsbuild.config.ts"
export default {
environments: {
// Configure the web environment for browsers
web: {
source: {
entry: {
index: './src/index.client.js',
},
},
output: {
// Use 'web' target for the browser outputs
target: 'web',
},
html: {
// Custom HTML template
template: './index.html',
},
},
// Configure the node environment for SSR
node: {
source: {
entry: {
index: './src/index.server.js',
},
},
output: {
// Use 'node' target for the Node.js outputs
target: 'node',
},
},
},
};
```
## Custom server
Rsbuild provides the [Dev server API](/api/javascript-api/dev-server-api) and [environment API](/guide/advanced/environments#environment-api) to allow you to implement SSR.
Here is a basic example:
```ts title="server.mjs"
import express from 'express';
import { createRsbuild } from '@rsbuild/core';
async function initRsbuild() {
const rsbuild = await createRsbuild({
config: {
server: {
middlewareMode: true,
},
},
});
return rsbuild.createDevServer();
}
async function startDevServer() {
const app = express();
const rsbuild = await initRsbuild();
const { environments } = rsbuild;
// SSR when accessing /index.html
app.get('/', async (req, res, next) => {
try {
// Load server bundle
const bundle = await environments.node.loadBundle('index');
const template = await environments.web.getTransformedHtml('index');
const rendered = bundle.render();
// Insert rendered content into HTML template
const html = template.replace('<!--app-content-->', rendered);
res.writeHead(200, { 'Content-Type': 'text/html' });
res.end(html);
} catch (err) {
logger.error('SSR failed.');
logger.error(err);
next();
}
});
app.use(rsbuild.middlewares);
const server = app.listen(rsbuild.port, async () => {
await rsbuild.afterListen();
});
rsbuild.connectWebSocket({ server });
}
startDevServer();
```
## Modify startup script
When you use a custom server, change the startup command from `rsbuild dev` to `node ./server.mjs`.
To preview the production SSR output, update the preview command as well. For an example of a production SSR server, see [Example](https://github.com/rspack-contrib/rstack-examples/blob/main/rsbuild/ssr-express/prod-server.mjs).
```json title="package.json"
{
"scripts": {
"build": "rsbuild build",
"dev": "node ./server.mjs",
"preview": "node ./prod-server.mjs"
}
}
```
You can now run `npm run dev` to start the dev server with SSR and open `http://localhost:3000/` to see the server-rendered content in the HTML page.
## Get manifest
By default, Rsbuild automatically inserts the scripts and links for the current page into the HTML template. You can retrieve the compiled template with [getTransformedHtml](/api/javascript-api/environment-api#gettransformedhtml).
When you need to dynamically generate HTML on the server side, you will need to inject the URLs of JavaScript and CSS assets into the HTML. By configuring [output.manifest](/config/output/manifest), you can easily obtain the manifest information of these assets. Here is an example:
```ts title="rsbuild.config.ts"
export default {
output: {
manifest: true,
},
};
```
```ts title="server.ts"
async function renderHtmlPage(): Promise<string> {
const manifest = await fs.promises.readFile('./dist/manifest.json', 'utf-8');
const { entries } = JSON.parse(manifest);
const { js, css } = entries['index'].initial;
const scriptTags = js
.map((url) => `<script src="${url}" defer></script>`)
.join('\n');
const styleTags = css
.map((file) => `<link rel="stylesheet" href="${file}">`)
.join('\n');
return `
<!DOCTYPE html>
<html>
<head>
${scriptTags}
${styleTags}
</head>
<body>
<div id="root"></div>
</body>
</html>`;
}
```
## Examples
- [SSR + Express Example](https://github.com/rspack-contrib/rstack-examples/blob/main/rsbuild/ssr-express)
- [SSR + Express + Manifest Example](https://github.com/rspack-contrib/rstack-examples/blob/main/rsbuild/ssr-express-with-manifest)
## SSR-specific plugins
When developing Rsbuild plugins, if you need to add specific logic for SSR, you can distinguish it by `target`.
- Modify Rsbuild configuration for SSR via [modifyEnvironmentConfig](/plugins/dev/hooks#modifyenvironmentconfig):
```js
export const myPlugin = () => ({
name: 'my-plugin',
setup(api) {
api.modifyEnvironmentConfig((config) => {
if (config.target === 'node') {
// SSR-specific Rsbuild config
}
});
},
});
```
- Modify Rspack configuration for SSR via [modifyRspackConfig](/plugins/dev/hooks#modifyrspackconfig):
```js
export const myPlugin = () => ({
name: 'my-plugin',
setup(api) {
api.modifyRspackConfig((config, { target }) => {
if (target === 'node') {
// SSR-specific Rspack config
}
});
},
});
```
- Transform code for SSR and client separately via [transform](/plugins/dev/core#apitransform):
```js
export const myPlugin = () => ({
name: 'my-plugin',
setup(api) {
api.transform({ test: /foo\.js$/, targets: ['web'] }, ({ code }) => {
// transform client code
});
api.transform({ test: /foo\.js$/, targets: ['node'] }, ({ code }) => {
// transform server code
});
},
});
```
---
url: /guide/advanced/testing.md
---
# Testing
Rsbuild doesn't include built-in testing frameworks, but integrates seamlessly with popular testing tools.
This guide shows how to add [unit testing](#unit-testing) and [end-to-end testing](#end-to-end-testing) to Rsbuild applications.
## Unit testing
Unit tests verify individual components and functions in isolation. Rsbuild can work with testing frameworks like [Rstest](https://rstest.rs), [Vitest](https://vitest.dev/), [Jest](https://jestjs.io/), and others.
The following example uses Rstest to show how to add unit tests to an Rsbuild application.
### Rstest
[Rstest](https://rstest.rs/) is a testing framework built on Rsbuild that provides first-class support for Rsbuild applications. It offers Jest-compatible APIs while natively supporting modern features like TypeScript and ESM.
#### Installing
import { PackageManagerTabs } from '@theme';
<PackageManagerTabs command="add @rstest/core -D" />
#### Configuring scripts
Add test scripts to your `package.json`:
```json
{
"scripts": {
"test": "rstest",
"test:watch": "rstest -w"
}
}
```
#### Writing tests
Create test files, for example:
```ts title="src/utils.ts"
export function add(a: number, b: number) {
return a + b;
}
```
```ts title="src/utils.test.ts"
import { expect, test } from '@rstest/core';
import { add } from './utils';
test('should add two numbers correctly', () => {
expect(add(1, 2)).toBe(3);
expect(add(-1, 1)).toBe(0);
});
```
#### Running tests
```bash
# Run tests
npm run test
# Run and watch
npm run test:watch
```
These are the basic steps for using Rstest. Check the [Rstest documentation](https://rstest.rs/guide/start/) for more usage details.
### Examples
Refer to the following examples for more usage patterns:
- [react-rstest](https://github.com/rspack-contrib/rstack-examples/tree/main/rsbuild/react-rstest): Using Rstest and [React Testing Library](https://github.com/testing-library/react-testing-library) to test React components.
- [react-jest](https://github.com/rspack-contrib/rstack-examples/tree/main/rsbuild/react-jest): Using Jest and [React Testing Library](https://github.com/testing-library/react-testing-library) to test React components.
## End-to-end testing
End-to-end testing validates complete user workflows, ensuring your application functions correctly in real browser environments.
For E2E testing, we recommend Playwright, a modern end-to-end testing framework. See the [Playwright documentation](https://playwright.dev/docs/intro) for details.
---
url: /guide/optimization/code-splitting.md
---
# Code splitting
A good chunk splitting strategy is important for improving application load performance. It leverages browser caching to reduce requests and improve loading speed.
Several [chunk splitting strategies](/guide/optimization/code-splitting) are built into Rsbuild to meet the needs of most applications. You can also customize chunk splitting configuration for specific use cases.
> See [Rspack - Code Splitting](https://rspack.rs/guide/optimization/code-splitting) for more details.
## Strategies
> The chunk splitting configuration of Rsbuild is in [performance.chunkSplit](/config/performance/chunk-split).
Rsbuild supports the following chunk splitting strategies:
- `split-by-experience`: an empirical splitting strategy that automatically splits some commonly used npm packages into chunks of moderate size.
- `split-by-module`: split by npm package granularity, where each npm package corresponds to a chunk.
- `split-by-size`: automatically split based on module size.
- `all-in-one`: bundle all code into one chunk.
- `single-vendor`: bundle all npm packages into a single chunk.
- `custom`: custom chunk splitting strategy.
::: tip
When using strategies other than `all-in-one`, Rspack's default splitting rules will also take effect. For more details, see [Rspack - SplitChunksPlugin](https://rspack.rs/plugins/webpack/split-chunks-plugin#default-behavior).
:::
## split-by-experience
### Behavior
Rsbuild uses the `split-by-experience` strategy by default, an optimization strategy based on practical experience. When your application uses the following npm packages, they're automatically split into separate chunks:
- `lib-polyfill.js`: Contains `core-js`, `@swc/helpers`, `tslib`
- `lib-axios.js`: Contains `axios`
- `lib-react.js`: Provided by [@rsbuild/plugin-react](/plugins/list/plugin-react#splitchunks)
- `lib-vue.js`: Provided by [@rsbuild/plugin-vue](/plugins/list/plugin-vue#splitchunks)
This approach groups commonly used packages and splits them into individual chunks, improving browser caching efficiency.
### Config
```ts
export default {
performance: {
chunkSplit: {
strategy: 'split-by-experience',
},
},
};
```
### Notes
If the npm packages mentioned above aren't installed or used, the corresponding chunks won't be generated.
## split-by-module
### Behavior
Split each npm package into a separate chunk.
::: warning
This strategy splits node_modules with the finest granularity. Under HTTP/2, multiplexing can speed up resource loading. However, in non-HTTP/2 environments, use this strategy cautiously due to HTTP head-of-line blocking.
:::
### Config
```ts
export default {
performance: {
chunkSplit: {
strategy: 'split-by-module',
},
},
};
```
### Notes
- This configuration splits node_modules into many smaller chunks, resulting in many file requests.
- With HTTP/2, resource loading accelerates and cache hit rates improve due to multiplexing.
- Without HTTP/2, page loading performance may degrade due to HTTP head-of-line blocking. Use with caution.
## all-in-one
### Behavior
This strategy puts all source code and third-party dependencies in a single chunk.
### Config
```ts
export default {
performance: {
chunkSplit: {
strategy: 'all-in-one',
},
},
};
```
### Notes
- This configuration bundles all generated JS code into a single file (except dynamically imported chunks).
- The single JS file may be very large, potentially reducing page loading performance.
To also bundle dynamically imported chunks into a single file, set the [output.asyncChunks](https://rspack.rs/config/output#outputasyncchunks) option in Rspack to `false`:
```js
export default defineConfig({
performance: {
chunkSplit: {
strategy: 'all-in-one',
},
},
tools: {
rspack: {
output: {
asyncChunks: false,
},
},
},
});
```
## single-vendor
### Behavior
This strategy puts third-party dependencies in one chunk and source code in another.
### Config
```ts
export default {
performance: {
chunkSplit: {
strategy: 'single-vendor',
},
},
};
```
### Notes
The single vendor file may be very large, potentially reducing page loading performance.
## split-by-size
### Behavior
With this strategy, after setting `minSize` and `maxSize` to fixed values, Rsbuild will automatically split chunks without extra configuration.
### Config
```ts
export default {
performance: {
chunkSplit: {
strategy: 'split-by-size',
minSize: 30000,
maxSize: 50000,
},
},
};
```
## Custom splitting strategy
Beyond the built-in strategies, you can customize the splitting strategy for specific needs. Custom strategies have two parts:
- Custom group
- Custom Rspack `splitChunks` config
You can combine these custom capabilities with built-in strategies: use built-in strategies for common packages and custom functions for other packages.
### Custom group
Rsbuild supports custom groups, which are more flexible than built-in strategies and simpler than writing Rspack's `splitChunks` config.
For example, split the `axios` library under node_modules into `axios.js`:
```js
export default {
performance: {
chunkSplit: {
forceSplitting: {
axios: /node_modules[\\/]axios/,
},
},
},
};
```
Using the `forceSplitting` config, you can easily split packages into chunks.
#### Notes
Chunks split using `forceSplitting` are inserted into the HTML file as initial resources using `<script>` tags. Split them appropriately based on your scenario to avoid excessive initial bundle size.
### Custom config
Beyond custom grouping, you can customize Rspack's `splitChunks` config using `override`. For example:
- Set `minSize` to 30,000 so modules smaller than 30,000 bytes will not be split.
```ts
export default {
performance: {
chunkSplit: {
override: {
chunks: 'all',
minSize: 30000,
},
},
},
};
```
- Bundle all CSS files into a single `styles.css`.
```ts
export default {
performance: {
chunkSplit: {
override: {
cacheGroups: {
styles: {
name: 'styles',
minSize: 0,
chunks: 'all',
test: /\.(?:css|less|sass|scss|styl)$/,
priority: 99,
},
},
},
},
},
};
```
The `override` config will be merged with Rspack's `splitChunks` config. For specific config details, see [Rspack - splitChunks](https://rspack.rs/config/optimization#optimizationsplitchunks).
## Using dynamic import for code splitting
Beyond the `chunkSplit` configuration, [dynamic import](https://developer.mozilla.org/en-US/docs/Web/JavaScript/Reference/Operators/import) is another important optimization technique that can effectively reduce initial bundle size.
:::tip About dynamic import
Dynamic import, introduced in ECMAScript 2020, allows you to load JavaScript modules dynamically. Rspack supports dynamic import by default, so you can use it directly in your code.
:::
When the bundler encounters `import()` syntax, it automatically splits the relevant code into a new chunk and loads it on-demand at runtime.
For example, if your project has a large module called `bigModule.ts` (which can also be a third-party dependency), you can use dynamic import to load it on-demand:
```js
// Somewhere in your code where you need to use bigModule
import('./bigModule.ts').then((bigModule) => {
// Use bigModule here
});
```
When you run the build command, `bigModule.ts` will be automatically split into a new chunk and loaded on-demand at runtime.
---
url: /guide/optimization/optimize-bundle.md
---
# Bundle size optimization
Bundle size optimization is important for production builds because it directly affects user experience. This document covers common bundle size optimization methods in Rsbuild.
## Reduce duplicate dependencies
Web applications commonly bundle multiple versions of third-party dependencies. Duplicate dependencies increase bundle size and slow down builds.
### Detect duplicate dependencies
You can use [Rsdoctor](https://rsdoctor.rs) to detect duplicate dependencies in your project. Rsdoctor analyzes the build, identifies duplicate bundled dependencies, and displays them visually:

For more details, see [Rsdoctor - Duplicate Dependency Problem](https://rsdoctor.rs/blog/topic/duplicate-pkg-problem).
### Eliminate duplicate dependencies
You can eliminate duplicate dependencies using your package manager.
- Rsbuild provides the [resolve.dedupe](/config/resolve/dedupe) config, which forces specified packages to resolve from the project root directory, removing duplicate packages.
- If you are using `pnpm >= 7.26.0`, you can use the [pnpm dedupe](https://pnpm.io/cli/dedupe) command to upgrade and eliminate duplicate dependencies.
```bash
pnpm dedupe
```
- If you are using `pnpm < 7.26.0`, you can use [pnpm-deduplicate](https://github.com/ocavue/pnpm-deduplicate) to analyze duplicate dependencies, then update dependencies or declare [pnpm overrides](https://pnpm.io/package_json#pnpmoverrides) to merge them.
```bash
npx pnpm-deduplicate --list
```
- If you are using `yarn`, you can use [yarn-deduplicate](https://github.com/scinos/yarn-deduplicate) to automatically merge duplicate dependencies:
```bash
npx yarn-deduplicate && yarn
```
## Use lightweight libraries
We recommend using lightweight libraries in your project, such as replacing [moment](https://momentjs.com/) with [day.js](https://day.js.org/).
To identify the largest third-party libraries in your project, analyze bundle size with Rsdoctor. For more details, see [Using Rsdoctor](/guide/debug/rsdoctor).
## Adjust browserslist
Rsbuild compiles code based on your project's browserslist config and injects polyfills. If your project doesn't need to support legacy browsers, adjust the browserslist to drop support for older browsers, reducing compilation overhead for syntax transformation and polyfills.
Rsbuild's default Browserslist config is:
```js
['chrome >= 87', 'edge >= 88', 'firefox >= 78', 'safari >= 14'];
```
For example, if you only need to be compatible with browsers above Chrome 100, you can change it to:
```js
['Chrome >= 100'];
```
:::tip
For more details on configuring Browserslist, see [Browserslist](/guide/advanced/browserslist).
:::
## Use polyfill on demand
If your project's [output.polyfill](/config/output/polyfill) is set to `'entry'` and you're certain that third-party dependencies don't require additional polyfills, switch it to `usage`.
In `usage` mode, Rsbuild analyzes the syntax in source code and injects only the required polyfills, reducing polyfill size.
```js
export default {
output: {
polyfill: 'usage',
},
};
```
:::tip
For more details on polyfill usage, see [Browser compatibility](/guide/advanced/browser-compatibility).
:::
## Image compression
In typical front-end projects, images often account for a large portion of total bundle size. Reducing image size can meaningfully lower the overall bundle size. Enable image compression by registering a plugin in Rsbuild:
```ts title="rsbuild.config.ts"
import { pluginImageCompress } from '@rsbuild/plugin-image-compress';
export default {
plugins: [pluginImageCompress()],
};
```
See details in [@rsbuild/plugin-image-compress](https://github.com/rspack-contrib/rsbuild-plugin-image-compress).
## Split chunk
A good chunk splitting strategy is important for improving application loading performance. It takes advantage of browser caching to reduce the number of requests and improve loading speed.
Several [chunk splitting strategies](/guide/optimization/code-splitting) are built into Rsbuild. These should meet the needs of most applications. You can also customize the chunk splitting config to suit your own usage scenario.
For example, split the `axios` library under node_modules into `axios.js`:
```js
export default {
performance: {
chunkSplit: {
strategy: 'split-by-experience',
forceSplitting: {
axios: /node_modules[\\/]axios/,
},
},
},
};
```
---
url: /guide/optimization/build-performance.md
---
# Improve build performance
While Rsbuild optimizes build performance by default, performance issues can arise as your project grows.
This document provides optional optimization strategies to improve build performance.
## Performance profiling
Performance profiling helps identify bottlenecks in your project for targeted optimization.
See the [Build Performance Analysis](/guide/debug/build-profiling) section.
## General optimization
These general optimization methods speed up both development and production builds.
### Upgrade Rsbuild
Upgrading to the latest version of Rsbuild gives you access to the latest performance optimizations. See [Upgrade Rsbuild](/guide/basic/upgrade-rsbuild) for more details.
### Enable persistent cache
Rsbuild provides a [performance.buildCache](/config/performance/build-cache) configuration that significantly improves rebuild speed.
### Reduce module count
Optimizing the number of modules in your application reduces bundle size and improves build performance. See [Bundle Size Optimization](/guide/optimization/optimize-bundle) to learn optimization strategies.
### Optimize Tailwind CSS
When using Tailwind CSS v3, incorrectly configuring the `content` field in `tailwind.config.js` can lead to poor build and HMR performance.
See [Tailwind CSS v3 - Optimize build performance](/guide/styling/tailwindcss-v3#optimize-build-performance) for more details.
### Parallel Less compilation
If your project uses the [@rsbuild/plugin-less](/plugins/list/plugin-less) plugin with many Less files, try enabling parallel compilation to improve build performance.
See [Less Plugin - parallel](/plugins/list/plugin-less#parallel) for more details.
### Tool selection
While Rsbuild delivers excellent build performance out of the box, certain JavaScript-based tools can negatively impact performance, particularly in large projects.
- [@rsbuild/plugin-babel](/plugins/list/plugin-babel): This plugin uses Babel. We recommend using the more performant [SWC](/guide/configuration/swc) for code transformation instead.
- [@rsbuild/plugin-less](/plugins/list/plugin-less): The Less compiler has relatively poor performance. Consider using [@rsbuild/plugin-sass](/plugins/list/plugin-sass) or other performant CSS solutions instead.
- [terser-webpack-plugin](https://www.npmjs.com/package/terser-webpack-plugin): You can replace Terser with faster minimizers like Rsbuild's built-in [SWC](/guide/configuration/swc) minifier.
## Development optimization
These methods improve performance in development mode.
### Enable lazy compilation
Enabling lazy compilation significantly reduces the number of modules compiled during dev server startup, improving startup time.
```ts title="rsbuild.config.ts"
export default {
dev: {
lazyCompilation: true,
},
};
```
> See [dev.lazyCompilation](/config/dev/lazy-compilation) for more information.
### Enable native watcher
Enabling Rspack's [native watcher](https://rspack.rs/config/experiments#experimentsnativewatcher) improves HMR performance in development mode.
```ts title="rsbuild.config.ts"
export default {
tools: {
rspack: {
experiments: {
nativeWatcher: true,
},
},
},
};
```
### Source map format
To provide a good debugging experience, Rsbuild uses the `cheap-module-source-map` format in development mode by default. This is a high-quality source map format that comes with some performance overhead.
You can improve build speed by adjusting the source map format using [output.sourceMap](/config/output/source-map).
For example, to disable source maps:
```ts title="rsbuild.config.ts"
export default {
output: {
sourceMap: {
js: false,
},
},
};
```
Or set the source map format to the fastest `eval` format in development mode:
```ts title="rsbuild.config.ts"
export default {
output: {
sourceMap: {
js: process.env.NODE_ENV === 'development' ? 'eval' : false,
},
},
};
```
> For detailed differences between different source map formats, see [Rspack - devtool](https://rspack.rs/config/devtool).
### Browserslist for development
This strategy is similar to ["Adjust Browserslist"](/guide/optimization/optimize-bundle#adjust-browserslist), except you can set different browserslist configurations for development and production, reducing compilation overhead in development.
For example, you can add the following config to `.browserslistrc` to target only the latest browsers in development while supporting a broader range in production:
```yaml title=".browserslistrc"
[production]
chrome >= 87
edge >= 88
firefox >= 78
safari >= 14
[development]
last 1 chrome version
last 1 firefox version
last 1 safari version
```
Note that this can lead to differences in build output between development and production modes.
---
url: /guide/optimization/inline-assets.md
---
# Inline static assets
Inlining static assets refers to embedding the content of a static asset directly in an HTML or JS file instead of linking to an external file. This can improve website performance by reducing the number of HTTP requests the browser needs to make to load the page.
However, inlining static assets has some disadvantages, such as increasing the size of a single file, which may lead to slower loading. Decide whether to inline assets based on your specific situation.
Rsbuild automatically inlines static assets smaller than 4KiB. Sometimes you may need to manually control whether assets are inlined. This document explains how to precisely control the inlining behavior of static assets.
## Automatic inlining
By default, Rsbuild inlines assets when the file size is less than a threshold (default is 4KiB). When inlined, the asset is converted to a Base64 encoded string and no longer requires a separate HTTP request. When the file size is greater than this threshold, it is loaded as a separate file with its own HTTP request.
```js
import smallImage from './static/smallImage.png';
console.log(smallImage); // "data:image/png;base64,iVBORw0KGgo..."
```
You can modify the threshold with the [output.dataUriLimit](/config/output/data-uri-limit) config. For example, set the threshold for images to 5000 bytes and disable inlining for media assets:
```ts
export default {
output: {
dataUriLimit: {
image: 5000,
media: 0,
},
},
};
```
## Force inlining
You can force an asset to be inlined by adding the `inline` query parameter when importing it, regardless of the asset's size.
```tsx
import React from 'react';
import img from './foo.png?inline';
export default function Foo() {
return <img src={img} />;
}
```
In the above example, the `foo.png` image will always be inlined, regardless of the image size.
### Referenced from CSS file
When you reference a static asset in your CSS file, you can also force it to inline with the `inline` query parameter.
```css
.foo {
background-image: url('./icon.png?inline');
}
```
:::tip Impact of forcing inlining
Inlining large assets will significantly increase the first paint time or first contentful paint time of a page, degrading user experience. If you inline a static asset multiple times in a CSS file, the base64 content will be injected repeatedly, increasing bundle size. Use forced inlining with caution.
:::
## Disable inlining
To prevent assets from being inlined and ensure they're always loaded as separate files (regardless of their size), add the `url` query parameter.
```tsx
import React from 'react';
import img from './foo.png?url';
export default function Foo() {
return <img src={img} />;
}
```
In the above example, the `foo.png` image will always be loaded as a separate file, even if it's smaller than the threshold.
### Referenced from CSS file
When you reference a static asset in your CSS file, you can also prevent inlining with the `url` query parameter.
```css
.foo {
background-image: url('./icon.png?url');
}
```
:::tip Impact of disabling inlining
Disabling asset inlining will increase the number of assets the web application needs to load. This will reduce loading efficiency in weak network environments or scenarios where HTTP/2 is not enabled. Use with caution.
:::
## Inline JS files
In addition to inlining static assets into JS files, Rsbuild also supports inlining JS files into HTML files.
Enable the [output.inlineScripts](/config/output/inline-scripts) config, and the generated JS files will not be written to the output directory but will be directly inlined in the HTML file.
```ts
export default {
output: {
inlineScripts: true,
},
};
```
:::tip
Inline JS files may cause the HTML file to become too large and will break HTTP caching. Use with caution.
:::
## Inline CSS files
You can also inline CSS files into HTML files.
Just enable the [output.inlineStyles](/config/output/inline-styles) config, and the generated CSS file will not be written to the output directory, but will be directly inlined in the HTML file.
```ts
export default {
output: {
inlineStyles: true,
},
};
```
## Type declaration
When you use URL queries such as `?inline` and `?url` in TypeScript code, TypeScript may prompt that the module is missing a type definition:
```
TS2307: Cannot find module './logo.png?inline' or its corresponding type declarations.
```
To fix this, you can add type declarations for these URL queries. Create a `src/env.d.ts` file and add the following type declarations:
- Method 1: If the `@rsbuild/core` package is installed, you can reference the [preset types](/guide/basic/typescript#preset-types) provided by `@rsbuild/core`:
```ts
/// <reference types="@rsbuild/core/types" />
```
- Method 2: Manually add the required type declarations:
```ts
declare module '*?url' {
const content: string;
export default content;
}
declare module '*?inline' {
const content: string;
export default content;
}
```
---
url: /guide/migration/rsbuild-0-x.md
---
# Migrating from Rsbuild 0.x
This document lists all breaking changes from Rsbuild 0.7 to 1.0. Use it as a migration reference.
> See [Breaking changes in Rsbuild v1.0.0](https://github.com/web-infra-dev/rsbuild/discussions/2508) for details.
## [Important] Lightning CSS loader
Rsbuild now enables [lightningcss-loader](https://rspack.rs/guide/features/builtin-lightningcss-loader) by default to transform CSS files. It replaces `autoprefixer` for adding vendor prefixes and delivers better performance.
- `@rsbuild/plugin-lightningcss` is deprecated and no longer needed.
- `tools.autoprefixer` config has been removed.
Since Lightning CSS has some uncovered edge cases, you can still enable autoprefixer through a postcss config file:
```js title="postcss.config.cjs"
module.exports = {
plugins: {
autoprefixer: {},
},
};
```
## [Important] output.polyfill
Rsbuild v1 sets [output.polyfill](/config/output/polyfill) to `'off'` by default. This reduces polyfill code and generates smaller bundles.
If your application needs polyfills, set `output.polyfill` to `'usage'` or `'entry'`:
```ts title="rsbuild.config.ts"
export default {
output: {
polyfill: 'usage',
},
};
```
## [Important] source.decorators
Rsbuild now uses `2022-11` decorators version by default. This aligns Rsbuild's default behavior with TypeScript >= 5.0 and esbuild >= 0.21.0.
For legacy decorators, add this config:
```ts title="rsbuild.config.ts"
import { defineConfig } from '@rsbuild/core';
export default defineConfig({
source: {
decorators: {
version: 'legacy',
},
},
});
```
## [Important] output.targets
:::tip
Rsbuild v1 removes the `output.targets` option and target parameters from `source.alias`, `source.entry`, and other configs. Instead, use `environments` for more flexible multi-environment configuration.
The `environments` option provides broader coverage and enables differentiated config across multiple environments. For details, see [Multiple-Environment Builds](/guide/advanced/environments).
:::
The `output.targets` config has been removed. Use [output.target](/config/output/target) and [environments](/config/environments) instead.
- before:
```js
export default {
output: {
targets: ['web', 'node'],
},
};
```
- after:
```js
export default {
environments: {
web: {
output: {
target: 'web',
},
},
node: {
output: {
target: 'node',
},
},
},
};
```
## source.alias
Removed `target` param for `source.alias` function, use [environments](/config/environments) config instead.
- before:
```js
export default {
source: {
alias: (alias, { target }) => {
if (target === 'node') {
alias['@common'] = './src/node/common';
} else if (target === 'web') {
alias['@common'] = './src/web/common';
}
},
},
output: {
targets: ['web', 'node'],
},
};
```
- after:
```js
export default {
environments: {
web: {
source: {
alias: {
'@common': './src/web/common',
},
},
output: {
target: 'web',
},
},
node: {
source: {
alias: {
'@common': './src/node/common',
},
},
output: {
target: 'node',
},
},
},
};
```
## source.entry
Removed function usage of `source.entry`, use [environments](/config/environments) config instead.
- before:
```js
export default {
source: {
entry({ target }) {
if (target === 'web') {
return {
index: './src/index.client.js',
};
}
if (target === 'node') {
return {
index: './src/index.server.js',
};
}
},
},
output: {
targets: ['web', 'node'],
},
};
```
- after:
```js
export default {
environments: {
web: {
source: {
entry: {
index: './src/index.client.js',
},
},
output: {
target: 'web',
},
},
node: {
source: {
entry: {
index: './src/index.server.js',
},
},
output: {
target: 'node',
},
},
},
};
```
## output.overrideBrowserslist
`output.overrideBrowserslist` no longer supports `Record<RsbuildTarget, string[]` type, use [environments](/config/environments) config instead.
- before:
```js
export default {
output: {
overrideBrowserslist: {
web: ['iOS >= 9', 'Android >= 4.4'],
node: ['node >= 20'],
},
},
};
```
- after:
```js
export default defineConfig({
environments: {
web: {
output: {
overrideBrowserslist: ['iOS >= 9', 'Android >= 4.4'],
},
},
node: {
output: {
overrideBrowserslist: ['node >= 20'],
},
},
},
});
```
## output.emitAssets
`output.emitAssets` changed to boolean type, use [environments](/config/environments) config instead.
- before:
```js
export default {
output: {
targets: ['web', 'node'],
emitAssets: ({ target }) => target !== 'node',
},
};
```
- after:
```js
export default {
environments: {
web: {
output: {
target: 'web',
},
},
node: {
output: {
target: 'node',
emitAssets: false,
},
},
},
};
```
## output.distPath.server
Removed `output.distPath.server`, use the [environments](/config/environments) config instead.
```js
export default {
environments: {
web: {
output: {
target: 'web',
},
},
node: {
output: {
target: 'node',
distPath: {
root: 'dist/server',
},
},
},
},
};
```
## output.minify.html
Rsbuild v1 removed the `output.minify.html` and `output.minify.htmlOptions` options, and no longer minify the HTML files.
Previously Rsbuild uses `html-minifier-terser` to minify the HTML files. But the performance of `html-minifier-terser` cannot meet the needs of Rsbuild applications, and in most cases, there is little benefit in compressing HTML.
At this stage, Rsbuild will not built-in `html-minifier-terser`, so we provide a standalone [rsbuild-plugin-html-minifier-terser](https://github.com/rspack-contrib/rsbuild-plugin-html-minifier-terser) to support HTML minification.
```ts title="rsbuild.config.ts"
import { pluginHtmlMinifierTerser } from 'rsbuild-plugin-html-minifier-terser';
export default {
plugins: [pluginHtmlMinifierTerser()],
};
```
And we plan to use some faster Rust-based HTML minimizer in the future.
## output.charset
The default value of [output.charset](/config/output/charset) has been changed from `ascii` to `utf8`.
To use `ascii`, add the following config:
```ts
export default {
output: {
charset: 'ascii',
},
};
```
## dev.startUrl
`dev.startUrl` has been renamed to [server.open](/config/server/open):
```js
export default {
// [!code --]
dev: {
startUrl: true, // [!code --]
}, // [!code --]
// [!code ++]
server: {
open: true, // [!code ++]
}, // [!code ++]
};
```
## dev.client.port
The default value of [dev.client.port](/config/dev/client) changed from `<port>` to `''` (use `location.port`).
Use the previous value if you want to keep the behavior:
```js
export default {
dev: {
client: {
port: '<port>',
},
},
};
```
## html.appIcon
Previously, [html.appIcon](/config/html/app-icon) did not support for web app manifests, meaning it was only available on iOS.
Now `html.appIcon` supports generating web app manifests, and the type of `html.appIcon` has been changed.
- before:
```js
export default {
html: {
appIcon: './src/icon.png',
},
};
```
- after:
```js
export default {
html: {
appIcon: {
icons: [{ src: './src/icon.png', size: 180 }],
},
},
};
```
## Others
Rsbuild 1.0 has made some adjustments and optimizations to plugins API and dev server API.
Includes:
- The `onBeforeBuild` hook supports triggering multiple times in watch mode.
- Added `onBeforeEnvironmentCompile` and `onAfterEnvironmentCompile` hooks, which are triggered before/after executing the build of a single environment respectively.
- Removed `api.getHtmlPaths` and replaced it with `environment.htmlPaths`.
- Removed `api.context.entry` and replaced it with `environment.entry`.
- Removed `api.context.targets` and replaced it with `environment.target`.
- Removed `rsbuildServer.onHTTPUpgrade` and replaced it with `rsbuildServer.connectWebSocket`.
---
url: /guide/migration/webpack.md
---
# webpack
This section introduces how to migrate a webpack project to Rsbuild.
## Installing dependencies
First, replace webpack's npm dependencies with Rsbuild's dependencies.
import { PackageManagerTabs } from '@theme';
- Remove webpack dependencies:
<PackageManagerTabs command="remove webpack webpack-cli webpack-dev-server" />
- Install Rsbuild dependencies:
<PackageManagerTabs command="add @rsbuild/core -D" />
## Updating npm scripts
Next, update the npm scripts in your package.json to use Rsbuild's CLI commands.
```json title="package.json"
{
"scripts": {
"serve": "webpack serve -c webpack.config.js", // [!code --]
"build": "webpack build -c webpack.config.js", // [!code --]
"dev": "rsbuild dev", // [!code ++]
"build": "rsbuild build" // [!code ++]
}
}
```
## Create configuration file
Create an Rsbuild configuration file `rsbuild.config.ts` in the same directory as package.json, and add the following content:
```ts title="rsbuild.config.ts"
import { defineConfig } from '@rsbuild/core';
export default defineConfig({
plugins: [],
});
```
> See [Configure Rsbuild](/guide/configuration/rsbuild) for more.
## Config migration
Webpack projects often include complex `webpack.config.js` configuration files.
After migrating to Rsbuild, most webpack configurations (such as output, resolve, and module.rules) are built-in and no longer require manual setup.
For the few webpack configurations that need to be migrated, you can choose the following options:
- Use the [tools.rspack](/config/tools/rspack) option (Rspack and webpack configurations are basically equivalent).
```ts title="rsbuild.config.ts"
export default {
tools: {
rspack: {
plugins: [new SomeWebpackPlugin()],
},
},
};
```
- Use the configuration helpers in Rsbuild; for example, you can set css-loader options through [tools.cssLoader](/config/tools/css-loader).
> See [Configure Rspack](/guide/configuration/rspack) for more.
### Build entry
webpack uses the `entry` field to set the build entry. In Rsbuild, you can use [source.entry](/config/source/entry) to set it.
```ts title="rsbuild.config.ts"
export default {
source: {
entry: {
foo: './src/pages/foo/index.ts',
bar: './src/pages/bar/index.ts',
},
},
};
```
### Cleaning up config
Because Rsbuild includes common loaders and plugins, you can remove the following dependencies to significantly speed up dependency installation:
- css-loader
- babel-loader
- style-loader
- postcss-loader
- html-webpack-plugin
- mini-css-extract-plugin
- autoprefixer
- @babel/core
- @babel/preset-env
- @babel/preset-typescript
- @babel/runtime
- ...
:::tip
The above list covers only some removable dependencies. Real-world webpack projects may include many others, so adjust as needed.
:::
### Using plugins
Rsbuild offers a rich set of plugins that provide out-of-the-box support for common scenarios. You can refer to the [Plugin List](/plugins/list/index) documentation to learn about these plugins.
For example, in a React project, you can integrate Rsbuild plugins as follows. First, remove React-related build dependencies that the Rsbuild React plugin already includes, such as:
- `react-refresh`
- `@babel/preset-react`
- `@pmmmwh/react-refresh-webpack-plugin`
Then follow the [React Plugin](/plugins/list/plugin-react) documentation to register and use it as follows:
```ts title="rsbuild.config.ts"
import { defineConfig } from '@rsbuild/core';
import { pluginReact } from '@rsbuild/plugin-react'; // [!code highlight]
export default defineConfig({
plugins: [pluginReact()], // [!code highlight]
});
```
Most common webpack loaders and plugins still work in Rsbuild, but we recommend prioritizing Rsbuild's plugins to simplify your configuration. The following shows how they map:
| webpack | Rsbuild |
| ------------------------------------------------------------------------------------------ | --------------------------------------------------------------------------------------------------------------- |
| [@babel/preset-react](https://npmjs.com/package/@babel/preset-react) | [React Plugin](/plugins/list/plugin-react) |
| [vue-loader](https://npmjs.com/package/vue-loader) | [Vue Plugin](/plugins/list/plugin-vue) or [Vue 2 Plugin](https://github.com/rspack-contrib/rsbuild-plugin-vue2) |
| [svelte-loader](https://npmjs.com/package/svelte-loader) | [Svelte Plugin](/plugins/list/plugin-svelte) |
| [babel-preset-solid](https://npmjs.com/package/babel-preset-solid) | [Solid Plugin](/plugins/list/plugin-solid) |
| [babel-loader](https://npmjs.com/package/babel-loader) | [Babel Plugin](/plugins/list/plugin-babel) |
| [sass-loader](https://npmjs.com/package/sass-loader) | [Sass Plugin](/plugins/list/plugin-sass) |
| [less-loader](https://npmjs.com/package/less-loader) | [Less Plugin](/plugins/list/plugin-less) |
| [stylus-loader](https://npmjs.com/package/stylus-loader) | [Stylus Plugin](/plugins/list/plugin-stylus) |
| [mdx-loader](https://npmjs.com/package/mdx-loader) | [MDX Plugin](https://github.com/rspack-contrib/rsbuild-plugin-mdx) |
| [pug-loader](https://npmjs.com/package/pug-loader) | [Pug Plugin](https://github.com/rspack-contrib/rsbuild-plugin-pug) |
| [yaml-loader](https://npmjs.com/package/yaml-loader) | [Yaml Plugin](https://github.com/rspack-contrib/rsbuild-plugin-yaml) |
| [toml-loader](https://npmjs.com/package/toml-loader) | [TOML Plugin](https://github.com/rspack-contrib/rsbuild-plugin-toml) |
| [@svgr/webpack](https://npmjs.com/package/@svgr/webpack) | [SVGR Plugin](/plugins/list/plugin-svgr) |
| [fork-ts-checker-webpack-plugin](https://npmjs.com/package/fork-ts-checker-webpack-plugin) | [@rsbuild/plugin-type-check](https://github.com/rspack-contrib/rsbuild-plugin-type-check) |
| [node-polyfill-webpack-plugin](https://npmjs.com/package/node-polyfill-webpack-plugin) | [Node Polyfill Plugin](https://github.com/rspack-contrib/rsbuild-plugin-node-polyfill) |
| [@vue/babel-plugin-jsx](https://npmjs.com/package/@vue/babel-plugin-jsx) | [Vue JSX Plugin](https://github.com/rspack-contrib/rsbuild-plugin-vue-jsx) |
| [@vue/babel-preset-jsx](https://npmjs.com/package/@vue/babel-preset-jsx) | [Vue 2 JSX Plugin](https://github.com/rspack-contrib/rsbuild-plugin-vue2-jsx) |
| [eslint-webpack-plugin](https://npmjs.com/package/eslint-webpack-plugin) | [ESLint Plugin](https://github.com/rspack-contrib/rsbuild-plugin-eslint) |
| [babel-plugin-styled-components](https://npmjs.com/package/babel-plugin-styled-components) | [Styled Components Plugin](https://github.com/rsbuild-contrib/rsbuild-plugin-styled-components) |
### Configure dev server
Rsbuild does not support Rspack's [devServer](https://rspack.rs/config/dev-server) config. See [Rspack Dev Server](/guide/basic/server#rspack-dev-server) for alternatives.
## Babel migration
Rsbuild uses SWC by default, so most commonly used Babel plugins are no longer required. Here are some common Babel plugins migration examples.
### @babel/preset-env
`@babel/preset-env` is no longer required, Rsbuild will automatically downgrade code based on the [browserslist](/guide/advanced/browserslist) configuration.
Note that Rsbuild does not inject polyfill by default. You can refer to [Polyfill mode](/guide/advanced/browser-compatibility#polyfill-mode) for how to inject.
### @babel/preset-typescript
`@babel/preset-typescript` is no longer required, as Rsbuild enables SWC's TypeScript transformation by default.
### @babel/preset-react
`@babel/preset-react` is no longer required, replace it with [@rsbuild/plugin-react](/plugins/list/plugin-react).
### @babel/plugin-transform-runtime
`@babel/plugin-transform-runtime` is no longer required, Rsbuild has built-in equivalent `@swc/helpers` as runtime helpers.
### babel-plugin-import
`babel-plugin-import` can be replaced with the [source.transformImport](/config/source/transform-import) configuration in Rsbuild.
- Babel configuration:
```js title="babel.config.js"
module.exports = {
plugins: [
[
'import',
{ libraryName: 'some-library', libraryDirectory: 'es', style: true },
],
],
};
```
- Rsbuild configuration:
```ts title="rsbuild.config.ts"
export default {
source: {
transformImport: [
{ libraryName: 'some-library', libraryDirectory: 'es', style: true },
],
},
};
```
## Validating results
After completing the above steps, you have completed the basic migration from webpack to Rsbuild. You can now run the `npm run dev` command to try starting the dev server.
If you encounter any issues during the build process, please debug according to the error log, or check the webpack configuration to see if there are any necessary configurations that have not been migrated to Rsbuild.
## Contents supplement
The current document only covers part of the migration process. If you find suitable content to add, feel free to contribute to the documentation via pull request 🤝.
> The documentation for rsbuild can be found in the [rsbuild/website](https://github.com/web-infra-dev/rsbuild/tree/main/website) directory.
---
url: /guide/migration/cra.md
---
# Create React App
This chapter introduces how to migrate a [Create React App](https://github.com/facebook/create-react-app) (CRA) or [CRACO](https://craco.js.org/) project to Rsbuild.
:::tip CRA eject
If your project has already run the CRA `eject` command, then most of the content in this document will no longer be applicable.
After ejecting a CRA project, it becomes more like a project directly using webpack, so you can refer to the [webpack migration guide](/guide/migration/webpack).
:::
## Installing dependencies
First, you need to replace the npm dependencies of CRA with Rsbuild's dependencies.
import { PackageManagerTabs } from '@theme';
- Remove CRA dependencies:
<PackageManagerTabs command="remove react-scripts" />
> For projects using CRACO, you can also remove the @craco/craco dependency.
- Install Rsbuild dependencies:
<PackageManagerTabs command="add @rsbuild/core @rsbuild/plugin-react -D" />
## Updating npm scripts
Next, you need to update the npm scripts in package.json to Rsbuild's CLI commands.
```json title="package.json"
{
"scripts": {
"start": "react-scripts start", // [!code --]
"build": "react-scripts build", // [!code --]
"eject": "react-scripts eject", // [!code --]
"start": "rsbuild dev", // [!code ++]
"build": "rsbuild build", // [!code ++]
"preview": "rsbuild preview" // [!code ++]
}
}
```
:::tip
Rsbuild doesn't include built-in testing frameworks, so it does not provide a command to replace `react-scripts test`. You can directly use testing frameworks such as [Rstest](https://github.com/web-infra-dev/rstest), Jest or Vitest. Check the [Testing](/guide/advanced/testing) section for more details.
:::
## Creating configuration file
Create a Rsbuild configuration file `rsbuild.config.ts` in the same directory as package.json and add the following content:
```ts title="rsbuild.config.ts"
import { defineConfig } from '@rsbuild/core';
import { pluginReact } from '@rsbuild/plugin-react';
export default defineConfig({
plugins: [pluginReact()],
});
```
## HTML template
CRA uses the `public/index.html` file as the default HTML template. In Rsbuild, you can specify the HTML template through [html.template](/config/html/template):
```ts title="rsbuild.config.ts"
export default defineConfig({
html: {
template: './public/index.html',
},
});
```
In the HTML template, if you are using the `%PUBLIC_URL%` variable from CRA, replace it with Rsbuild's [assetPrefix variable](/config/html/template-parameters) and use a forward slash for concatenation:
```html
<!-- [!code --] -->
<link rel="icon" href="%PUBLIC_URL%/favicon.ico" />
<!-- [!code ++] -->
<link rel="icon" href="<%= assetPrefix %>/favicon.ico" />
```
This completes the basic migration from CRA to Rsbuild. You can now run the `npm run start` command to try starting the dev server.
## Output directory
By default, CRA outputs to the `build` directory, while Rsbuild's default output directory is `dist`.
You can configure Rsbuild's [output.distPath.root](/config/output/dist-path) option to change the directory to `build`, in line with CRA:
```ts title="rsbuild.config.ts"
export default {
output: {
distPath: {
root: 'build',
},
},
};
```
> For more details, please refer to the [Output Files](/guide/basic/output-files) section.
## Using CSS preprocessors
Rsbuild supports CSS preprocessors such as Sass and Less through plugins. Please refer to:
- [Sass Plugin](/plugins/list/plugin-sass)
- [Less Plugin](/plugins/list/plugin-less)
- [Stylus Plugin](/plugins/list/plugin-stylus)
## Using SVGR
If you are using the "SVG to React Component" feature of CRA (i.e., [SVGR](https://react-svgr.com/)), you also need to install the SVGR plugin for Rsbuild.
For example, if you are using the following usage:
```jsx
import { ReactComponent as Logo } from './logo.svg';
const App = () => (
<div>
<Logo />
</div>
);
```
You only need to install and register `@rsbuild/plugin-svgr`:
```ts title="rsbuild.config.ts"
import { pluginSvgr } from '@rsbuild/plugin-svgr';
export default {
plugins: [pluginSvgr({ mixedImport: true })],
};
```
Please refer to the [SVGR plugin](/plugins/list/plugin-svgr) documentation to learn how to use SVGR in Rsbuild.
## Config migration
Here is the corresponding Rsbuild configuration for [CRA configuration](https://create-react-app.dev/docs/advanced-configuration/):
| CRA | Rsbuild |
| ----------------------- | ----------------------------------------------------------------------------------------------- |
| HOST | [server.host](/config/server/host) |
| PORT | [server.port](/config/server/port) |
| HTTPS | [server.https](/config/server/https) |
| WDS_SOCKET_HOST | [dev.client.host](/config/dev/client) |
| WDS_SOCKET_PATH | [dev.client.path](/config/dev/client) |
| WDS_SOCKET_PORT | [dev.client.port](/config/dev/client) |
| PUBLIC_URL | [dev.assetPrefix](/config/dev/asset-prefix) / [output.assetPrefix](/config/output/asset-prefix) |
| BUILD_PATH | [output.distPath](/config/output/dist-path) |
| GENERATE_SOURCEMAP | [output.sourceMap](/config/output/source-map) |
| IMAGE_INLINE_SIZE_LIMIT | [output.dataUriLimit](/config/output/data-uri-limit) |
| FAST_REFRESH | [dev.hmr](/config/dev/hmr) |
| TSC_COMPILE_ON_ERROR | [@rsbuild/plugin-type-check](https://github.com/rspack-contrib/rsbuild-plugin-type-check) |
Notes:
- The above table does not cover all configurations of CRA, feel free to add more.
## Compile node_modules
By default, CRA uses Babel to compile dependencies in node_modules, but Rsbuild does not, to avoid the performance overhead and potential compilation errors caused by secondary compilation.
To handle syntax compatibility issues caused by dependencies in node_modules, you can use the [source.include](/config/source/include#compile-node_modules) config to compile node_modules.
```ts title="rsbuild.config.ts"
export default {
source: {
// Compile all JS files and exclude core-js
include: [{ not: /[\\/]core-js[\\/]/ }],
},
};
```
## Environment variables
CRA injects environment variables starting with `REACT_APP_` into the client code by default, while Rsbuild injects environment variables starting with `PUBLIC_` by default (see [public variables](/guide/advanced/env-vars#public-variables)).
To be compatible with CRA's behavior, you can manually call Rsbuild's [loadEnv](/api/javascript-api/core#loadenv) method to read environment variables starting with `REACT_APP_`, and inject them into the client code through the [source.define](/config/source/define) config.
```ts title="rsbuild.config.ts"
import { defineConfig, loadEnv } from '@rsbuild/core';
const { publicVars } = loadEnv({ prefixes: ['REACT_APP_'] });
export default defineConfig({
source: {
define: publicVars,
},
});
```
Note that CRA allows access to the full `process.env` object in the code and also allows destructuring of `process.env`. However, Rsbuild does not define the `process.env` object due to bundle size and security concerns.
```ts title="src/index.js"
// In CRA, you can access it like this
const { PUBLIC_URL } = process.env;
console.log(PUBLIC_URL);
console.log(process.env);
```
In Rsbuild, you can use the [source.define](/config/source/define) config to set `process.env` and read the `rawPublicVars` returned by the `loadEnv` method to allow the above usage:
```ts title="rsbuild.config.ts"
import { defineConfig, loadEnv } from '@rsbuild/core';
const { publicVars, rawPublicVars } = loadEnv({ prefixes: ['REACT_APP_'] });
export default defineConfig({
source: {
define: {
...publicVars,
'process.env': JSON.stringify(rawPublicVars),
},
},
});
```
## Import unknown assets
In CRA, if you import an asset that the build tool cannot recognize, CRA will by default output the file to the `build/static/media` directory, for example, the `document.pdf` file:
```js title="index.js"
import document from './document.pdf';
```
In Rsbuild, when you import unrecognized assets, Rsbuild will output error logs:
```
You may need an appropriate loader to handle this file type.
```
To resolve this error, you can use the following methods:
- Configure a suitable loader to handle this type of asset via [tools.rspack](/config/tools/rspack).
- Configure [asset modules](https://rspack.rs/guide/features/asset-module) rule to handle this type of asset via [tools.rspack](/config/tools/rspack).
For example, you can add the following asset modules config to get the same output result as CRA:
```ts title="rsbuild.config.ts"
export default {
tools: {
rspack: {
module: {
rules: [
{
// Match .png asset
// You can change this regular expression to match different types of files
test: /\.png$/,
type: 'asset/resource',
generator: {
filename: 'static/media/[name].[hash][ext]',
},
},
],
},
},
},
};
```
## Remove react-app-polyfill
CRA provides [react-app-polyfill](https://npmjs.com/package/react-app-polyfill) to manually inject polyfill code.
In the Rsbuild project, you can remove the dependency and code related to react-app-polyfill, as Rsbuild will automatically read the browserslist config and allow you to enable polyfill injection through the [output.polyfill](/config/output/polyfill) config.
1. Remove the `react-app-polyfill` reference:
```ts title="src/index.js"
import 'react-app-polyfill/ie11'; // [!code --]
import 'react-app-polyfill/stable'; // [!code --]
```
2. Configure [output.polyfill](/config/output/polyfill):
```ts title="rsbuild.config.ts"
export default {
output: {
polyfill: 'usage',
},
};
```
> Read [Browser compatibility](/guide/advanced/browser-compatibility) to understand how Rsbuild handles polyfills.
## Setup ESLint
CRA uses ESLint to lint the code by default. Rsbuild does not include linting by default, but you can add a separate npm script to run ESLint in `package.json`.
First, install [eslint](https://eslint.org/) and [eslint-config-react-app](https://npmjs.com/package/eslint-config-react-app), you need to install ESLint v8 to keep consistent with CRA:
<PackageManagerTabs command="add eslint@8 eslint-config-react-app -D" />
Then, add the `lint` command in `package.json`, and confirm that the project contains an `eslintConfig` configuration or an independent ESLint configuration file:
```json title="package.json"
{
"scripts": {
"lint": "eslint src"
},
"eslintConfig": {
"extends": ["react-app", "react-app/jest"]
}
}
```
Then, you can use the `npm run lint` command to run ESLint.
### Run ESLint during the build
In addition to adding the `lint` command in `package.json`, you can also add the [@rsbuild/plugin-eslint](https://github.com/rspack-contrib/rsbuild-plugin-eslint) plugin to maintain the same behavior as CRA.
`@rsbuild/plugin-eslint` allows you to run ESLint during the build process.
```ts title="rsbuild.config.ts"
import { pluginEslint } from '@rsbuild/plugin-eslint';
export default {
plugins: [pluginEslint()],
};
```
After registering the plugin, ESLint will run automatically during development (`npm run dev`) and production builds (`npm run build`). The plugin will display ESLint warnings and errors in the console output.
:::warning
We do not recommend using the `@rsbuild/plugin-eslint` plugin, as running ESLint during the build process will significantly increase the build time. Instead, we recommend using a separate `lint` command to run ESLint checks.
:::
## Reading jsconfig.json
In non-TypeScript projects, CRA supports reading the `paths` field in jsconfig.json as the path alias.
To use this feature in Rsbuild, refer to the [Path Alias - jsconfig.json](/guide/advanced/alias#jsconfigjson).
## CRACO migration
If your project is using [CRACO](https://craco.js.org) to override CRA configuration, you can refer to the table below for migration:
| CRACO | Rsbuild |
| ----------------------------------------------------------------------------------------------- | ----------------------------------------------------------------------------------------- |
| [webpack.configure](https://craco.js.org/docs/configuration/webpack/#webpackconfigure) | [tools.rspack](/config/tools/rspack) |
| [webpack.alias](https://craco.js.org/docs/configuration/webpack/#webpackalias) | [resolve.alias](/config/resolve/alias) |
| [webpack.plugins.add](https://craco.js.org/docs/configuration/webpack/#webpackplugins) | [appendPlugins of tools.rspack](/config/tools/rspack#appendplugins) |
| [webpack.plugins.remove](https://craco.js.org/docs/configuration/webpack/#webpackpluginsremove) | [removePlugin of tools.rspack](/config/tools/rspack#removeplugin) |
| [style.modules](https://craco.js.org/docs/configuration/style/#stylemodules) | [output.cssModules](/config/output/css-modules) |
| [style.css](https://craco.js.org/docs/configuration/style/#stylecss) | [tools.cssLoader](/config/tools/css-loader) |
| [style.sass](https://craco.js.org/docs/configuration/style/#stylesass) | [Sass Plugin](/plugins/list/plugin-sass) |
| [style.postcss](https://craco.js.org/docs/configuration/style/#stylepostcss) | [tools.postcss](/config/tools/postcss) |
| [babel](https://craco.js.org/docs/configuration/babel/) | [Babel Plugin](/plugins/list/plugin-babel) |
| [typescript](https://craco.js.org/docs/configuration/typescript/) | [@rsbuild/plugin-type-check](https://github.com/rspack-contrib/rsbuild-plugin-type-check) |
| [devServer](https://craco.js.org/docs/configuration/devserver/) | [server configs](/config/index) |
### Example
Here is an example of migrating from `webpack.configure` to `tools.rspack`:
- Before migration:
```js title="craco.config.js"
const { whenDev } = require('@craco/craco');
module.exports = {
webpack: {
configure: {
resolve: {
mainFields: ['browser', 'module', 'main'],
},
},
plugins: [...whenDev(() => [new MyWebpackPlugin()], [])],
},
};
```
- After migration:
```ts title="rsbuild.config.ts"
export default {
tools: {
rspack: {
resolve: {
mainFields: ['browser', 'module', 'main'],
},
plugins:
process.env.NODE_ENV === 'development' ? [new MyWebpackPlugin()] : [],
},
},
};
```
## Contents supplement
The current document only covers part of the migration process. If you find suitable content to add, feel free to contribute to the documentation via pull request 🤝.
> The documentation for rsbuild can be found in the [rsbuild/website](https://github.com/web-infra-dev/rsbuild/tree/main/website) directory.
---
url: /guide/migration/vue-cli.md
---
# Vue CLI
This chapter introduces how to migrate a [Vue CLI](https://github.com/vuejs/vue-cli) project to Rsbuild.
## Install dependencies
First, you need to replace the npm dependencies of Vue CLI with Rsbuild's dependencies.
import { PackageManagerTabs } from '@theme';
- Remove Vue CLI dependencies:
<PackageManagerTabs command="remove @vue/cli-service @vue/cli-plugin-babel @vue/cli-plugin-eslint core-js" />
- Install Rsbuild dependencies:
<PackageManagerTabs command="add @rsbuild/core @rsbuild/plugin-vue -D" />
:::tip
If your project is based on Vue 2, replace `@rsbuild/plugin-vue` with `@rsbuild/plugin-vue2`.
:::
## Update npm scripts
Next, you need to update the npm scripts in the package.json file to Rsbuild's CLI commands.
```json title="package.json"
{
"scripts": {
"serve": "vue-cli-service serve", // [!code --]
"build": "vue-cli-service build", // [!code --]
"serve": "rsbuild dev", // [!code ++]
"build": "rsbuild build", // [!code ++]
"preview": "rsbuild preview" // [!code ++]
}
}
```
:::tip
Rsbuild does not integrate ESLint, so it does not provide a command to replace `vue-cli-service lint`. You can directly use ESLint's [CLI commands](https://eslint.org/docs/latest/use/command-line-interface) as an alternative.
:::
## Create configuration file
Create a Rsbuild configuration file `rsbuild.config.ts` in the same directory as package.json, and add the following content:
```ts title="rsbuild.config.ts"
import { defineConfig } from '@rsbuild/core';
import { pluginVue } from '@rsbuild/plugin-vue';
export default defineConfig({
plugins: [pluginVue()],
source: {
// Specify the entry file
entry: {
index: './src/main.js',
},
},
});
```
:::tip
If your project is based on Vue 2, use `import { pluginVue2 } from '@rsbuild/plugin-vue2';`.
:::
## HTML template
Vue CLI uses the `public/index.html` file as the default HTML template. In Rsbuild, you can specify the HTML template through [html.template](/config/html/template):
```ts title="rsbuild.config.ts"
export default defineConfig({
html: {
template: './public/index.html',
},
});
```
In the HTML template, if you are using the `BASE_URL` variable from Vue CLI, replace it with Rsbuild's [assetPrefix variable](/config/html/template-parameters) and use a forward slash for concatenation:
```html
<link rel="icon" href="<%= BASE_URL %>favicon.ico" />
<!-- [!code --] -->
<link rel="icon" href="<%= assetPrefix %>/favicon.ico" />
<!-- [!code ++] -->
```
This completes the basic migration from Vue CLI to Rsbuild. You can now run the `npm run serve` command to try starting the dev server.
## Config migration
Here is the corresponding Rsbuild configuration for Vue CLI configuration:
| Vue CLI | Rsbuild |
| --------------------------------------------------------------------------------------------------------------------------------------- | ------------------------------------------------------------------------------------------------------------------------------------------------------ |
| [publicPath](https://cli.vuejs.org/config/#publicpath) | [dev.assetPrefix](/config/dev/asset-prefix) / [output.assetPrefix](/config/output/asset-prefix) |
| [outputDir](https://cli.vuejs.org/config/#outputdir) / [assetsDir](https://cli.vuejs.org/config/#assetsdir) | [output.distPath](/config/output/dist-path) |
| [filenameHashing](https://cli.vuejs.org/config/#filenamehashing) | [output.filenameHash](/config/output/filename-hash) |
| [pages](https://cli.vuejs.org/config/#pages) | [source.entry](/config/source/entry) / [html.template](/config/html/template) / [html.title](/config/html/title) |
| [transpileDependencies](https://cli.vuejs.org/config/#transpiledependencies) | [source.include](/config/source/include) |
| [productionSourceMap](https://cli.vuejs.org/config/#productionsourcemap) / [css.sourceMap](https://cli.vuejs.org/config/#css-sourcemap) | [output.sourceMap](/config/output/source-map) |
| [crossorigin](https://cli.vuejs.org/config/#crossorigin) | [html.crossorigin](/config/html/crossorigin) |
| [configureWebpack](https://cli.vuejs.org/config/#configurewebpack) | [tools.rspack](/config/tools/rspack) |
| [chainWebpack](https://cli.vuejs.org/config/#chainwebpack) | [tools.bundlerChain](/config/tools/bundler-chain) |
| [css.extract](https://cli.vuejs.org/config/#css-extract) | [output.injectStyles](/config/output/inject-styles) |
| [css.loaderOptions](https://cli.vuejs.org/config/#css-loaderoptions) | [tools.cssLoader](/config/tools/css-loader) / [less](/plugins/list/plugin-less) / [sass](/plugins/list/plugin-sass) / [postcss](/config/tools/postcss) |
| [devServer.proxy](https://cli.vuejs.org/config/#devserver-proxy) | [server.proxy](/config/server/proxy) |
Notes:
- When migrating `configureWebpack`, note that most of the webpack and Rsbuild configs are the same, but there are also some differences or functionalities not implemented in Rsbuild.
- The above table does not cover all configurations of Vue CLI, feel free to add more.
## Environment variables
Vue CLI injects environment variables starting with `VUE_APP_` into the client code by default, while Rsbuild injects environment variables starting with `PUBLIC_` by default (see [public variables](/guide/advanced/env-vars#public-variables)).
To be compatible with Vue CLI's behavior, you can manually call Rsbuild's [loadEnv](/api/javascript-api/core#loadenv) method to read environment variables starting with `VUE_APP_`, and inject them into the client code through the [source.define](/config/source/define) config.
```ts title="rsbuild.config.ts"
import { defineConfig, loadEnv } from '@rsbuild/core';
const { publicVars } = loadEnv({ prefixes: ['VUE_APP_'] });
export default defineConfig({
source: {
define: publicVars,
},
});
```
## Contents supplement
The current document only covers part of the migration process. If you find suitable content to add, feel free to contribute to the documentation via pull request 🤝.
> The documentation for rsbuild can be found in the [rsbuild/website](https://github.com/web-infra-dev/rsbuild/tree/main/website) directory.
---
url: /guide/migration/vite.md
---
# Vite
This guide explains how to migrate a Vite project to Rsbuild.
## Installing dependencies
First, replace Vite's npm dependencies with Rsbuild's equivalents.
import { PackageManagerTabs } from '@theme';
- Remove Vite dependencies:
<PackageManagerTabs command="remove vite" />
- Install Rsbuild dependencies:
<PackageManagerTabs command="add @rsbuild/core -D" />
## Updating npm scripts
Next, update the npm scripts in your package.json to run Rsbuild CLI commands.
```json title="package.json"
{
"scripts": {
"dev": "vite", // [!code --]
"build": "vite build", // [!code --]
"preview": "vite preview", // [!code --]
"dev": "rsbuild dev", // [!code ++]
"build": "rsbuild build", // [!code ++]
"preview": "rsbuild preview" // [!code ++]
}
}
```
## Create configuration file
Create an Rsbuild configuration file `rsbuild.config.ts` in the same directory as package.json, and add the following content:
```ts title="rsbuild.config.ts"
import { defineConfig } from '@rsbuild/core';
export default defineConfig({
plugins: [],
});
```
## Build entry
The default build entry points for Rsbuild and Vite are different. Vite uses `index.html` as the default entry, while Rsbuild uses `src/index.js`.
When migrating from Vite to Rsbuild, you can use Rsbuild's [source.entry](/config/source/entry) to set the build entry and [html.template](/config/html/template) to set the template.
Using a newly created Vite project as an example, first delete the `<script>` tags from `index.html`:
```html title="index.html"
<!-- [!code --] -->
<script type="module" src="/src/main.ts"></script>
```
Then add the following configuration:
```ts title="rsbuild.config.ts"
export default {
html: {
template: './index.html',
},
source: {
entry: {
index: './src/main.ts',
},
},
};
```
Rsbuild will automatically inject the `<script>` tags into the generated HTML files during the build process.
## Migrating plugins
Most common Vite plugins can be easily migrated to Rsbuild plugins, such as:
| Vite | Rsbuild |
| -------------------------------------------------------------------------------------- | ----------------------------------------------------------------------------------------------- |
| [@vitejs/plugin-react](https://npmjs.com/package/@vitejs/plugin-react) | [@rsbuild/plugin-react](/plugins/list/plugin-react) |
| [@vitejs/plugin-react-swc](https://npmjs.com/package/@vitejs/plugin-react-swc) | [@rsbuild/plugin-react](/plugins/list/plugin-react) |
| [@vitejs/plugin-vue](https://npmjs.com/package/@vitejs/plugin-vue) | [@rsbuild/plugin-vue](/plugins/list/plugin-vue) |
| [@vitejs/plugin-vue2](https://npmjs.com/package/@vitejs/plugin-vue2) | [@rsbuild/plugin-vue2](https://github.com/rspack-contrib/rsbuild-plugin-vue2) |
| [@vitejs/plugin-vue-jsx](https://npmjs.com/package/@vitejs/plugin-vue-jsx) | [@rsbuild/plugin-vue-jsx](https://github.com/rspack-contrib/rsbuild-plugin-vue-jsx) |
| [@vitejs/plugin-vue2-jsx](https://npmjs.com/package/@vitejs/plugin-vue2-jsx) | [@rsbuild/plugin-vue2-jsx](https://github.com/rspack-contrib/rsbuild-plugin-vue2-jsx) |
| [@vitejs/plugin-basic-ssl](https://npmjs.com/package/@vitejs/plugin-basic-ssl) | [@rsbuild/plugin-basic-ssl](https://github.com/rspack-contrib/rsbuild-plugin-basic-ssl) |
| [@vitejs/plugin-legacy](https://npmjs.com/package/@vitejs/plugin-legacy) | No need to use, see [Browser Compatibility](/guide/advanced/browser-compatibility) for details |
| [@sveltejs/vite-plugin-svelte](https://npmjs.com/package/@sveltejs/vite-plugin-svelte) | [@rsbuild/plugin-svelte](/plugins/list/plugin-svelte) |
| [vite-plugin-svgr](https://npmjs.com/package/vite-plugin-svgr) | [@rsbuild/plugin-svgr](/plugins/list/plugin-svgr) |
| [vite-plugin-checker](https://npmjs.com/package/vite-plugin-checker) | [@rsbuild/plugin-type-check](https://github.com/rspack-contrib/rsbuild-plugin-type-check) |
| [vite-plugin-eslint](https://npmjs.com/package/vite-plugin-eslint) | [@rsbuild/plugin-eslint](https://github.com/rspack-contrib/rsbuild-plugin-eslint) |
| [vite-plugin-static-copy](https://npmjs.com/package/vite-plugin-static-copy) | [output.copy](/config/output/copy) |
| [vite-plugin-node-polyfills](https://npmjs.com/package/vite-plugin-node-polyfills) | [@rsbuild/plugin-node-polyfill](https://github.com/rspack-contrib/rsbuild-plugin-node-polyfill) |
| [vite-plugin-solid](https://npmjs.com/package/vite-plugin-solid) | [@rsbuild/plugin-solid](/plugins/list/plugin-solid) |
| [@preact/preset-vite](https://npmjs.com/package/@preact/preset-vite) | [@rsbuild/plugin-preact](/plugins/list/plugin-preact) |
You can refer to [Plugin List](/plugins/list/index) to learn more about available plugins.
## Config migration
Here is the corresponding Rsbuild configuration for Vite configuration:
| Vite | Rsbuild |
| ------------------------------------- | ---------------------------------------------------------------- |
| root | [root](/config/root) |
| mode | [mode](/config/mode) |
| base | [server.base](/config/server/base) |
| define | [source.define](/config/source/define) |
| plugins | [plugins](/config/plugins) |
| appType | [server.historyApiFallback](/config/server/history-api-fallback) |
| envDir | [Env directory](/guide/advanced/env-vars#env-directory) |
| logLevel | [logLevel](/config/log-level) |
| cacheDir | [buildCache](/config/performance/build-cache) |
| publicDir | [server.publicDir](/config/server/public-dir) |
| customLogger | [Custom logger](/api/javascript-api/core#custom-logger) |
| assetsInclude | [source.assetsInclude](/config/source/assets-include) |
| resolve.alias | [resolve.alias](/config/resolve/alias) |
| resolve.dedupe | [resolve.dedupe](/config/resolve/dedupe) |
| resolve.extensions | [resolve.extensions](/config/resolve/extensions) |
| resolve.conditions | [resolve.conditionNames](/config/resolve/condition-names) |
| resolve.mainFields | [resolve.mainFields](/config/resolve/main-fields) |
| resolve.preserveSymlinks | [tools.rspack.resolve.symlinks](/config/tools/rspack) |
| html.cspNonce | [security.nonce](/config/security/nonce) |
| css.modules | [output.cssModules](/config/output/css-modules) |
| css.postcss | [tools.postcss](/config/tools/postcss) |
| css.preprocessorOptions.sass | [pluginSass](/plugins/list/plugin-sass) |
| css.preprocessorOptions.less | [pluginLess](/plugins/list/plugin-less) |
| css.preprocessorOptions.stylus | [pluginStylus](/plugins/list/plugin-stylus) |
| css.devSourcemap | [output.sourceMap](/config/output/source-map) |
| css.lightningcss | [tools.lightningcssLoader](/config/tools/lightningcss-loader) |
| server.host, preview.host | [server.host](/config/server/host) |
| server.port, preview.port | [server.port](/config/server/port) |
| server.cors, preview.cors | [server.cors](/config/server/cors) |
| server.strictPort, preview.strictPort | [server.strictPort](/config/server/strict-port) |
| server.https, preview.https | [server.https](/config/server/https) |
| server.open, preview.open | [server.open](/config/server/open) |
| server.proxy, preview.proxy | [server.proxy](/config/server/proxy) |
| server.headers, preview.headers | [server.headers](/config/server/headers) |
| server.hmr | [dev.hmr](/config/dev/hmr), [dev.client](/config/dev/client) |
| server.middlewareMode | [server.middlewareMode](/config/server/middleware-mode) |
| build.target, build.cssTarget | [Browserslist](/guide/advanced/browserslist) |
| build.outDir, build.assetsDir | [output.distPath](/config/output/dist-path) |
| build.assetsInlineLimit | [output.dataUriLimit](/config/output/data-uri-limit) |
| build.cssMinify | [output.minify](/config/output/minify) |
| build.sourcemap | [output.sourceMap](/config/output/source-map) |
| build.lib | Use [Rslib](https://github.com/web-infra-dev/rslib) |
| build.manifest | [output.manifest](/config/output/manifest) |
| build.ssrEmitAssets | [output.emitAssets](/config/output/emit-assets) |
| build.minify, build.terserOptions | [output.minify](/config/output/minify) |
| build.emptyOutDir | [output.cleanDistPath](/config/output/clean-dist-path) |
| build.copyPublicDir | [server.publicDir](/config/server/public-dir) |
| build.reportCompressedSize | [performance.printFileSize](/config/performance/print-file-size) |
| ssr, worker | [environments](/config/environments) |
Notes:
- The above table does not cover all configurations of Vite, feel free to add more.
## Environment variables
Vite injects environment variables starting with `VITE_` into the client code by default, while Rsbuild injects environment variables starting with `PUBLIC_` by default (see [public variables](/guide/advanced/env-vars#public-variables)).
To be compatible with Vite's behavior, you can manually call Rsbuild's [loadEnv](/api/javascript-api/core#loadenv) method to read environment variables starting with `VITE_`, and inject them into the client code through the [source.define](/config/source/define) config.
```ts title="rsbuild.config.ts"
import { defineConfig, loadEnv } from '@rsbuild/core';
const { publicVars } = loadEnv({ prefixes: ['VITE_'] });
export default defineConfig({
source: {
define: publicVars,
},
});
```
Rsbuild injects the following [environment variables](/guide/advanced/env-vars) by default:
- `import.meta.env.MODE`
- `import.meta.env.BASE_URL`
- `import.meta.env.PROD`
- `import.meta.env.DEV`
For `import.meta.env.SSR`, you can set it through the [environments](/config/environments) and [source.define](/config/source/define) configuration options:
```ts title="rsbuild.config.ts"
export default defineConfig({
environments: {
web: {
source: {
define: {
'import.meta.env.SSR': JSON.stringify(false),
},
},
},
node: {
source: {
define: {
'import.meta.env.SSR': JSON.stringify(true),
},
},
output: {
target: 'node',
},
},
},
});
```
## Preset types
Vite provides some preset type definitions through the `vite-env.d.ts` file. When migrating to Rsbuild, you can use the [preset types](/guide/basic/typescript#preset-types) provided by `@rsbuild/core`:
```ts title="src/env.d.ts"
// [!code --]
/// <reference types="vite/client" />
// [!code ++]
/// <reference types="@rsbuild/core/types" />
```
## Glob import
Vite provides `import.meta.glob()` for importing multiple modules.
When migrating to Rsbuild, you can use the [import.meta.webpackContext()](https://rspack.rs/api/runtime-api/module-variables#importmetawebpackcontext) function of Rspack instead:
- Vite:
```js
const modules = import.meta.glob('./dir/*.js');
for (const path in modules) {
modules[path]().then((mod) => {
console.log(path, mod);
});
}
```
- Rsbuild:
```js
const context = import.meta.webpackContext('./dir', {
// Whether to search subdirectories
recursive: false,
regExp: /\.js$/,
});
for (const path of context.keys()) {
const mod = context(path);
console.log(path, mod);
}
```
## vite-tsconfig-paths
Rsbuild supports TypeScript's `paths` option as alias out of the box, so you can remove the `vite-tsconfig-paths` dependency directly.
See [Path aliases](/guide/advanced/alias) for more details.
## Migrating Vite plugins
See [Vite plugin](/guide/migration/vite-plugin) to learn how to migrate Vite plugins.
## Validating results
After completing the above steps, you have completed the basic migration from Vite to Rsbuild. You can now run the `npm run dev` command to try starting the dev server.
If you encounter any issues during the build process, please debug according to the error log, or check the Vite configuration to see if there are any necessary configurations that have not been migrated to Rsbuild.
## Contents supplement
The current document only covers part of the migration process. If you find suitable content to add, feel free to contribute to the documentation via pull request 🤝.
> The documentation for rsbuild can be found in the [rsbuild/website](https://github.com/web-infra-dev/rsbuild/tree/main/website) directory.
---
url: /guide/migration/vite-plugin.md
---
# Vite plugin
This chapter introduces how to migrate a Vite plugin to Rsbuild plugin.
## Existing plugins
Before migrating a Vite plugin, it is recommended to check if there is a corresponding plugin in the Rsbuild ecosystem. You can find the plugins through the following pages:
- [Rsbuild official plugins](/plugins/list)
- [Rsbuild community plugins](https://github.com/web-infra-dev/awesome-rstack?tab=readme-ov-file#rsbuild-plugins)
## Define a plugin
Rsbuild plugin is defined in a way similar to Vite, usually a function that accepts plugin options as a parameter and returns a plugin description object.
The main difference is that Vite's hooks are defined directly on the plugin description object, while Rsbuild's hooks are accessed and called through the [api object](/plugins/dev/core). This allows you to control the timing of plugin API calls more flexibly.
- Vite plugin:
```ts title="vitePlugin.ts"
const vitePlugin = (options) => ({
name: 'vite-plugin',
transform() {
// ...
},
});
```
- Rsbuild plugin:
```ts title="rsbuildPlugin.ts"
const rsbuildPlugin = (options) => ({
name: 'rsbuild-plugin',
setup(api) {
api.transform(() => {
// ...
});
},
});
```
## Plugin hooks
Rsbuild's plugin API covers most of the Vite and Rollup plugin hooks, for example:
| Vite plugin hooks | Rsbuild plugin API |
| -------------------- | ---------------------------------------------------------------------------------------------------------------------- |
| `resolveId` | [resolve](/plugins/dev/core#apiresolve) |
| `transform` | [transform](/plugins/dev/core#apitransform) |
| `config` | [modifyRsbuildConfig](/plugins/dev/hooks#modifyrsbuildconfig) |
| `configResolved` | [getNormalizedConfig](/plugins/dev/core#apigetnormalizedconfig) |
| `configEnvironment` | [modifyEnvironmentConfig](/plugins/dev/hooks#modifyenvironmentconfig) |
| `configureServer` | [onBeforeStartDevServer](/plugins/dev/hooks#onbeforestartdevserver) |
| `buildStart` | [onBeforeBuild](/plugins/dev/hooks#onbeforebuild), [onBeforeStartDevServer](/plugins/dev/hooks#onbeforestartdevserver) |
| `buildEnd` | [onAfterBuild](/plugins/dev/hooks#onafterbuild), [onCloseDevServer](/plugins/dev/hooks#onclosedevserver) |
| `closeBundle` | [onCloseBuild](/plugins/dev/hooks#onclosebuild), [onCloseDevServer](/plugins/dev/hooks#onclosedevserver) |
| `transformIndexHtml` | [modifyHTML](/plugins/dev/hooks#modifyhtml), [modifyHTMLTags](/plugins/dev/hooks#modifyhtmltags) |
See [Plugin system](/plugins/dev/index) for more details.
## `config` hook
Rsbuild provides the [modifyRsbuildConfig](/plugins/dev/hooks#modifyrsbuildconfig) hook to modify Rsbuild configuration. Since Rsbuild and Vite have different configuration structures, you'll need to adjust your configuration when migrating Vite plugins.
For example, you should replace Vite's `define` option with Rsbuild's [source.define](/config/source/define) option.
- Vite plugin:
```ts title="vitePlugin.ts"
const vitePlugin = {
name: 'my-plugin',
config: (config) => {
config.define = {
...config.define,
FOO: '"foo"',
};
},
};
```
- Rsbuild plugin:
```ts title="rsbuildPlugin.ts"
const rsbuildPlugin = {
name: 'my-plugin',
setup(api) {
api.modifyRsbuildConfig((config) => {
config.source ||= {};
config.source.define = {
...config.source.define,
FOO: '"foo"',
};
});
},
};
```
:::tip
See [Config migration](/guide/migration/vite#config-migration) to learn how to migrate Vite configurations to Rsbuild.
:::
## `configEnvironment` hook
Rsbuild provides the [modifyEnvironmentConfig](/plugins/dev/hooks#modifyenvironmentconfig) hook to modify the configuration of a specific environment.
- Vite plugin:
```ts
const vitePlugin = {
name: 'config-environment',
configEnvironment(name, config) {
if (name === 'web') {
config.resolve.alias = {
// ...
};
}
},
};
```
- Rsbuild plugin:
```js
const rsbuildPlugin = {
name: 'config-environment',
setup(api) {
api.modifyEnvironmentConfig((config, { name }) => {
if (name === 'web') {
config.resolve.alias = {
// ...
};
}
});
},
};
```
## `configResolved` hook
Rsbuild provides the [api.getNormalizedConfig](/plugins/dev/core#apigetnormalizedconfig) method to get the resolved configuration. This method serves a similar purpose to Vite's `configResolved` hook.
- Vite plugin:
```ts title="vitePlugin.ts"
const vitePlugin = () => {
let config;
return {
name: 'read-config',
configResolved(resolvedConfig) {
config = resolvedConfig;
},
transform() {
console.log(config);
// ...
},
};
};
```
- Rsbuild plugin:
```ts title="rsbuildPlugin.ts"
const rsbuildPlugin = () => ({
name: 'read-config',
setup(api) {
api.transform(() => {
const config = api.getNormalizedConfig();
console.log(config);
// ...
});
},
});
```
## `transformIndexHtml` hook
Vite's `transformIndexHtml` hook corresponds to two hooks in Rsbuild:
- [modifyHTML](/plugins/dev/hooks#modifyhtml): for modifying HTML content
- [modifyHTMLTags](/plugins/dev/hooks#modifyhtmltags): for modifying HTML tags
Here is an example of replacing the HTML title.
- Vite Plugin:
```ts title="vitePlugin.ts"
const htmlPlugin = () => {
return {
name: 'html-plugin',
transformIndexHtml(html) {
return html.replace(
/<title>(.*?)<\/title>/,
`<title>Title replaced!`,
);
},
};
};
```
- Rsbuild Plugin:
```ts title="rsbuildPlugin.ts"
const rsbuildPlugin = {
name: 'html-plugin',
setup(api) {
api.modifyHTML((html) => {
return html.replace(
/(.*?)<\/title>/,
`<title>Title replaced!`,
);
});
},
};
```
## `configureServer` hook
Rsbuild provides the `onBeforeStartDevServer` hook to replace Vite's `configureServer` hook, which allows you to get the dev server instance and add custom middleware.
- Vite plugin:
```ts title="vitePlugin.ts"
const vitePlugin = () => ({
name: 'setup-middleware',
configureServer(server) {
server.middlewares.use((req, res, next) => {
// custom handle request...
});
},
});
```
- Rsbuild plugin:
```ts title="rsbuildPlugin.ts"
const rsbuildPlugin = {
name: 'setup-middleware',
setup(api) {
api.onBeforeStartDevServer(({ server }) => {
server.middlewares.use((req, res, next) => {
// custom handle request...
});
});
},
};
```
## `apply` property
Rsbuild plugin provides the same [apply property](/plugins/dev/core#conditional-application) as Vite plugins.
- Vite plugin:
```ts title="vitePlugin.ts"
const vitePlugin = {
name: 'vite-plugin',
apply: 'build',
};
```
- Rsbuild plugin:
```ts title="rsbuildPlugin.ts"
const rsbuildPlugin = {
name: 'rsbuild-plugin',
apply: 'build',
};
```
---
url: /guide/migration/modern-builder.md
---
# Modern.js Builder
This chapter introduces how to migrate a Modern.js Builder (or EdenX Builder) project to Rsbuild.
## Key differences
Rsbuild is the new version of Modern.js Builder, with the following key differences:
- Rsbuild has better performance. When using Rspack simultaneously, **the startup speed and build speed of Rsbuild are 1.5 to 2 times faster than Builder**.
- Rsbuild only supports Rspack as the bundler and no longer supports webpack.
- Rsbuild's CLI tool and dev server are more powerful and support more features.
## Installing dependencies
First, you need to replace the npm dependencies related to Builder with Rsbuild's dependencies.
import { PackageManagerTabs } from '@theme';
- Remove Builder's dependencies:
- Install Rsbuild's dependencies:
## Updating npm scripts
Next, you need to update the npm scripts in the package.json to Rsbuild's CLI commands.
```json title="package.json"
{
"scripts": {
"dev": "builder dev", // [!code --]
"build": "builder build", // [!code --]
"serve": "builder serve", // [!code --]
"dev": "rsbuild dev", // [!code ++]
"build": "rsbuild build", // [!code ++]
"preview": "rsbuild preview" // [!code ++]
}
}
```
## Modifying configuration files
- Rename `builder.config.ts` to `rsbuild.config.ts`.
- Change the import of the `defineConfig` method from `@modern-js/builder-cli` to `@rsbuild/core`.
- Change the `builderPlugins` field to `plugins`.
```ts title="rsbuild.config.ts"
import { defineConfig } from '@modern-js/builder-cli'; // [!code --]
import { defineConfig } from '@rsbuild/core'; // [!code ++]
export default defineConfig({
builderPlugins: [], // [!code --]
plugins: [], // [!code ++]
});
```
## Replacing plugins
Rsbuild and Builder have incompatible plugin systems, so you need to replace Builder's plugins with Rsbuild's plugins.
The following table shows the correspondence between Builder plugins and Rsbuild plugins:
| Builder | Rsbuild |
| ---------------------------------------- | ------------------------------------------------------------------------------------------------- |
| @modern-js/builder-plugin-vue | [@rsbuild/plugin-vue](/plugins/list/plugin-vue) |
| @modern-js/builder-plugin-vue2 | [@rsbuild/plugin-vue2](https://github.com/rspack-contrib/rsbuild-plugin-vue2) |
| @modern-js/builder-plugin-stylus | [@rsbuild/plugin-stylus](/plugins/list/plugin-stylus) |
| @modern-js/builder-plugin-node-polyfill | [@rsbuild/plugin-node-polyfill](https://github.com/rspack-contrib/rsbuild-plugin-node-polyfill) |
| @modern-js/builder-plugin-image-compress | [@rsbuild/plugin-image-compress](https://github.com/rspack-contrib/rsbuild-plugin-image-compress) |
| @modern-js/builder-plugin-swc | Enabled by default, no need to use |
| @modern-js/builder-plugin-esbuild | No longer supported |
For example, if you were using `@modern-js/builder-plugin-vue`, you need to first install `@rsbuild/plugin-vue`, then import the plugin in `rsbuild.config.ts` and add it to the `plugins` field.
```ts title="rsbuild.config.ts"
import { builderPluginVue } from '@modern-js/builder-plugin-vue'; // [!code --]
import { pluginVue } from '@rsbuild/plugin-vue'; // [!code ++]
export default defineConfig({
builderPlugins: [builderPluginVue()], // [!code --]
plugins: [pluginVue()], // [!code ++]
});
```
## Add React-related plugins
Rsbuild is not coupled with any front-end UI framework. Therefore, if you are a React project, you need to manually add [React Plugin](/plugins/list/plugin-react):
```ts title="rsbuild.config.ts"
import { pluginReact } from '@rsbuild/plugin-react';
export default {
plugins: [pluginReact()],
};
```
If you are using SVGR in your current project, you also need to register [SVGR Plugin](/plugins/list/plugin-svgr):
```ts title="rsbuild.config.ts"
import { pluginSvgr } from '@rsbuild/plugin-svgr';
export default {
plugins: [pluginSvgr()],
};
```
If you are a user of other frameworks, you can refer to [Rsbuild Plugin List](/plugins/list/index) to select the corresponding framework plugin.
## Config migration
Most configs in Rsbuild and Builder are consistent, with only a few adjustments.
You can refer to the [Rsbuild options](/config/index) to view the configs of Rsbuild.
It is worth noting that, compared to Builder, **there are some differences in default values and behaviors in Rsbuild**:
- **Browserslist:** The default is minimum compatible with browsers that support [Native ES Modules](https://developer.mozilla.org/en-US/docs/Web/JavaScript/Guide/Modules), refer to [Default Browserslist](/guide/advanced/browserslist#default-browserslist).
- **HTML file output path:** default output to the root of the dist directory, refer to [Default Directory Structure](/guide/basic/output-files#default-directory-structure).
- **Polyfill injection method:** Inject on demand by default, refer to [output.polyfill](/config/output/polyfill).
- **TypeScript type check:** not enabled by default, you need to manually register the [@rsbuild/plugin-type-check](https://github.com/rspack-contrib/rsbuild-plugin-type-check).
- **Modify DevServer configuration:** Modify `dev` and `server` configuration instead.
## Validating results
After completing the above steps, you have migrated from Modern.js Builder to Rsbuild. You can now try starting the dev server by running the `npm run dev` command.
If you encounter any issues during the build process, please debug according to the error logs.
## Contents supplement
The current document only covers part of the migration process. If you find suitable content to add, feel free to contribute to the documentation via pull request 🤝.
> The documentation for rsbuild can be found in the [rsbuild/website](https://github.com/web-infra-dev/rsbuild/tree/main/website) directory.
---
url: /guide/debug/debug-mode.md
---
# Debug mode
Rsbuild provides a debug mode to troubleshoot problems. Add the `DEBUG=rsbuild` environment variable when you run a build to enable it.
```bash
# Debug in development mode
DEBUG=rsbuild pnpm dev
# Debug in production mode
DEBUG=rsbuild pnpm build
```
In debug mode, Rsbuild prints additional log information and writes the Rsbuild and Rspack configs to the `dist` directory so you can inspect them.
## Log information
In debug mode, the terminal shows logs that start with `rsbuild`, including internal operations and the Rspack version in use.
```bash
$ DEBUG=rsbuild pnpm dev
...
rsbuild 10:00:00 configuration loaded from: /path/to/...
rsbuild 10:00:00 registering default plugins
rsbuild 10:00:00 default plugins registered
...
```
Rsbuild also prints the following message to indicate that it has written the generated build configurations to disk. Open these files to review the contents.
```bash
config inspection completed, generated files:
- Rsbuild config: /Project/demo/dist/.rsbuild/rsbuild.config.mjs
- Rspack config (web): /Project/demo/dist/.rsbuild/rspack.config.web.mjs
```
## Rsbuild config file
In debug mode, Rsbuild automatically generates a `dist/.rsbuild/rsbuild.config.mjs` file that contains the final Rsbuild config after the framework finishes processing your settings.
The structure of the file is as follows:
```js title="rsbuild.config.mjs"
export default {
dev: {
// some configs...
},
source: {
// some configs...
},
// other configs...
};
```
For a complete introduction to Rsbuild config, please see the [Configure Rsbuild](/guide/configuration/rsbuild) chapter.
## Rspack config file
Rsbuild also creates a `dist/.rsbuild/rspack.config.web.mjs` file with the final Rspack config that Rsbuild passes to Rspack.
The structure of the file is as follows:
```js title="rspack.config.web.mjs"
export default {
resolve: {
// some resolve configs...
},
module: {
// some Rspack loaders...
},
plugins: [
// some Rspack plugins...
],
// other configs...
};
```
For a complete introduction to Rspack configs, please see [Rspack official documentation](https://rspack.rs/config/).
---
url: /guide/debug/build-profiling.md
---
# Build profiling
Running a performance analysis helps you identify bottlenecks in your project so you can optimize the right areas.
## Using Rsdoctor
Rsdoctor is a build analyzer that visualizes how long each loader and plugin takes to compile.
See [Use Rsdoctor](/guide/debug/rsdoctor) for more information.
## Node.js profiling
A build runs both JavaScript and Rust code and incurs communication overhead between them.
JavaScript overhead is usually higher than Rust overhead. Use Node.js profiling to understand where time is spent in JavaScript and pinpoint bottlenecks.
For example, to capture a [CPU profile](https://nodejs.org/docs/v20.17.0/api/cli.html#--cpu-prof), run the following commands from your project root:
```bash
# dev
node --cpu-prof ./node_modules/@rsbuild/core/bin/rsbuild.js dev
# build
node --cpu-prof ./node_modules/@rsbuild/core/bin/rsbuild.js build
# Set higher precision sampling interval
node --cpu-prof --cpu-prof-interval=100 ./node_modules/@rsbuild/core/bin/rsbuild.js build
```
These commands generate a `*.cpuprofile` file. You can use [speedscope](https://github.com/jlfwong/speedscope) to visualize it:
```bash
# Install speedscope
npm install -g speedscope
# View cpuprofile content
# Replace the name with the local file name
speedscope CPU.date.000000.00000.0.001.cpuprofile
```
## Rspack profiling
Set the `RSPACK_PROFILE` environment variable to capture an Rspack build performance profile.
```json title="package.json"
{
"scripts": {
"dev:profile": "RSPACK_PROFILE=OVERVIEW rsbuild dev",
"build:profile": "RSPACK_PROFILE=OVERVIEW rsbuild build"
}
}
```
Because Windows does not support this syntax, you can use [cross-env](https://npmjs.com/package/cross-env) to set environment variables across different systems:
```json title="package.json"
{
"scripts": {
"dev:profile": "cross-env RSPACK_PROFILE=OVERVIEW rsbuild dev",
"build:profile": "cross-env RSPACK_PROFILE=OVERVIEW rsbuild build"
},
"devDependencies": {
"cross-env": "^7.0.0"
}
}
```
After the build finishes or the dev server stops, Rsbuild creates a `.rspack-profile-${timestamp}-${pid}` folder in the current directory. It contains a `rspack.pftrace` file (in versions before 1.4.0, the file name was `trace.json`) generated by Rspack using [tracing](https://github.com/tokio-rs/tracing). The file records the time spent in each phase and can be viewed with [ui.perfetto.dev](https://ui.perfetto.dev/).
:::tip
- When shutting down the dev server, press `CTRL + D` instead of `CTRL + C` so Rspack can finish recording performance data.
- The generated `trace.json` file can be large. Compress it into a zip file before sharing.
- For more information about Rspack profiling, refer to [Rspack - Tracing](https://rspack.rs/contribute/development/tracing).
:::
---
url: /guide/debug/rsdoctor.md
---
# Use Rsdoctor
[Rsdoctor](https://rsdoctor.rs/) is a build analyzer tailored for the Rspack ecosystem.
Rsdoctor aims to be a one-stop, intelligent build analyzer that makes the build process transparent, predictable, and optimizable through visualization and smart analysis, helping teams pinpoint bottlenecks, improve performance, and raise engineering quality.
Use Rsdoctor to debug build outputs or the build process.
## Quick start
In an Rsbuild project, enable Rsdoctor as follows:
1. Install the Rsdoctor plugin:
import { PackageManagerTabs } from '@theme';
2. Set the `RSDOCTOR=true` environment variable before running the CLI command:
```json title="package.json"
{
"scripts": {
"dev:rsdoctor": "RSDOCTOR=true rsbuild dev",
"build:rsdoctor": "RSDOCTOR=true rsbuild build"
}
}
```
Because Windows does not support this syntax, you can use [cross-env](https://npmjs.com/package/cross-env) to set environment variables across different systems:
```json title="package.json"
{
"scripts": {
"dev:rsdoctor": "cross-env RSDOCTOR=true rsbuild dev",
"build:rsdoctor": "cross-env RSDOCTOR=true rsbuild build"
},
"devDependencies": {
"cross-env": "^7.0.0"
}
}
```
After running these scripts, Rsbuild automatically registers the Rsdoctor plugin and opens the build analysis page when the build finishes. See the [Rsdoctor documentation](https://rsdoctor.rs/) for all features.
## Options
To configure the [options](https://rsdoctor.rs/config/options/options) exposed by the Rsdoctor plugin, manually register the plugin:
```ts title="rsbuild.config.ts"
import { RsdoctorRspackPlugin } from '@rsdoctor/rspack-plugin';
export default {
tools: {
rspack: {
plugins: [
process.env.RSDOCTOR === 'true' &&
new RsdoctorRspackPlugin({
// plugin options
}),
],
},
},
};
```
---
url: /guide/faq/general.md
---
# General FAQ
### What is the relationship between Rsbuild and Rspack?
Rspack is the base bundler for Rsbuild. The goal of Rsbuild is to provide out-of-the-box build capabilities for Rspack users, allowing developers to start a web project with zero configuration.
The main differences between Rspack and Rsbuild are:
- Rspack projects need to be configured from scratch, while Rsbuild provides default best practice configurations and supports extending Rspack configurations.
- Rspack projects require integration with loaders and plugins from the community to support different scenarios, while Rsbuild provides official plugins and default support for common frontend frameworks and build capabilities.
- The capabilities of Rspack CLI are comparable to webpack CLI, with relatively streamlined functionality, while Rsbuild provides a more powerful CLI and a more complete dev server.
---
### Can Rsbuild be used to build libraries or UI components?
Rsbuild is designed for building web applications out of the box.
For libraries and UI components, we recommend using [Rslib](https://github.com/web-infra-dev/rslib), a library development tool based on Rsbuild that can reuse Rsbuild's configuration and plugins.
---
### What is the relationship between Rsbuild and Modern.js?
Modern.js is a progressive web development framework built on top of Rsbuild. Modern.js's build capabilities are powered by Rsbuild.
The main differences between Modern.js and Rsbuild are:
- Modern.js is based on React, while Rsbuild is not coupled with any frontend UI framework.
- Modern.js is a full-stack solution providing runtime and server-side capabilities, while Rsbuild is a build tool with other capabilities extensible via plugins.
- Modern.js has more built-in features, while Rsbuild focuses on being lightweight and flexible.
---
url: /guide/faq/features.md
---
# Features FAQ
### How to import a UI component library on demand?
To enable on-demand imports for a component library, configure [source.transformImport](/config/source/transform-import). This works the same way as [babel-plugin-import](https://npmjs.com/package/babel-plugin-import).
```ts
export default {
source: {
transformImport: [
{
libraryName: 'my-components',
libraryDirectory: 'es',
style: true,
},
],
},
};
```
---
### How to run ESLint during compilation?
To protect compilation performance, Rsbuild doesn't run ESLint checks during builds by default. If you need ESLint in the pipeline, use the [ESLint plugin](https://github.com/rspack-contrib/rsbuild-plugin-eslint).
---
### How to configure CDN path for static assets?
To serve static assets like JS and CSS from a CDN, set the asset URL prefix with [output.assetPrefix](/config/output/asset-prefix).
```js
export default {
output: {
assetPrefix: 'https://cdn.example.com/assets/',
},
};
```
---
### How to remove console after production build?
In production builds, you can strip `console` calls to avoid shipping development logs.
Rsbuild provides a built-in option for removing console statements. See [performance.removeConsole](/config/performance/remove-console).
---
### How to view the final generated Rspack configuration?
Use Rsbuild's debug mode to view the Rspack configuration that Rsbuild generates.
Enable debug mode by setting the `DEBUG=rsbuild` environment variable when running a build. In this mode, the generated Rspack configuration is written to the `dist` directory.
```bash
➜ DEBUG=rsbuild pnpm dev
...
rsbuild 10:00:00 configuration loaded from: /path/to/...
rsbuild 10:00:00 registering default plugins
rsbuild 10:00:00 default plugins registered
...
config inspection completed, generated files:
- Rsbuild config: /root/my-project/dist/.rsbuild/rsbuild.config.mjs
- Rspack config (web): /root/my-project/dist/.rsbuild/rspack.config.web.mjs
```
---
### How to ignore specific warnings?
By default, Rsbuild prints all errors and warnings from the build.
If a noisy third-party package produces many warnings, you can silence specific messages with Rspack's `ignoreWarnings` configuration.
```ts
export default {
tools: {
rspack: {
ignoreWarnings: [/Using \/ for division outside of calc()/],
},
},
};
```
For details, please refer to: [ignoreWarnings](https://rspack.rs/config/other-options#ignorewarnings).
---
url: /guide/faq/exceptions.md
---
# Exceptions FAQ
### Seeing ESNext code in the compiled files?
By default, Rsbuild does not compile JavaScript files in `node_modules`. If an npm package includes ESNext syntax, that code is bundled as is.
To compile these files, use the [source.include](/config/source/include) configuration to specify additional directories or modules.
---
### Build error `Error: [object Object] is not a PostCSS plugin`?
Rsbuild uses PostCSS v8. If you encounter this error during compilation, it's usually because a package is using an incompatible PostCSS version. For example, the `postcss` peer dependency version in `cssnano` may not match the expected version.
To find unmet peer dependencies, run `npm ls postcss`. Then fix the issue by specifying the correct PostCSS version in your package.json.
```
npm ls postcss
├─┬ css-loader@6.3.0
│ └── UNMET PEER DEPENDENCY postcss@8.3.9
├─┬ css-minimizer-webpack-plugin@3.0.0
│ └── UNMET PEER DEPENDENCY postcss@8.3.9
```
---
### Build error `You may need additional loader`?
If you see this error during compilation, it means some files cannot be compiled correctly.
```bash
Module parse failed: Unexpected token
File was processed with these loaders:
* some-loader/index.js
You may need an additional loader to handle the result of these loaders.
```
Check whether you're importing unsupported file formats, and configure the appropriate Rspack loader to handle them.
---
### Compilation error `export 'foo' (imported as 'foo') was not found in './utils'`?
This error means your code is importing a symbol that doesn't exist.
For example, in the following code, `index.ts` is importing the `foo` variable from `utils.ts`, but `utils.ts` only exports the `bar` variable.
```ts
// utils.ts
export const bar = 'bar';
// index.ts
import { foo } from './utils';
```
In this case, Rsbuild will throw the following error:
```bash
Compile Error:
File: ./src/index.ts
export 'foo' (imported as 'foo') was not found in './utils' (possible exports: bar)
```
To fix this, check your import/export statements and correct any errors.
There are some common mistakes:
- Importing a non-existent variable:
```ts
// utils.ts
export const bar = 'bar';
// index.ts
import { foo } from './utils';
```
- Re-exporting a type without the `type` modifier, which prevents transpilers like SWC or Babel from recognizing the type export.
```ts
// utils.ts
export type Foo = 'bar';
// index.ts
export { Foo } from './utils'; // Incorrect
export type { Foo } from './utils'; // Correct
```
In some cases, a third-party dependency you can't modify causes this error. If you're sure it doesn't affect your application, you can downgrade the log level from `error` to `warn`:
```ts title="rsbuild.config.ts"
export default {
tools: {
rspack: {
module: {
parser: {
javascript: {
exportsPresence: 'warn',
},
},
},
},
},
};
```
However, you should still contact the dependency maintainer to report the issue.
> You can refer to the Rspack documentation for more details on [module.parser.javascript.exportsPresence](https://rspack.rs/config/module#moduleparserjavascriptexportspresence).
---
### Tree shaking does not take effect?
Rsbuild enables Rspack's tree shaking by default during production builds. Whether tree shaking works depends on whether your code meets Rspack's tree shaking requirements.
If tree shaking isn't working as expected, check the `sideEffects` configuration in the related npm package. To learn more about `sideEffects` and tree shaking principles, see [Rspack - Tree shaking](https://rspack.rs/guide/optimization/tree-shaking).
---
### `JavaScript heap out of memory` when compiling?
This error indicates a memory overflow during the build process. This typically happens when the bundled content exceeds Node.js's default memory limit.
To fix out-of-memory issues, the easiest solution is to increase the memory limit using Node.js's `--max-old-space-size` option. Set this by adding [NODE_OPTIONS](https://nodejs.org/api/cli.html#node_optionsoptions) before your CLI command.
For example, add parameters before the `rsbuild build` command:
```json title="package.json"
{
"scripts": {
"build": "rsbuild build" // [!code --]
"build": "NODE_OPTIONS=--max_old_space_size=16384 rsbuild build" // [!code ++]
}
}
```
For other commands like `rsbuild dev`, add the parameters before that command instead.
The value of the `max_old_space_size` parameter represents the upper limit of the memory size (MB). Generally, it can be set to `16384` (16GB).
The following parameters are explained in more detail in the official Node.js documentation:
- [NODE_OPTIONS](https://nodejs.org/api/cli.html#node_optionsoptions)
- [--max-old-space-size](https://nodejs.org/api/cli.html#--max-old-space-sizesize-in-megabytes)
Besides increasing the memory limit, you can also improve efficiency by enabling optimization strategies. See [Improve Build Performance](/guide/optimization/build-performance) for details.
If these methods don't solve your problem, unusual logic in your project may be causing the overflow. Debug recent code changes to find the root cause. If you can't locate it, please contact us.
---
### `Can't resolve 'core-js/modules/abc.js'` when compiling?
If you see an error like this during compilation, it means [core-js](https://github.com/zloirock/core-js) cannot be resolved in your project.
```
Module not found: Can't resolve 'core-js/modules/es.error.cause.js'
```
Usually, you don't need to install `core-js` because Rsbuild includes `core-js` v3 by default.
If `core-js` cannot be found, the issue may be:
1. Your project overrides Rsbuild's built-in `alias` configuration, causing incorrect `core-js` path resolution. Check your `alias` configuration.
2. Some code depends on `core-js` v2. Find the corresponding code and upgrade to `core-js` v3.
3. An npm package in `node_modules` imports `core-js` but doesn't declare it in `dependencies`. Either add the `core-js` dependency to that package, or install `core-js` in your project root.
---
url: /guide/faq/hmr.md
---
# HMR FAQ
### How to troubleshoot HMR issues?
There are several possible reasons why HMR may not work. This document covers the most common causes and provides troubleshooting guidance.
Before troubleshooting, it's helpful to understand how HMR works:
:::tip HMR principle
1. The browser establishes a WebSocket connection with the dev server for real-time communication.
2. When the dev server finishes recompiling, it sends a notification to the browser via WebSocket. The browser then sends a `hot-update.(js|json)` request to the dev server to load the newly compiled module.
3. After receiving the new module, React projects use React Refresh (an official React tool) to update components. Other frameworks have similar tools.
:::
After understanding how HMR works, you can follow these troubleshooting steps:
#### 1. Check the WebSocket connection
Open the browser console and check for the presence of the `[HMR] connected.` log.
- If present, the WebSocket connection is working correctly. Continue with the following steps.
- If not present, open the Network panel in Chrome and check the status of the `ws://[host]:[port]/rsbuild-hmr` request. If the request failed, this indicates that HMR failed because the WebSocket connection was not established.
The WebSocket connection can fail for various reasons, such as a network proxy preventing the WebSocket request from reaching the dev server. Check whether the WebSocket request address matches your dev server address. If it doesn't match, configure the WebSocket request address using [dev.client](/config/dev/client).
#### 2. Check the hot-update requests
When you modify a module's code and trigger a recompilation, the browser sends several `hot-update.json` and `hot-update.js` requests to the dev server to fetch the updated code.
Try modifying a module and inspect the content of the `hot-update.(js|json)` requests. If the request contains the latest code, the hot update request is working correctly.
If the request content is incorrect, it's likely due to a network proxy. Check whether the `hot-update.(js|json)` request address matches your dev server address. If it doesn't match, adjust the proxy rules to route the `hot-update.(js|json)` requests to the dev server address.
#### 3. Check for other causes
If the above steps don't reveal any issues, other factors may be causing HMR to fail. For example, the code may not meet React's HMR requirements. Refer to the following questions for further troubleshooting.
---
### HMR not working with external React?
To ensure HMR works properly, you need to use the development builds of React and ReactDOM.
If you exclude React via `externals` during bundling, the production build of React is typically injected through a CDN, which can cause HMR to fail.
```js
export default {
output: {
externals: {
react: 'React',
'react-dom': 'ReactDOM',
},
},
};
```
To solve this problem, reference the React development builds and install React DevTools. Hot reloading will then work properly.
If you're unsure which React build you're using, refer to the [React documentation - Use the Production Build](https://legacy.reactjs.org/docs/optimizing-performance.html#use-the-production-build).
---
### HMR not working with filename hash in development mode?
Typically, filename hashes should only be set in production mode (when `process.env.NODE_ENV === 'production'`).
Setting filename hashes in development mode can cause HMR to fail, especially for CSS files. This is because the hash changes every time the file content changes, preventing tools like [mini-css-extract-plugin](https://npmjs.com/package/mini-css-extract-plugin) from reading the latest file content.
- Correct usage:
```js
export default {
output: {
filename: {
css:
process.env.NODE_ENV === 'production'
? '[name].[contenthash:8].css'
: '[name].css',
},
},
};
```
- Incorrect usage:
```js
export default {
output: {
filename: {
css: '[name].[contenthash:8].css',
},
},
};
```
---
### HMR not working with HTTPS?
When HTTPS is enabled, the HMR connection may fail due to certificate issues. If you open the console, you'll see an HMR connection failed error.
```
» WebSocket connection to 'wss://localhost:3000/rsbuild-hmr' failed:
[HMR] disconnected. Attempting to reconnect.
```
To solve this problem, click "Advanced" -> "Proceed to [domain] (unsafe)" in the Chrome warning page.
> Tip: When accessing the page via localhost, the "Your connection is not private" warning may not appear. In that case, access the page via a network domain instead.
---
url: /config/index.md
---
# Config overview
This page lists all the configurations for Rsbuild. See ["Configure Rsbuild"](/guide/configuration/rsbuild) for details.
import Overview from '@components/Overview';
---
url: /config/root.md
---
# root
- **Type:** `string`
- **Default:** [process.cwd()](https://nodejs.org/api/process.html#processcwd)
- **Version:** `>= 1.0.0`
Specify the project root directory. Can be an absolute path, or a path relative to `process.cwd()`.
The value of Rsbuild `root` is also passed to the [context](https://rspack.rs/config/context) configuration of Rspack.
:::tip
The value of `root` does not affect the path of the `.env` file, as the `.env` file is resolved before the Rsbuild configuration file.
Rsbuild CLI supports using the `--root` option to specify the root directory, which can affect the path of the `.env` file. See ["CLI"](/guide/basic/cli) for more details.
:::
## Example
- Relative path:
```ts title="rsbuild.config.ts"
export default {
root: './foo',
};
```
- Absolute path:
```ts title="rsbuild.config.ts"
import { join } from 'node:path';
export default {
root: join(__dirname, 'foo'),
};
```
---
url: /config/mode.md
---
# mode
- **Type:** `'production' | 'development' | 'none'`
- **Version:** `>= 1.0.0`
Sets the Rsbuild build mode. Each mode applies different defaults and optimizations; for example, `production` minifies code by default.
The Rsbuild `mode` value is also passed to Rspack's [mode](https://rspack.rs/config/mode) configuration.
:::tip
The `mode` value does not change which `.env` file loads because `.env` files resolve before the Rsbuild config file.
Use the `--env-mode` option in the Rsbuild CLI to specify the env mode. See ["Env mode"](/guide/advanced/env-vars#env-mode) for details.
:::
## Default values
The default value of `mode` depends on the `process.env.NODE_ENV` environment variable:
- If `NODE_ENV` is `production`, the default value is `production`.
- If `NODE_ENV` is `development`, the default value is `development`.
- If `NODE_ENV` has any other value, the default value is `none`.
If you set `mode`, the `NODE_ENV` value will be ignored.
```ts title="rsbuild.config.ts"
export default {
mode: 'production',
};
```
### Command line
When using the Rsbuild CLI:
- `rsbuild dev` will set the default values of `NODE_ENV` and `mode` to `development`.
- `rsbuild build` and `rsbuild preview` will set the default values of `NODE_ENV` and `mode` to `production`.
### JavaScript API
When using the Rsbuild JavaScript API:
- [rsbuild.startDevServer](/api/javascript-api/instance#rsbuildstartdevserver) and [rsbuild.createDevServer](/api/javascript-api/instance#rsbuildcreatedevserver) will set the default values of `NODE_ENV` and `mode` to `development`.
- [rsbuild.build](/api/javascript-api/instance#rsbuildbuild) and [rsbuild.preview](/api/javascript-api/instance#rsbuildpreview) will set the default values of `NODE_ENV` and `mode` to `production`.
## Development mode
If `mode` is `development`:
- Enable HMR and register the [HotModuleReplacementPlugin](https://rspack.rs/plugins/webpack/hot-module-replacement-plugin).
- Generate JavaScript source maps, but do not generate CSS source maps. See [output.sourceMap](/config/output/source-map) for details.
- The `process.env.NODE_ENV` in the source code will be replaced with `'development'`.
- The `import.meta.env.MODE` in the source code will be replaced with `'development'`.
- The `import.meta.env.DEV` in the source code will be replaced with `true`.
- The `import.meta.env.PROD` in the source code will be replaced with `false`.
- Use [dev.assetPrefix](/config/dev/asset-prefix) as the URL prefix for static assets.
## Production mode
If `mode` is `production`:
- Enable JavaScript code minification and register the [SwcJsMinimizerRspackPlugin](https://rspack.rs/plugins/rspack/swc-js-minimizer-rspack-plugin).
- Enable CSS code minification and register the [LightningCssMinimizerRspackPlugin](https://rspack.rs/plugins/rspack/lightning-css-minimizer-rspack-plugin).
- JavaScript and CSS filenames include hash suffixes. See [output.filenameHash](/config/output/filename-hash).
- CSS Modules class names are shorter. See [cssModules.localIdentName](/config/output/css-modules#cssmoduleslocalidentname).
- JavaScript and CSS source maps are disabled. See [output.sourceMap](/config/output/source-map).
- The `process.env.NODE_ENV` in the source code will be replaced with `'production'`.
- The `import.meta.env.MODE` in the source code will be replaced with `'production'`.
- The `import.meta.env.DEV` in the source code will be replaced with `false`.
- The `import.meta.env.PROD` in the source code will be replaced with `true`.
- Use [output.assetPrefix](/config/output/asset-prefix) as the URL prefix for static assets.
## None mode
If `mode` is `none`:
- Do not enable any optimizations.
- The `process.env.NODE_ENV` in the source code will not be replaced.
- The `import.meta.env.MODE` in the source code will be replaced with `'none'`.
- The `import.meta.env.DEV` in the source code will be replaced with `false`.
- The `import.meta.env.PROD` in the source code will be replaced with `false`.
- Use [output.assetPrefix](/config/output/asset-prefix) as the URL prefix for static assets.
---
url: /config/plugins.md
---
# plugins
Registers Rsbuild plugins.
- **Type:**
```ts
type Falsy = false | null | undefined;
type RsbuildPlugins = (
| RsbuildPlugin
| Falsy
| Promise
| RsbuildPlugins
)[];
```
- **Default:** `undefined`
> Please check out the [Plugin List](/plugins/list/index) page to discover all available plugins.
## Example
For example, to register the [Sass plugin](/plugins/list/plugin-sass) in Rsbuild:
- Installing the plugin:
import { PackageManagerTabs } from '@theme';
- Registering the plugin:
```ts title="rsbuild.config.ts"
import { defineConfig } from '@rsbuild/core';
import { pluginSass } from '@rsbuild/plugin-sass';
export default defineConfig({
plugins: [pluginSass()],
});
```
## Execution order
By default, plugins run in the order they appear in the `plugins` array. Built-in Rsbuild plugins always execute before user-defined plugins.
If a plugin specifies ordering controls such as the `enforce` property, the final execution sequence will be adjusted accordingly. See the [`enforce` property](/plugins/dev/core#enforce-property) for details.
## Conditional registration
Falsy values in the `plugins` array are ignored, which lets you register plugins conditionally:
```ts title="rsbuild.config.ts"
const isProd = process.env.NODE_ENV === 'production';
export default defineConfig({
plugins: [isProd && somePlugin()],
});
```
## Async plugins
If the plugin is async, you can return a `Promise` object or use an `async` function, and Rsbuild will automatically wait for the `Promise` to be resolved:
```ts title="rsbuild.config.ts"
async function myPlugin() {
await someAsyncOperation();
return {
name: 'my-plugin',
setup(api) {
// ...
},
};
}
export default {
plugins: [myPlugin()],
};
```
## Nested plugins
Rsbuild also supports nested plugins. You can pass an array that contains multiple plugins, similar to a plugin preset. This is useful for complex features that combine several plugins, such as framework integrations.
```ts title="rsbuild.config.ts"
function myPlugin() {
return [fooPlugin(), barPlugin()];
}
export default {
plugins: [myPlugin()],
};
```
## Local plugins
If your local code repository contains Rsbuild plugins, you can import them using relative paths.
```ts title="rsbuild.config.ts"
import { defineConfig } from '@rsbuild/core';
import { pluginCustom } from './plugins/pluginCustom';
export default defineConfig({
plugins: [pluginCustom()],
});
```
## Plugin options
If a plugin provides custom options, you can pass the configurations through the plugin function's parameters.
```ts title="rsbuild.config.ts"
import { defineConfig } from '@rsbuild/core';
import { pluginStylus } from '@rsbuild/plugin-stylus';
export default defineConfig({
plugins: [
pluginStylus({
stylusOptions: {
lineNumbers: false,
},
}),
],
});
```
## Plugin registration phase
Plugin registration only runs during the Rsbuild initialization phase. You cannot dynamically add other plugins within a plugin through the plugin API:
```ts title="rsbuild.config.ts"
// Wrong
function myPlugin() {
return {
setup(api) {
api.modifyRsbuildConfig((config, { mergeRsbuildConfig }) => {
return mergeRsbuildConfig(config, {
plugins: [fooPlugin(), barPlugin()], // <- this will not work
});
});
},
};
}
// Correct
function myPlugin() {
return [fooPlugin(), barPlugin()];
}
export default {
plugins: [myPlugin()],
};
```
## Rspack plugins
The `plugins` option is used to register Rsbuild plugins. If you need to register Rspack or webpack plugins, please use [tools.rspack](/config/tools/rspack).
```ts title="rsbuild.config.ts"
export default {
// Rsbuild Plugins
plugins: [pluginStylus()],
tools: {
rspack: {
// Rspack or webpack Plugins
plugins: [new SomeWebpackPlugin()],
},
},
};
```
## Unplugin
[unplugin](https://github.com/unjs/unplugin) is a unified plugin system for various build tools. You can use plugins implemented based on unplugin in Rsbuild, just import the `/rspack` subpath of the plugin and register it via [tools.rspack](/config/tools/rspack).
Here is an example of using [unplugin-vue-components](https://npmjs.com/package/unplugin-vue-components):
```ts title="rsbuild.config.ts"
import { defineConfig } from '@rsbuild/core';
import { pluginVue } from '@rsbuild/plugin-vue';
import Components from 'unplugin-vue-components/rspack';
export default defineConfig({
plugins: [pluginVue()],
tools: {
rspack: {
plugins: [
Components({
// options
}),
],
},
},
});
```
:::tip
When you use the transform hook in unplugin, also use the `transformInclude` hook to target specific modules. If the transform hook matches an `.html` module, it replaces the default EJS transform from the [html-rspack-plugin](https://github.com/rspack-contrib/html-rspack-plugin).
:::
> Please ensure that the version of `unplugin` package is >= v1.6.0.
---
url: /config/log-level.md
---
# logLevel
- **Type:** `'info' | 'warn' | 'error' | 'silent'`
- **Default:** `'info'`
- **Version:** `>= 1.4.0`
Sets the Rsbuild log level. Defaults to `info`.
:::tip
This option also affects Rsbuild's log output in the browser. You can override this behavior through the [client.logLevel](/config/dev/client#loglevel) option.
:::
## Example
When `logLevel` is set to `warn`, Rsbuild only outputs warning and error logs:
```ts title="rsbuild.config.ts"
export default {
logLevel: 'warn',
};
```
When `logLevel` is set to `error`, Rsbuild only outputs error logs:
```ts title="rsbuild.config.ts"
export default {
logLevel: 'error',
};
```
## Optional values
- `info`: Output all logs.
- `warn`: Output warning and error logs.
- `error`: Output error logs.
- `silent`: Do not output any logs.
::: note
In [debug mode](/guide/debug/debug-mode), Rsbuild always outputs all logs.
:::
## Limitations
Rsbuild currently cannot set different log levels per instance because all instances share a global [logger](/api/javascript-api/core#logger).
---
url: /config/environments.md
---
# environments
Rsbuild supports building outputs for multiple environments. You can use `environments` to define different Rsbuild configurations for each environment.
> Please refer to [Multi-environment builds](/guide/advanced/environments) for more information.
- **Type:**
```ts
type Environments = {
[name: string]: EnvironmentConfig;
};
```
- **Default:** `undefined`
## Available options
`EnvironmentConfig` is a subset of the Rsbuild configuration, supporting most options.
Since multiple environments share the same server instance, the following options are currently not supported in `EnvironmentConfig`:
- `server.*`
- `dev.watchFiles`
- `dev.cliShortcuts`
- `dev.setupMiddlewares`
## Example
Configure Rsbuild configuration for `web` (client) and `node` (SSR) environments:
```ts title="rsbuild.config.ts"
export default {
// Shared configuration for all environments
resolve: {
alias: {
'@common': './src/common',
},
},
environments: {
// configuration for client
web: {
source: {
entry: {
index: './src/index.client.js',
},
},
output: {
target: 'web',
},
resolve: {
alias: {
'@common1': './src/web/common1',
},
},
},
// configuration for SSR
node: {
source: {
entry: {
index: './src/index.server.js',
},
},
output: {
target: 'node',
},
resolve: {
alias: {
'@common1': './src/ssr/common1',
},
},
},
},
};
```
For the `web` environment, the merged Rsbuild configuration is:
```js
const webConfig = {
source: {
entry: {
index: './src/index.client.js',
},
},
output: {
target: 'web',
},
resolve: {
alias: {
'@common': './src/common',
'@common1': './src/web/common1',
},
},
};
```
For the `node` environment, the merged Rsbuild configuration is:
```js
const nodeConfig = {
source: {
entry: {
index: './src/index.server.js',
},
},
output: {
target: 'node',
},
resolve: {
alias: {
'@common': './src/common',
'@common1': './src/ssr/common1',
},
},
};
```
## Environment name
Since environment names are used in directory names and object property names, we recommend using only letters, numbers, `-`, `_`, and `$`. When other characters are used, Rsbuild will show a warning.
```ts title="rsbuild.config.ts"
export default {
environments: {
someName: {}, // ✅
some_name: {}, // ✅
'some-name': {}, // ✅
'some:name': {}, // ❌
},
};
```
---
url: /config/dev/asset-prefix.md
---
# dev.assetPrefix
- **Type:** `boolean | string | 'auto'`
- **Default:** [server.base](/config/server/base)
Set the URL prefix of static assets in [development mode](/config/mode).
`assetPrefix` affects most static asset URLs, including JavaScript files, CSS files, images, videos, etc. If it is set incorrectly, these resources may return 404 errors.
This config is only used in `development` mode. In `production` mode or `none` mode, use [output.assetPrefix](/config/output/asset-prefix) to configure the URL prefix.
## Default value
The default value of `dev.assetPrefix` is the same as [server.base](/config/server/base).
When `server.base` is `/foo`, `index.html` and other static assets can be accessed through `http://localhost:3000/foo/`.
When you customize `dev.assetPrefix`, keep its URL prefix consistent with `server.base` so assets stay accessible through the Rsbuild dev server. For example:
```ts title="rsbuild.config.ts"
export default {
dev: {
assetPrefix: '/foo/bar/',
},
server: {
base: '/foo',
},
};
```
## Boolean type
If `assetPrefix` is set to `true`, the URL prefix will be `http://localhost:/`:
```ts title="rsbuild.config.ts"
export default {
dev: {
assetPrefix: true,
},
};
```
The resource URL loaded in the browser is as follows:
```html
```
If `assetPrefix` is set to `false` or not set, `/` is used as the default value.
## String type
When the value of `assetPrefix` is a `string` type, the string will be used as a prefix and automatically appended to the static resource URL.
- For example, set to a path relative to the root directory:
```ts title="rsbuild.config.ts"
export default {
dev: {
assetPrefix: '/example/',
},
};
```
The resource URL loaded in the browser is as follows:
```html
```
- For example, set to a complete URL:
```ts title="rsbuild.config.ts"
export default {
dev: {
assetPrefix: 'https://example.com/assets/',
},
};
```
The resource URL loaded in the browser is as follows:
```html
```
### Port placeholder
The port number that Rsbuild server listens on may change. For example, if the port is in use, Rsbuild will automatically increment the port number until it finds an available port.
To avoid `dev.assetPrefix` becoming invalid due to port changes, you can use one of the following methods:
- Enable [server.strictPort](/config/server/strict-port).
- Use the `` placeholder to refer to the current port number. Rsbuild will replace the placeholder with the actual port number it is listening on.
```ts title="rsbuild.config.ts"
export default {
dev: {
assetPrefix: 'http://localhost:/',
},
};
```
## Path types
The `assetPrefix` option accepts the following path types:
- **absolute path**: The most common choice, including specific server paths like `/assets/`.
- **'auto'**: Rspack will automatically calculate the path and generate relative paths based on file location.
:::tip
It's not recommended to set assetPrefix as a relative path, such as `'./assets/'`. This is because when assets are at different path depths, using relative paths may cause assets to load incorrectly.
:::
## Compare with `publicPath`
The functionality of `dev.assetPrefix` is basically the same as the [output.publicPath](https://rspack.rs/config/output#outputpublicpath) config in Rspack.
The differences from the native configuration are as follows:
- `dev.assetPrefix` only takes effect in development mode.
- `dev.assetPrefix` default value is the same as [server.base](/config/server/base).
- `dev.assetPrefix` automatically appends a trailing `/` by default.
- The value of `dev.assetPrefix` is written to the [process.env.ASSET_PREFIX](/guide/advanced/env-vars#processenvasset_prefix) environment variable (can only be accessed in client code).
## Dynamic asset prefix
Use the `__webpack_public_path__` variable provided by Rspack to dynamically set the URL prefix of static assets in JavaScript code.
See [Rspack - Dynamically set publicPath](https://rspack.rs/config/output#dynamically-set-publicpath).
---
url: /config/dev/browser-logs.md
---
# dev.browserLogs
- **Type:**
```ts
type BrowserLogs =
| boolean
| {
stackTrace?: 'summary' | 'full' | 'none';
};
```
- **Default:** `{ stackTrace: 'summary' }`
Controls whether to forward browser runtime errors to the terminal.
When set to `true`, Rsbuild's client script listens for `window.error` events and unhandled Promise rejections in the browser, then sends these errors to the dev server. The server prints them in the terminal with a `[browser]` prefix, along with improved formatting and contextual information.
This feature is particularly useful when working with AI coding agents that can only read terminal output, helping them better understand runtime errors and assist in debugging.
## Example
For example, if you have the following code in your application:
```jsx title="src/App.jsx"
const App = () => {
const item = undefined;
return
{item.name}
;
};
```
The browser will throw an error, and Rsbuild will forward this error to the terminal:
```bash
error [browser] Uncaught TypeError: Cannot read properties of undefined (reading 'name')
at handleClick (src/App.jsx:3:0)
```
## Options
### stackTrace
- **Type:** `'summary' | 'full' | 'none'`
- **Default:** `'summary'`
Controls how the error stack trace is displayed in the terminal when forwarding browser errors.
- `'summary'` – Show only the first frame (e.g. `(src/App.jsx:3:0)`).
- `'full'` – Print the full stack trace with all frames.
- `'none'` – Hide stack traces.
For example, setting `stackTrace` to `'full'`:
```ts title="rsbuild.config.ts"
export default {
dev: {
browserLogs: {
stackTrace: 'full',
},
},
};
```
The full stack trace will be like:
```bash
error [browser] Uncaught TypeError: Cannot read properties of undefined (reading 'name')
at handleClick (src/App.jsx:6:0)
at someFunction (src/App.jsx:12:0)
at App (src/App.jsx:6:0)
...
```
## Disabling
Set `dev.browserLogs` to `false` to disable this behavior.
```ts title="rsbuild.config.ts"
export default {
dev: {
browserLogs: false,
},
};
```
## Version history
| Version | Changes |
| ------- | ------------------------- |
| v1.5.13 | Added this option |
| v1.6.0 | Added `stackTrace` option |
---
url: /config/dev/cli-shortcuts.md
---
# dev.cliShortcuts
- **Type:**
```ts
type CliShortcuts =
| boolean
| {
help?: boolean;
custom?: (shortcuts: CliShortcut[]) => CliShortcut[];
};
```
- **Default:** `true` when using Rsbuild CLI, `false` otherwise.
- **Version:** `>= 1.0.11`
Whether to enable CLI shortcuts.
## All shortcuts
Press `h + Enter` to show all shortcuts:
```
Shortcuts:
c + enter clear console
o + enter open in browser
q + enter quit process
r + enter restart server
u + enter show urls
```
## Example
- Enable:
```ts title="rsbuild.config.ts"
export default {
dev: {
cliShortcuts: true,
},
};
```
- Disable:
```ts title="rsbuild.config.ts"
export default {
dev: {
cliShortcuts: false,
},
};
```
## Custom shortcuts
`custom` option can be used to custom shortcuts, the value is a function that receives the default shortcuts array and returns a new shortcuts array.
- Add custom shortcuts:
```ts title="rsbuild.config.ts"
export default {
dev: {
cliShortcuts: {
custom: (shortcuts) => {
return [
...shortcuts,
{
key: 's',
description: 'say hello',
action: () => {
console.log('hello world!');
},
},
];
},
},
},
};
```
- Disable some shortcuts:
```ts title="rsbuild.config.ts"
export default {
dev: {
cliShortcuts: {
custom: (shortcuts) => {
return shortcuts.filter((shortcut) => shortcut.key !== 'o');
},
},
},
};
```
## Print help
`help` option can be used to control whether to print the help hint when the server is started, the default help hint is:
```bash
➜ press h + enter to show shortcuts
```
- Disable the help hint:
```ts title="rsbuild.config.ts"
export default {
dev: {
cliShortcuts: {
help: false,
},
},
};
```
- Print a custom help hint:
```ts title="rsbuild.config.ts"
export default {
dev: {
cliShortcuts: {
help: 'type "h + enter" to view available commands',
},
},
};
```
---
url: /config/dev/client.md
---
# dev.client
Configure the client code injected by Rsbuild during the development process. This can be used to set the WebSocket URL for HMR.
- **Type:**
```ts
type Client = {
// The protocol name for the WebSocket request
protocol?: 'ws' | 'wss';
// The path for the WebSocket request
path?: string;
// The port number for the WebSocket request
port?: string | number;
// The host for the WebSocket request
host?: string;
// The maximum number of reconnection attempts after a WebSocket request is disconnected.
reconnect?: number;
// Whether to display an error overlay in the browser when a compilation error occurs
overlay?: boolean;
// Controls the log level for client-side logging in the browser console
logLevel?: 'info' | 'warn' | 'error' | 'silent';
};
```
- **Default:**
```js
const defaultConfig = {
path: '/rsbuild-hmr',
// By default it is set to "location.port"
port: '',
// By default it is set to "location.hostname"
host: '',
// By default it is set to "location.protocol === 'https:' ? 'wss' : 'ws'""
protocol: undefined,
reconnect: 100,
overlay: true,
// Inherits from root logLevel, defaults to 'info'
logLevel: 'info',
};
```
## Configure WebSocket URL
By default, when you start the dev server and visit the `http://localhost:3000/`, a WebSocket request is made to `ws://localhost:3000/rsbuild-hmr`, establishing a connection between the page and the dev server.
In some development scenarios, you may need to adjust the WebSocket URL to ensure that the WebSocket request can connect correctly.
For example, if you are developing using a proxy tool, you may actually be accessing an online domain. In this case, you can manually configure `dev.client` to point the WebSocket URL to your local dev server. Below is an example where the WebSocket request URL is `ws://127.0.0.1:3000/rsbuild-hmr`:
```ts title="rsbuild.config.ts"
export default {
dev: {
client: {
protocol: 'ws',
// Usually `127.0.0.1` is used to avoid cross-origin requests being blocked by the browser
host: '127.0.0.1',
port: 3000,
},
},
};
```
### Port placeholder
The port number that Rsbuild server listens on may change. For example, if the port is in use, Rsbuild will automatically increment the port number until it finds an available port.
To avoid `client.port` becoming invalid due to port changes, you can use one of the following methods:
- Enable [server.strictPort](/config/server/strict-port).
- Use the `` placeholder to refer to the current port number. Rsbuild will replace the placeholder with the actual port number it is listening on.
```ts title="rsbuild.config.ts"
export default {
dev: {
client: {
port: '',
},
},
};
```
## hot-update files
During the HMR process, the page will make GET requests to get hot-update files, including `*.hot-update.json` and `*.hot-update.js`. These files contain the necessary information for hot updates, such as the updated modules and their code.
Hot-update files are considered to be static assets. If you need to configure the URL for hot-update files, please use the [dev.assetPrefix](/config/dev/asset-prefix) option.
## Options
### overlay
The `dev.client.overlay` option allows you to choose whether or not to enable the error overlay feature.
By default, Rsbuild will display an error overlay in the browser when a compilation error occurs, providing error messages and stacks:
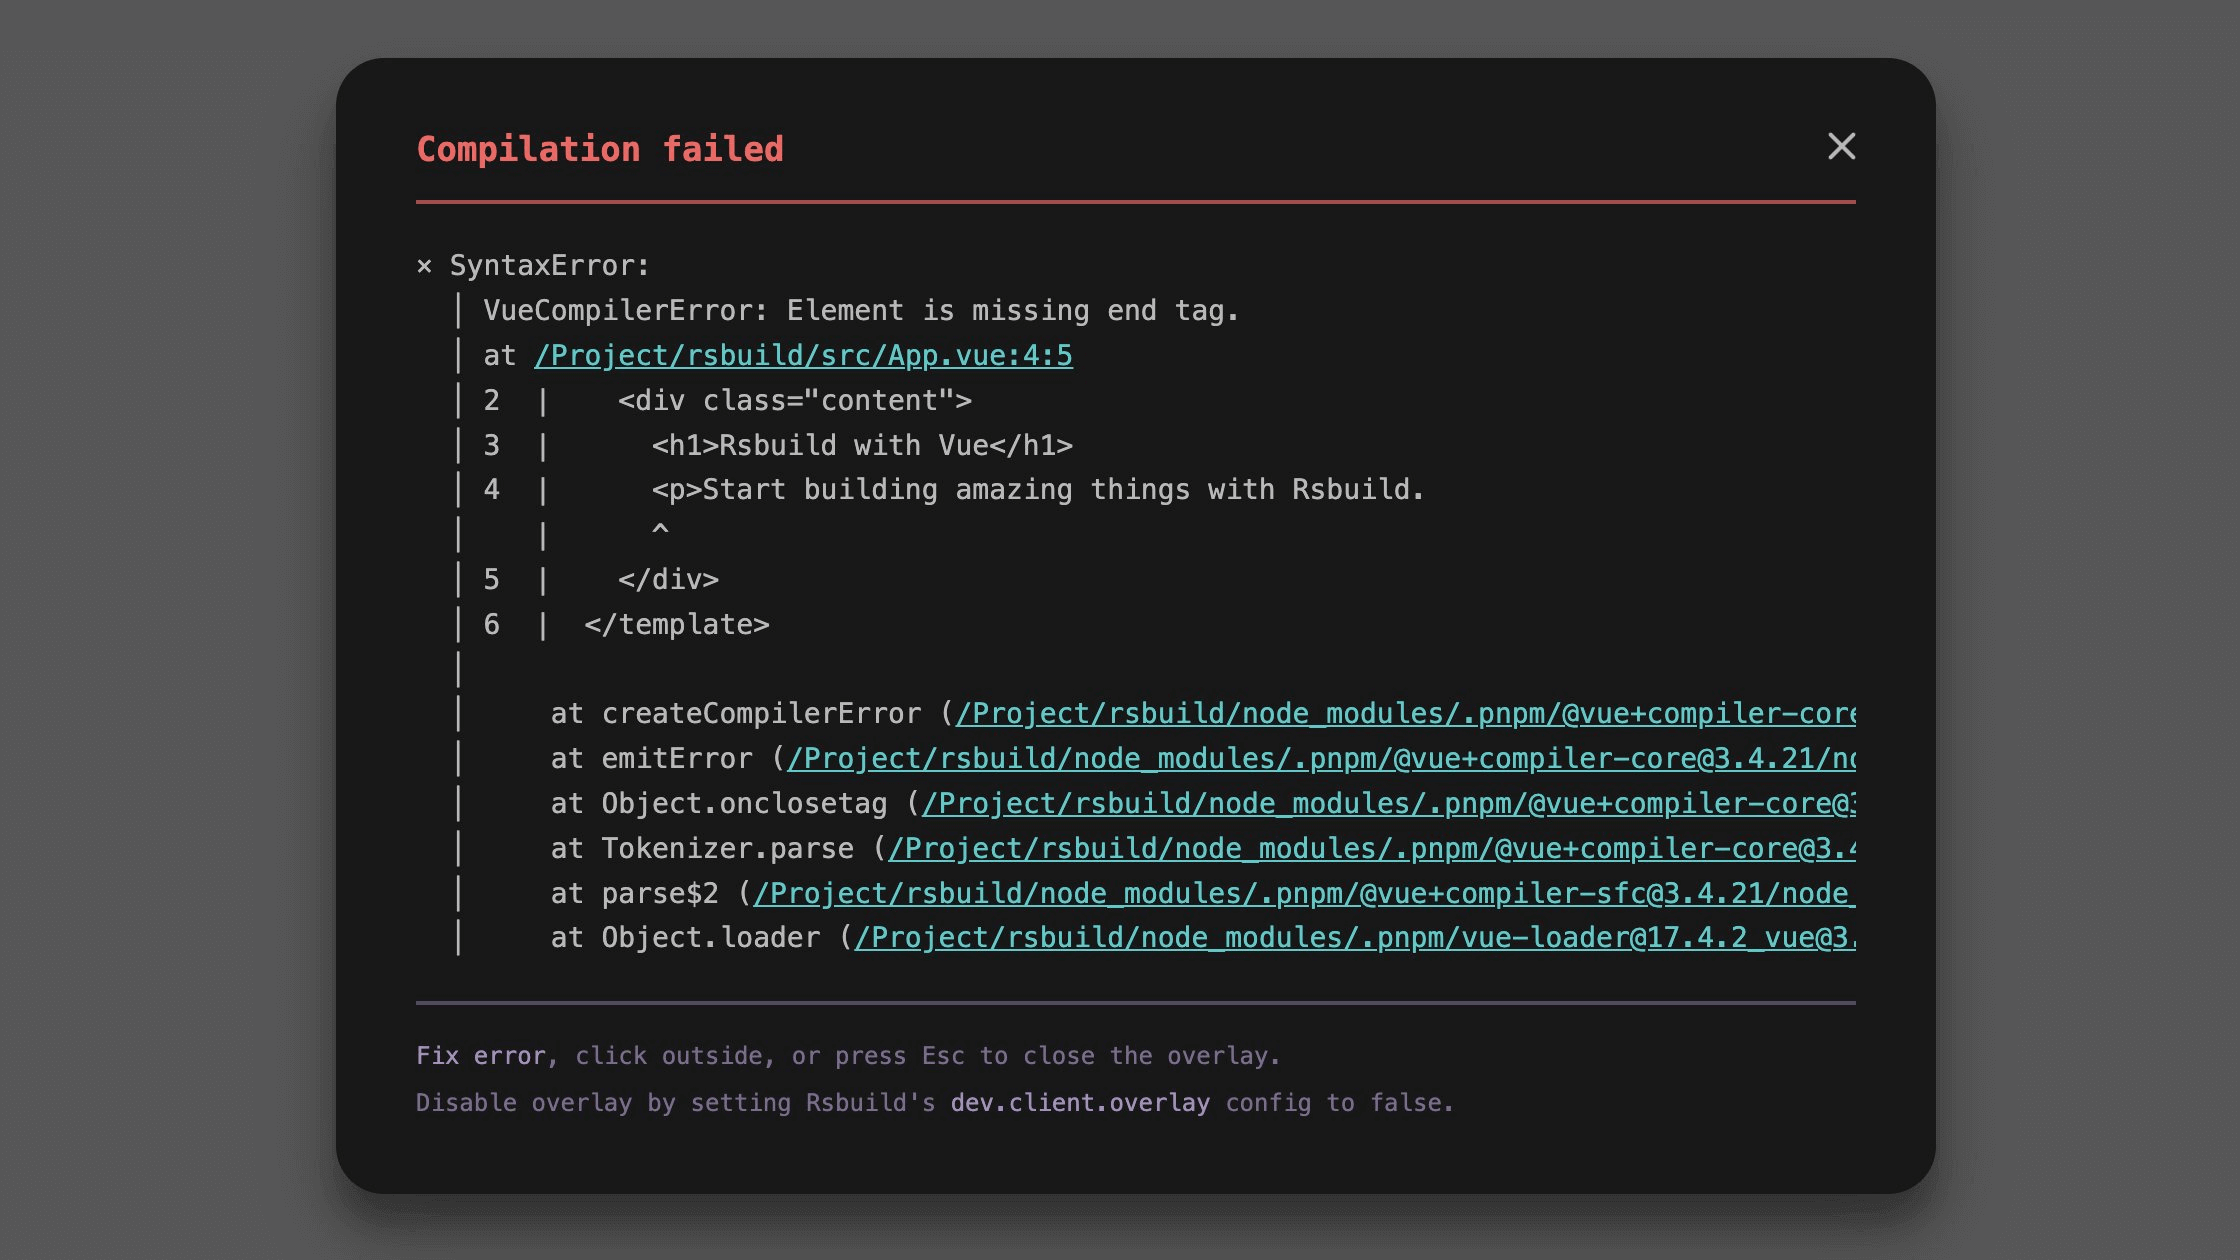
To disable the error overlay, set it to `false`:
```ts title="rsbuild.config.ts"
export default {
dev: {
client: {
overlay: false,
},
},
};
```
:::tip
The error overlay feature requires the current browser to support [Web Components](https://developer.mozilla.org/en-US/docs/Web/API/Web_components). If the browser does not support it, the overlay will not be displayed.
:::
### logLevel
- **Type:** `'info' | 'warn' | 'error' | 'silent'`
- **Default:** Inherits from root [logLevel](/config/log-level), defaults to `info`
The `dev.client.logLevel` option controls the log level for Rsbuild's client-side messages in the browser console.
```ts title="rsbuild.config.ts"
export default {
dev: {
client: {
logLevel: 'warn',
},
},
};
```
Optional values:
- `'info'` - Shows all messages (default).
- `'warn'` - Shows warnings and errors only.
- `'error'` - Shows only errors.
- `'silent'` - Suppresses all Rsbuild client logs.
### reconnect
- **Type:** `number`
- **Default:** `100`
Controls the maximum number of automatic reconnection attempts after the WebSocket connection is disconnected.
When the connection is lost, Rsbuild will retry the connection at increasing time intervals. Once the maximum number of attempts is reached, it will stop reconnecting. After a successful reconnection, HMR and related features will be restored automatically.
```ts title="rsbuild.config.ts"
export default {
dev: {
client: {
// Retry up to 3 times
reconnect: 3,
},
},
};
```
Setting this value to `0` disables automatic reconnection. In this case, the connection can only be restored by manually refreshing the page.
## Version history
| Version | Changes |
| ------- | ----------------------- |
| v1.6.13 | Added `logLevel` option |
---
url: /config/dev/hmr.md
---
# dev.hmr
- **Type:** `boolean`
- **Default:** `true`
Whether to enable Hot Module Replacement.
Refer to [Hot Module Replacement](/guide/advanced/hmr) for more information.
> You can configure the HMR behavior of the client code via [dev.client](/config/dev/client).
## Disabling HMR
When `dev.hmr` is set to `false`, HMR and react-refresh will be disabled and Rsbuild will automatically fall back to [dev.liveReload](/config/dev/live-reload).
```ts title="rsbuild.config.ts"
export default {
dev: {
hmr: false,
},
};
```
---
url: /config/dev/lazy-compilation.md
---
# dev.lazyCompilation
- **Type:**
```ts
type LazyCompilationOptions =
| boolean
| {
/**
* Enable lazy compilation for entries.
*/
entries?: boolean;
/**
* Enable lazy compilation for dynamic imports.
*/
imports?: boolean;
/**
* Specify which imported modules should be lazily compiled.
*/
test?: RegExp | ((m: Module) => boolean);
/**
* The path to a custom runtime code that overrides the default lazy compilation client.
*/
client?: string;
/**
* Tells the client the server URL that needs to be requested.
*/
serverUrl?: string;
/**
* Customize the prefix used for lazy compilation endpoint.
* @default "/lazy-compilation-using-"
*/
prefix?: string;
};
```
- **Default:**
```js
const defaultOptions = {
imports: true,
entries: false,
};
```
Enable lazy compilation (compilation on demand), implemented based on Rspack's [lazy compilation](https://rspack.rs/guide/features/lazy-compilation) feature.
## Introduction
Although Rspack itself has good performance, the overall build time can still be less than ideal when building applications with a large number of modules. This is because the modules in the application need to be compiled by various loaders, such as `postcss-loader`, `sass-loader`, `vue-loader`, etc., which introduce additional compilation overhead.
Lazy compilation is an effective strategy to improve the startup performance of the development phase. Instead of compiling all modules at initialization, it compiles modules on demand as they are needed. This means that developers can quickly see the application running when starting the dev server, and build the required modules in batches. By compiling on demand, unnecessary compilation time can be reduced. As the project scales up, compilation time does not significantly increase, which greatly enhances the development experience.
:::tip
Lazy compilation is only effective for dev builds and does not affect production builds.
:::
## Example
### Enable lazy compilation
By default, Rsbuild already enables `imports` option, which means lazy compilation of dynamic imported modules.
To enable full lazy compilation functionality, set `lazyCompilation` option to `true`:
```ts title="rsbuild.config.ts"
export default {
dev: {
lazyCompilation: true,
},
};
```
This is equivalent to the following configuration:
```ts title="rsbuild.config.ts"
export default {
dev: {
lazyCompilation: {
imports: true,
// If there is only one entry, Rsbuild will not enable the entries option by default
entries: true,
},
},
};
```
### Disable lazy compilation
To disable lazy compilation, set `lazyCompilation` to `false`:
```ts title="rsbuild.config.ts"
export default {
dev: {
lazyCompilation: false,
},
};
```
### Entry modules
Use `lazyCompilation.entries` to control whether to lazily compile entry modules:
```ts title="rsbuild.config.ts"
export default {
dev: {
lazyCompilation: {
entries: true,
},
},
};
```
With the `entries` option enabled, Rsbuild will not compile all pages when you start the dev server. Instead, it will only compile a specific page when you visit it.
When lazily compiling entry modules, please note:
- It only applies to multi-page applications (MPA) and does not optimize single-page applications (SPA).
- When you visit a page, you need to wait for the page to finish compiling before you can see its content.
### Async modules
Use `lazyCompilation.imports` to control whether to lazily compile [dynamic imported](https://developer.mozilla.org/en-US/docs/Web/JavaScript/Reference/Operators/import) modules.
```ts title="rsbuild.config.ts"
export default {
dev: {
lazyCompilation: {
imports: true,
},
},
};
```
When the `imports` option is enabled, all async modules will only be compiled when requested. If your project is a single-page application (SPA) and you have split the routes using dynamic import, this will significantly speed up the startup time.
### Server URL
Use [lazyCompilation.serverUrl](https://rspack.rs/config/experiments#lazycompilationserverurl) to tell the client the server URL that needs to be requested.
```ts title="rsbuild.config.ts"
export default {
dev: {
lazyCompilation: {
serverUrl: 'http://localhost:',
},
},
};
```
:::tip
Rsbuild will replace the `` placeholder with the actual port number the server is listening on.
:::
## Version history
| Version | Changes |
| ------- | ------------------------------------------------------------------------- |
| v1.3.0 | Added this option |
| v1.5.0 | Changed default value from `false` to `{ imports: true, entries: false }` |
---
url: /config/dev/live-reload.md
---
# dev.liveReload
- **Type:** `boolean`
- **Default:** `true`
Whether to reload the page when source files are changed.
By default, Rsbuild uses HMR as the preferred method to update modules. If HMR is disabled or cannot be used in certain scenarios, it will automatically fallback to liveReload.
Please refer to [Hot Module Replacement](/guide/advanced/hmr) for more information.
## Disabling live reload
To disable live reload, set both `dev.hmr` and `dev.liveReload` to `false`. Then, no WebSocket requests will be made to the dev server on the page, and the page will not automatically refresh when files change.
```ts title="rsbuild.config.ts"
export default {
dev: {
hmr: false,
liveReload: false,
},
};
```
---
url: /config/dev/progress-bar.md
---
# dev.progressBar
- **Type:**
```ts
type ProgressBar =
| boolean
| {
id?: string;
};
```
- **Default:** `false`
Whether to render progress bars to display the build progress.
:::tip
In `@rsbuild/core < 1.4.0`, the progress bar is enabled by default in production mode.
:::
## Example
Enable the progress bar:
```ts title="rsbuild.config.ts"
export default {
dev: {
progressBar: true,
},
};
```
Disable the progress bar:
```ts title="rsbuild.config.ts"
export default {
dev: {
progressBar: false,
},
};
```
Only enable the progress bar in development mode:
```ts title="rsbuild.config.ts"
const isDev = process.env.NODE_ENV === 'development';
export default {
dev: {
progressBar: isDev,
},
};
```
## Customize the progress bar `id`
To modify the text displayed on the left side of the progress bar, set the `id` option:
```ts title="rsbuild.config.ts"
export default {
dev: {
progressBar: {
id: 'Some Text',
},
},
};
```
When using [environments](/guide/advanced/environments), you can set different progress bar `id` for different environments:
```ts title="rsbuild.config.ts"
export default {
environments: {
web: {
dev: {
progressBar: {
id: 'Web',
},
},
},
node: {
output: {
target: 'node',
},
dev: {
progressBar: {
id: 'Node',
},
},
},
},
};
```
---
url: /config/dev/setup-middlewares.md
---
# dev.setupMiddlewares
- **Type:**
```ts
type SetupMiddlewaresContext = {
sockWrite: (
type: string,
data?: string | boolean | Record,
) => void;
environments: EnvironmentAPI;
};
type SetupMiddlewaresFn = (
middlewares: {
unshift: (...handlers: RequestHandler[]) => void;
push: (...handlers: RequestHandler[]) => void;
},
context: SetupMiddlewaresContext,
) => void;
type SetupMiddlewares = SetupMiddlewaresFn | SetupMiddlewaresFn[];
```
- **Default:** `undefined`
- **Version:** `>= 1.4.0`
Used to add custom middleware to the dev server.
> See [Dev server - Middleware](/guide/basic/server#middleware) for more information.
## Basic usage
`setupMiddlewares` function receives a `middlewares` array, you can add custom middleware by `unshift` and `push` methods:
- Use `unshift` to prepend middleware to the array, executed earlier than the built-in middleware.
- Use `push` to append middleware to the array, executed later than the built-in middleware.
```ts title="rsbuild.config.ts"
export default {
dev: {
setupMiddlewares: (middlewares) => {
middlewares.unshift((req, res, next) => {
console.log('first');
next();
});
middlewares.push((req, res, next) => {
console.log('last');
next();
});
},
},
};
```
The middleware can be an async function:
```ts title="rsbuild.config.ts"
export default {
dev: {
setupMiddlewares: (middlewares) => {
middlewares.unshift(async (req, res, next) => {
await someAsyncOperation();
next();
});
},
},
};
```
`setupMiddlewares` also supports passing an array, each item of which is a function to set up middlewares:
```ts title="rsbuild.config.ts"
export default {
dev: {
setupMiddlewares: [
(middlewares) => {
// ...
},
(middlewares) => {
// ...
},
],
},
};
```
:::tip
In versions before Rsbuild 1.4.0, `setupMiddlewares` must pass an array.
:::
## Context object
The second parameter of the `setupMiddlewares` function is the `context` object, which provides some server context and APIs.
### environments
Provides Rsbuild's [environment API](/api/javascript-api/environment-api#environment-api), see [Dev server API - environments](/api/javascript-api/dev-server-api#environments) for more details.
```ts title="rsbuild.config.ts"
export default {
dev: {
setupMiddlewares: (middlewares, { environments }) => {
middlewares.unshift(async (req, _res, next) => {
const webStats = await environments.web.getStats();
console.log(webStats.toJson({ all: false }));
next();
});
},
},
};
```
### sockWrite
Sends some message to HMR client, see [Dev server API - sockWrite](/api/javascript-api/dev-server-api#sockwrite) for more details.
For example, if you send a `'static-changed'` message, the page will reload.
```ts title="rsbuild.config.ts"
export default {
dev: {
setupMiddlewares: (middlewares, { sockWrite }) => {
if (someCondition) {
sockWrite('static-changed');
}
},
},
};
```
---
url: /config/dev/watch-files.md
---
# dev.watchFiles
- **Type:**
```ts
type WatchFiles = {
paths: string | string[];
type?: 'reload-page' | 'reload-server';
// watch options for chokidar
options?: ChokidarOptions;
};
type WatchFilesConfig = WatchFiles | WatchFiles[];
```
- **Default:** `undefined`
Watch specified files and directories for changes. When a change is detected, it can trigger a page reload or restart the dev server.
## paths
- **Type:** `string | string[]`
- **Default:** `undefined`
Paths of the files or directories to watch, supports glob syntax. It can be a single path or an array of multiple paths.
- Watching a single file:
```ts title="rsbuild.config.ts"
export default {
dev: {
watchFiles: {
paths: 'public/demo.txt',
},
},
};
```
- Using glob to match multiple files:
```ts title="rsbuild.config.ts"
export default {
dev: {
watchFiles: {
paths: 'src/**/*.txt',
},
},
};
```
- Watching multiple file paths:
```ts title="rsbuild.config.ts"
export default {
dev: {
watchFiles: {
paths: ['src/**/*.txt', 'public/**/*'],
},
},
};
```
## type
- **Type:** `'reload-page' | 'reload-server'`
- **Default:** `'reload-page'`
Specifies whether to trigger a page reload or restart the dev server when a file changes.
### reload-page
`reload-page` means that when a file changes, the page in the browser will automatically reload. If the type is not explicitly specified, Rsbuild defaults to the `reload-page` behavior.
This can be used to watch changes to static assets, such as files in the [public directory](/config/server/public-dir).
```ts title="rsbuild.config.ts"
export default {
dev: {
watchFiles: {
type: 'reload-page',
paths: 'public/**/*',
},
},
};
```
> If both [dev.hmr](/config/dev/hmr) and [dev.liveReload](/config/dev/live-reload) are set to `false`, the page will not automatically reload.
### reload-server
`reload-server` means that the dev server will automatically restart when a file changes. This can be used to watch changes to configuration files, such as modules imported by your `rsbuild.config.ts` file.
For example, if you maintain some common configuration files in the `config` directory, such as `common.ts`, you may want the dev server to automatically restart when these files change. Example configuration:
```ts title="rsbuild.config.ts"
import { commonConfig } from './config/common';
export default {
...commonConfig,
dev: {
watchFiles: {
type: 'reload-server',
paths: ['./config/*.ts'],
},
},
};
```
Note that the reload-server functionality is provided by Rsbuild CLI. If you are using a custom server or a framework built on top of Rsbuild, this configuration is currently not supported.
## options
- **Type:** `ChokidarOptions`
- **Default:** `undefined`
`watchFiles` is implemented based on [chokidar v4](https://github.com/paulmillr/chokidar#api), and you can pass chokidar options through `options`.
```ts title="rsbuild.config.ts"
export default {
dev: {
watchFiles: {
paths: 'src/**/*.txt',
options: {
usePolling: false,
},
},
},
};
```
## Notes
`watchFiles` is not applicable for watching build dependency files. When an Rsbuild build starts, the underlying Rspack automatically watches all build dependencies. Any changes to these files will trigger a new build.
If you want to prevent some files from triggering a rebuild when they change, you can use Rspack's [watchOptions.ignored](https://rspack.rs/config/watch#watchoptionsignored) configuration item.
> See [HMR - File Watching](/guide/advanced/hmr#file-watching) for details.
---
url: /config/dev/write-to-disk.md
---
# dev.writeToDisk
- **Type:** `boolean | ((filename: string) => boolean)`
- **Default:** `false`
Controls whether the build output from development mode is written to disk.
:::tip
In development mode, Rsbuild stores the build outputs in memory on the dev server by default, rather than writing them to disk. This can reduce the overhead of fs operations. You can refer to [View Static Assets](/guide/basic/server#view-static-assets) to view all static assets generated in the current build.
:::
## Writing to disk
You can choose to write the build output to disk, which is usually used for inspecting the content of the build output or configuring proxy rules for static assets.
Simply set the `dev.writeToDisk` option to `true`:
```ts title="rsbuild.config.ts"
export default {
dev: {
writeToDisk: true,
},
};
```
:::tip
Setting `writeToDisk: true` is used for viewing the build output from development mode. It does not change the behavior of the dev server. When accessing files through a browser, the dev server will still read the file content from memory.
:::
## Matching specific files
You can also set `dev.writeToDisk` to a function to match only certain files. When the function returns `false`, the file will not be written; when it returns `true`, the file will be written to disk.
For example, to write files to disk while excluding hot-update temporary files:
```ts title="rsbuild.config.ts"
export default {
dev: {
writeToDisk: (file) => !file.includes('.hot-update.'),
},
};
```
---
url: /config/resolve/alias-strategy.md
---
# resolve.aliasStrategy
- **Type:** `'prefer-tsconfig' | 'prefer-alias'`
- **Default:** `'prefer-tsconfig'`
- **Version:** `>=1.1.7`
Set the strategy for path alias resolution, to control the priority relationship between the `paths` option in `tsconfig.json` and the [resolve.alias](/config/resolve/alias) option of Rsbuild.
:::tip
See [Path aliases](/guide/advanced/alias) for the differences between the `paths` option in `tsconfig.json` and the `resolve.alias` option of Rsbuild.
:::
## prefer-tsconfig
By default, `resolve.aliasStrategy` is set to `'prefer-tsconfig'`. In this case, both the `paths` option in `tsconfig.json` and the `alias` option in the bundler will take effect, but the `paths` option in tsconfig has a higher priority.
For example, if the following configurations are set at the same time:
- tsconfig paths:
```json title="tsconfig.json"
{
"compilerOptions": {
"paths": {
"@common/*": ["./src/common-1/*"]
}
}
}
```
- `resolve.alias`:
```ts title="rsbuild.config.ts"
export default {
resolve: {
alias: {
'@common': './src/common-2',
'@utils': './src/utils',
},
},
};
```
Since the tsconfig paths have a higher priority, the following will happen:
- `@common` will use the value defined in tsconfig paths, pointing to `./src/common-1`
- `@utils` will use the value defined in `resolve.alias`, pointing to `./src/utils`
## prefer-alias
If the value of `resolve.aliasStrategy` is set to `prefer-alias`, the `paths` option in `tsconfig.json` will only be used to provide TypeScript type definitions and will not affect the bundling result. In this case, the bundler will only read the `alias` option as the path alias.
```ts title="rsbuild.config.ts"
export default {
resolve: {
aliasStrategy: 'prefer-alias',
},
};
```
For example, if the following configurations are set at the same time:
- tsconfig paths:
```json title="tsconfig.json"
{
"compilerOptions": {
"paths": {
"@common/*": ["./src/common-1/*"],
"@utils/*": ["./src/utils/*"]
}
}
}
```
- `resolve.alias`:
```ts title="rsbuild.config.ts"
export default {
resolve: {
alias: {
'@common': './src/common-2',
},
},
};
```
Since the tsconfig paths are only used to provide types, only the `@common` alias will be effective, pointing to the `./src/common-2` directory.
In most cases, you do not need to use `prefer-alias`, but you can consider using it if you need to dynamically generate some alias configurations. For example, generating the `alias` option based on environment variables:
```ts title="rsbuild.config.ts"
export default {
resolve: {
alias: {
'@common':
process.env.NODE_ENV === 'production'
? './src/common-prod'
: './src/common-dev',
},
},
};
```
---
url: /config/resolve/alias.md
---
# resolve.alias
- **Type:**
```ts
type Alias = Record | Function;
```
- **Default:**
```ts
const defaultAlias = {
'@swc/helpers': path.dirname(require.resolve('@swc/helpers/package.json')),
};
```
- **Version:** `>=1.1.7`
Create aliases for module paths to simplify import paths or redirect module references.
For TypeScript projects, configure [compilerOptions.paths](https://typescriptlang.org/tsconfig#paths) in your `tsconfig.json` file. Rsbuild automatically recognizes these settings, so you don't need to configure `resolve.alias` separately. For more details, see [Path Aliases](/guide/advanced/alias).
:::tip
In versions prior to Rsbuild 1.1.7, you can use `source.alias` to set alias, but it will be removed in the next major version.
:::
## Basic usage
`resolve.alias` accepts an object where the `key` is the module path in your source code to replace, and the `value` is the target path for the module mapping.
```ts title="rsbuild.config.ts"
export default {
resolve: {
alias: {
'@common': './src/common',
},
},
};
```
With this configuration, importing `@common/Foo.tsx` in your code maps to `/src/common/Foo.tsx`.
## Function usage
`resolve.alias` can also be a function that receives the previous alias object, which you can modify:
```ts title="rsbuild.config.ts"
export default {
resolve: {
alias: (alias) => {
alias['@common'] = './src/common';
},
},
};
```
To remove the built-in `@swc/helpers` alias, delete it in the function:
```ts title="rsbuild.config.ts"
export default {
resolve: {
alias: (alias) => {
delete alias['@swc/helpers'];
},
},
};
```
You can also return a new object as the final result in the function, which will replace the preset alias object.
```ts title="rsbuild.config.ts"
export default {
resolve: {
alias: (alias) => {
return {
'@common': './src/common',
};
},
},
};
```
## Differences with Rspack
Rsbuild's `resolve.alias` is similar to Rspack's [resolve.alias](https://rspack.rs/config/resolve#resolvealias) configuration, but there are some differences:
- If the value of `resolve.alias` is a relative path, Rsbuild will automatically convert it to an absolute path to ensure that the path is relative to the project root.
```ts title="rsbuild.config.ts"
export default {
resolve: {
alias: {
// Will be converted to `/src/common`
'@common': './src/common',
},
},
};
```
- Rsbuild additionally supports the function type.
## Set by environment
When you build for multiple [environments](/config/environments), you can set different alias for each environment:
For example, set different alias for `web` and `node` environments:
```ts title="rsbuild.config.ts"
export default {
environments: {
web: {
resolve: {
alias: {
'@common': './src/web/common',
},
},
output: {
target: 'web',
},
},
node: {
resolve: {
alias: {
'@common': './src/node/common',
},
},
output: {
target: 'node',
},
},
},
};
```
## Exact matching
By default, `resolve.alias` will automatically match sub-paths, for example, with the following configuration:
```ts title="rsbuild.config.ts"
import path from 'node:path';
export default {
resolve: {
alias: {
'@common': './src/common',
},
},
};
```
It will match as follows:
```ts
import a from '@common'; // resolved to `./src/common`
import b from '@common/util'; // resolved to `./src/common/util`
```
You can add the `$` symbol to enable exact matching, which will not automatically match sub-paths.
```ts title="rsbuild.config.ts"
import path from 'node:path';
export default {
resolve: {
alias: {
'@common$': './src/common',
},
},
};
```
It will match as follows:
```ts
import a from '@common'; // resolved to `./src/common`
import b from '@common/util'; // remains as `@common/util`
```
## Handling npm packages
You can use `alias` to resolve an npm package to a specific directory.
For example, if multiple versions of the `react` are installed in the project, you can alias `react` to the version installed in the root `node_modules` directory to avoid bundling multiple copies of the React code.
```ts title="rsbuild.config.ts"
import path from 'node:path';
export default {
resolve: {
alias: {
react: path.resolve(__dirname, './node_modules/react'),
},
},
};
```
When using alias to handle npm packages, please be aware of whether different major versions of the package are being used in the project.
For example, if a module or npm dependency in your project uses the React 19 API, and you alias React to version 17, the module will not be able to reference the React 19 API, resulting in code exceptions.
## Handling loader
`resolve.alias` does not support creating aliases for loaders.
To create aliases for loaders, use Rspack's [resolveLoader](https://rspack.rs/config/resolve-loader) configuration.
```ts title="rsbuild.config.ts"
export default {
tools: {
rspack: {
resolveLoader: {
alias: {
'amazing-loader': require.resolve('path-to-your-amazing-loader'),
},
},
},
},
};
```
---
url: /config/resolve/condition-names.md
---
# resolve.conditionNames
- **Type:** `string[]`
- **Default:** Same as Rspack's [resolve.conditionNames](https://rspack.rs/config/resolve#resolveconditionnames)
- **Version:** `>= 1.5.7`
Specifies the condition names used to match entry points in the [`exports` field](https://nodejs.org/api/packages.html#packages_exports) of a package.
## Example
The value of `resolve.conditionNames` overrides the default value of Rsbuild:
```js title="rsbuild.config.ts"
export default {
resolve: {
conditionNames: ['require', 'node'],
},
};
```
## Rspack config
`resolve.conditionNames` is provided by Rspack, see [Rspack - resolve.conditionNames](https://rspack.rs/config/resolve#resolveconditionnames).
You can also configure it using [tools.rspack](/config/tools/rspack):
```ts title="rsbuild.config.ts"
export default {
tools: {
rspack: {
resolve: {
conditionNames: ['custom'],
},
},
},
};
```
The difference between them is how the configuration is merged.
`tools.rspack` merges the configuration arrays based on [webpack-merge](https://github.com/survivejs/webpack-merge), which means `tools.rspack.resolve.conditionNames` will merge with the default value of Rsbuild, rather than overriding it.
---
url: /config/resolve/dedupe.md
---
# resolve.dedupe
- **Type:** `string[]`
- **Default:** `undefined`
- **Version:** `>= 1.1.7`
Force Rsbuild to resolve the specified packages from project root, which is useful for deduplicating packages and reducing the bundle size.
## Example
For example, assume your project is based on React 19, and you are using the `foo` package that depends on React 17, then your project will have two different versions of React:
```
app/
├── src/
└── node_modules/
├── foo/
│ └── node_modules/
│ ├── react (v17)
│ └── react-dom (v17)
├── react (v19)
└── react-dom (v19)
```
In this case, you can use the `resolve.dedupe` config to remove the duplicate React packages, and resolve all `react` and `react-dom` packages to `/node_modules/react` and `/node_modules/react-dom`:
```ts title="rsbuild.config.ts"
export default defineConfig({
resolve: {
dedupe: ['react', 'react-dom'],
},
});
```
Note that using `resolve.dedupe` to unify different major versions of a package may cause some packages to fail because they may depend on specific versions of APIs or features.
For example, if `foo` depends on a React 17-specific API or feature, then unifying React 17 and React 19 with React 19 using `resolve.dedupe` may cause `foo` to fail.
## How it works
`resolve.dedupe` is implemented based on [resolve.alias](/config/resolve/alias), it will get the path of the specified package through `require.resolve` in the project root directory and set it to the alias.
In the above example, `resolve.dedupe` will be converted to the following alias config:
```ts
const alias = {
react: '/app/node_modules/react',
'react-dom': '/app/node_modules/react-dom',
};
```
The alias generated by `resolve.dedupe` will be merged with the configured `resolve.alias` in the project, and the `resolve.alias` config will take precedence when the keys are the same.
---
url: /config/resolve/extensions.md
---
# resolve.extensions
- **Type:** `string[]`
- **Default:** `['.ts', '.tsx', '.mjs', '.js', '.jsx', '.json']`
- **Version:** `>= 1.1.9`
Automatically resolve file extensions when importing modules. This means you can import files without explicitly writing their extensions.
For example, if importing `'./index'`, Rsbuild will try to resolve using the following order:
- `./index.ts`
- `./index.tsx`
- `./index.mjs`
- `./index.js`
- `./index.jsx`
- `./index.json`
:::tip
It is not recommended to omit `.vue` or other custom import extension names using `resolve.extensions`, as this may interfere IDE and type support.
:::
## Example
The value of `resolve.extensions` overrides the default value of Rsbuild:
```ts title="rsbuild.config.ts"
export default {
resolve: {
extensions: ['.ts', '.tsx', '.js'],
},
};
```
## Rspack config
`resolve.extensions` is provided by Rspack, see [Rspack - resolve.extensions](https://rspack.rs/config/resolve#resolveextensions).
You can also configure it using [tools.rspack](/config/tools/rspack):
```ts title="rsbuild.config.ts"
export default {
tools: {
rspack: {
resolve: {
extensions: ['.ts', '.tsx', '.js'],
},
},
},
};
```
The difference between them is how the configuration is merged.
`tools.rspack` merges the configuration arrays based on [webpack-merge](https://github.com/survivejs/webpack-merge), which means `tools.rspack.resolve.extensions` will merge with the default value of Rsbuild, rather than overriding it.
---
url: /config/resolve/main-fields.md
---
# resolve.mainFields
- **Type:** `string[]`
- **Version:** `>= 1.5.9`
Controls the priority of fields in a package.json used to locate a package's entry file. It is the ordered list of package.json fields Rspack will try when resolving an npm package's entry point.
:::tip
`resolve.mainFields` is provided by Rspack, see [Rspack - resolve.mainFields](https://rspack.rs/config/resolve#resolvemainfields) to learn more.
:::
## Default values
- If [output.target](/config/output/target) is `'web'`, `'web-worker'`, or not specified, the default value is `["browser", "module", "main"]`.
- If [output.target](/config/output/target) is `'node'`, the default value is `["module", "main"]`.
## Basic example
The value of `resolve.mainFields` overrides the default value of Rsbuild:
```js title="rsbuild.config.ts"
export default {
resolve: {
mainFields: ['custom', 'module', 'main'],
},
};
```
## Multi-environments
Configure different `mainFields` for different [environments](/config/environments):
```js title="rsbuild.config.ts"
export default {
environments: {
web: {
resolve: {
mainFields: ['custom', 'browser', 'module', 'main'],
},
},
node: {
resolve: {
mainFields: ['custom', 'module', 'main'],
},
},
},
};
```
---
url: /config/source/assets-include.md
---
# source.assetsInclude
- **Type:** [Rspack.RuleSetCondition](https://rspack.rs/config/module-rules#condition)
- **Default:** `undefined`
- **Version:** `>= 1.0.18`
Include additional files that should be treated as static assets.
By default, Rsbuild treats common image, font, audio, and video files as static assets. Through the `source.assetsInclude` config, you can specify additional file types that should be treated as static assets. These added static assets are processed using the same rules as the built-in supported static assets, see [Static Assets](/guide/basic/static-assets).
The value of `source.assetsInclude` is the same as the `test` option in Rspack loader. It can be a regular expression, string, array, logical condition, etc. For more details, see [Rspack RuleSetCondition](https://rspack.rs/config/module-rules#condition).
## Example
- Treating `.json5` files as static assets:
```ts
export default defineConfig({
source: {
assetsInclude: /\.json5$/,
},
});
```
- Treating multiple file types as static assets:
```ts
export default defineConfig({
source: {
assetsInclude: [/\.json5$/, /\.pdf$/],
},
});
```
- Treating specific files as static assets:
```ts
import path from 'node:path';
export default defineConfig({
source: {
assetsInclude: path.resolve(__dirname, 'src/assets/foo.json5'),
},
});
```
---
url: /config/source/decorators.md
---
# source.decorators
- **Type:**
```ts
type Decorators = {
version?: 'legacy' | '2022-03';
};
```
Used to configure the decorators syntax.
## decorators.version
- **Type:** `'legacy' | '2022-03'`
- **Default:** `'2022-03'`
Specify the decorator syntax version to be used.
If you want to know the differences between different decorators versions, you can refer to: [How does this proposal compare to other versions of decorators?](https://github.com/tc39/proposal-decorators?tab=readme-ov-file#how-does-this-proposal-compare-to-other-versions-of-decorators)
### 2022-03
`2022-03` corresponds to the Stage 3 decorator proposal, equivalent to the decorator syntax supported by TypeScript 5.0 by default.
```ts title="rsbuild.config.ts"
export default {
source: {
decorators: {
version: '2022-03',
},
},
};
```
Reference documentation:
- [JavaScript meta programming with the 2022-03 decorators API](https://2ality.com/2022/10/javascript-decorators.html)
- [TypeScript 5.0 Decorators](https://typescriptlang.org/docs/handbook/release-notes/typescript-5-0.html#decorators)
### legacy
Equivalent to TypeScript's `experimentalDecorators: true`.
```ts title="rsbuild.config.ts"
export default {
source: {
decorators: {
version: 'legacy',
},
},
};
```
Reference documentation:
- [A Complete Guide to TypeScript Decorators](https://mirone.me/a-complete-guide-to-typescript-decorator/)
- [TypeScript Decorators](https://typescriptlang.org/docs/handbook/decorators.html)
---
url: /config/source/define.md
---
# source.define
- **Type:** `Record`
- **Default:** `{}`
Replaces variables in your code with other values or expressions at compile time. This enables different behavior between development and production builds.
Each configuration key represents an identifier or multiple identifiers joined with `.`:
- String values are used as code fragments.
- Other types (including functions) are stringified.
- Object values define all keys the same way.
- Keys prefixed with `typeof` are only defined for typeof calls.
> For more usage, see [Using define](/guide/advanced/env-vars#using-define) and [Rspack - DefinePlugin](https://rspack.rs/plugins/webpack/define-plugin).
## Example
```ts title="rsbuild.config.ts"
export default {
source: {
define: {
PRODUCTION: JSON.stringify(true),
VERSION: JSON.stringify('5fa3b9'),
BROWSER_SUPPORTS_HTML5: true,
TWO: '1 + 1',
'typeof window': JSON.stringify('object'),
'process.env.NODE_ENV': JSON.stringify(process.env.NODE_ENV),
'import.meta.test': JSON.stringify('foo'),
},
},
};
```
Expressions are replaced with the corresponding code fragments:
```js
const foo = TWO;
// ⬇️ Turns into
const foo = 1 + 1;
```
---
url: /config/source/entry.md
---
# source.entry
- **Type:**
```ts
type Entry = Record<
string,
string | string[] | (Rspack.EntryDescription & { html?: boolean })
>;
```
- **Default:**
```ts
const defaultEntry = {
// Rsbuild also supports other suffixes by default, such as ts, tsx, jsx, mts, cts, mjs, cjs
index: './src/index.js',
};
```
Set the entry modules for building.
`source.entry` is an object where the key is the entry name and the value is the path of the entry module or a [description object](#description-object).
If the value is a path, it can be an absolute path or a relative path. Relative paths will be resolved based on [root](/config/root).
## HTML generation
Rsbuild will register [html-rspack-plugin](https://github.com/rspack-contrib/html-rspack-plugin) for each entry in `source.entry` and generate the corresponding HTML files.
- **Example:**
```ts title="rsbuild.config.ts"
export default {
source: {
entry: {
foo: './src/pages/foo/index.ts', // generate foo.html
bar: './src/pages/bar/index.ts', // generate bar.html
},
},
};
```
The generated directory structure is as follows:
```
.
├── foo.html
├── bar.html
└── static
├── css
│ ├── foo.css
│ └── bar.css
└── js
├── foo.js
└── bar.js
```
If you do not need to generate HTML files:
- Set the [html](/config/source/entry#html-property) property to `false` in the entry description object to disable the HTML generation for a single entry.
- Set [tools.htmlPlugin](/config/tools/html-plugin) to `false` to disable the HTML generation for all entries.
## Description object
`source.entry` also supports Rspack's entry description object. For example:
```ts title="rsbuild.config.ts"
export default {
source: {
entry: {
foo: {
import: './src/foo.js',
runtime: 'foo',
},
bar: {
import: './src/bar.js',
runtime: 'bar',
},
},
},
};
```
### `html` property
Rsbuild has added an `html` property to the description object that controls whether an HTML file is generated.
For example, the `bar` entry does not generate an HTML file:
```ts title="rsbuild.config.ts"
export default {
source: {
entry: {
foo: './src/foo.js',
bar: {
import: './src/bar.js',
html: false,
},
},
},
};
```
In the above example, `foo.html` will be generated, while `bar.html` will not be generated.
> For detailed usage of the description object, refer to [Rspack - Entry description object](https://rspack.rs/config/entry#entry-description-object).
## Set by environment
When you build for multiple [environments](/config/environments), you can set different entry for each environment:
For example, set different entry for `web` and `node` environments:
```ts title="rsbuild.config.ts"
export default {
environments: {
web: {
source: {
entry: {
index: './src/index.client.js',
},
},
output: {
target: 'web',
},
},
node: {
source: {
entry: {
index: './src/index.server.js',
},
},
output: {
target: 'node',
},
},
},
};
```
## Asynchronous setting
To set entry asynchronously, for example, use [glob](https://npmjs.com/package/glob) to scan the directory, you can export an async function in `rsbuild.config.ts`:
```ts title="rsbuild.config.ts"
import path from 'node:path';
import { glob } from 'glob';
import { defineConfig } from '@rsbuild/core';
export default defineConfig(async () => {
const entryFiles = await glob('./src/**/main.{ts,tsx,js,jsx}');
const entry = Object.fromEntries(
entryFiles.map((file) => {
const entryName = path.basename(path.dirname(file));
return [entryName, `./${file}`];
}),
);
return {
source: {
entry: entry,
},
};
});
```
---
url: /config/source/exclude.md
---
# source.exclude
- **Type:** [Rspack.RuleSetCondition](https://rspack.rs/config/module-rules#condition)
- **Default:** `[]`
Exclude JavaScript or TypeScript files that do not need to be compiled by [SWC](/guide/configuration/swc).
## Usage
The usage of `source.exclude` is similar to [source.include](/config/source/include), supporting passing in strings or regular expressions to match the module path.
For example:
```ts title="rsbuild.config.ts"
import path from 'node:path';
export default {
source: {
exclude: [path.resolve(__dirname, 'src/module-a'), /src\/module-b/],
},
};
```
> See [source.include](/config/source/include) to learn more usages.
## Priority
When both `source.include` and `source.exclude` are set, `source.exclude` has higher priority.
For example, in the following example, although `source.include` matches the entire `src` directory, JavaScript files in the `src/foo` directory will not be compiled by SWC:
```ts title="rsbuild.config.ts"
import path from 'node:path';
export default {
source: {
include: [path.resolve(__dirname, 'src')],
exclude: [path.resolve(__dirname, 'src/foo')],
},
};
```
## Exclude from bundling
`source.exclude` specifies JavaScript/TypeScript files that do not need to be compiled. These files will not be transformed by SWC, but referenced files will still be bundled into the outputs.
If you want certain files to be excluded and not bundled into the outputs, you can use Rspack's [IgnorePlugin](https://rspack.rs/plugins/webpack/ignore-plugin).
```ts title="rsbuild.config.ts"
export default {
tools: {
rspack: (config, { rspack }) => {
config.plugins.push(
new rspack.IgnorePlugin({
resourceRegExp: /^\.\/locale$/,
contextRegExp: /moment$/,
}),
);
return config;
},
},
};
```
---
url: /config/source/include.md
---
# source.include
- **Type:** [Rspack.RuleSetCondition](https://rspack.rs/config/module-rules#condition)
Specify additional JavaScript files that need to be compiled by [SWC](/guide/configuration/swc).
## Default value
By default, Rsbuild's built-in [swc-loader](https://rspack.rs/guide/features/builtin-swc-loader) compiles the following files:
- TypeScript and JSX files in any directory, matching file extensions `.ts`, `.tsx`, `.jsx`, `.mts`, `.cts`.
- JavaScript files that are not in the `node_modules` directory, matching file extensions `.js`, `.mjs`, `.cjs`.
The default value of `source.include` can be expressed as:
```ts
const defaultInclude = [
{ not: /[\\/]node_modules[\\/]/ },
/\.(?:ts|tsx|jsx|mts|cts)$/,
];
```
## Usage
Through the `source.include` configuration, you can specify directories or modules that need to be compiled by Rsbuild. The usage of `source.include` is consistent with [rules[].include](https://rspack.rs/config/module-rules#rulesinclude) in Rspack, which supports passing in strings or regular expressions to match the module path.
For example:
```ts title="rsbuild.config.ts"
import path from 'node:path';
export default {
source: {
include: [path.resolve(__dirname, '../other-dir')],
},
};
```
## Compile npm packages
A typical usage scenario is to compile npm packages under node_modules, because some third-party dependencies have ESNext syntax, which may cause them to fail to run on older browsers. You can solve this problem by using this configuration to specify the dependencies that need to be compiled.
:::tip
If you are unsure which third-party dependencies in node_modules contain ESNext syntax, you can use the [@rsbuild/plugin-check-syntax](https://github.com/rspack-contrib/rsbuild-plugin-check-syntax) for checking. The plugin can help you find the modules that contain ESNext syntax.
:::
Take `query-string` as an example, you can add the following configuration:
```ts title="rsbuild.config.ts"
import path from 'node:path';
export default {
source: {
include: [
// Method 1:
// Match by regular expression
// All paths containing `node_modules/query-string/` will be matched
/node_modules[\\/]query-string[\\/]/,
// Method 2:
// First get the path of the module by require.resolve
// Then pass path.dirname to point to the corresponding directory
path.dirname(require.resolve('query-string')),
],
},
};
```
The above two methods match the absolute paths of files using "path prefixes" and "regular expressions" respectively. It is worth noting that all referenced modules in the project will be matched. Therefore, you should avoid using overly loose values for matching to prevent compilation performance issues or compilation errors.
:::tip
In the regular expression example, we use `[\\/]` to match the path separator because different operating systems use different path separators. Using `[\\/]` ensures that the paths can be matched on macOS, Linux and Windows.
:::
## Compile sub dependencies
When you compile an npm package via `source.include`, Rsbuild will only compile the matching module by default, not the **Sub Dependencies** of the module.
Take `query-string` for example, it depends on the `decode-uri-component` package, which also has ESNext code, so you need to add the `decode-uri-component` package to `source.include` as well.
```ts title="rsbuild.config.ts"
export default {
source: {
include: [
/node_modules[\\/]query-string[\\/]/,
/node_modules[\\/]decode-uri-component[\\/]/,
],
},
};
```
## Matching symlink
If you match a module that is symlinked to the current project, then you need to match the **real path** of the module, not the symlinked path.
For example, if you symlink the `packages/foo` path in Monorepo to the `node_modules/foo` path of the current project, you need to match the `packages/foo` path, not the `node_modules/foo` path.
## Compile node_modules
In general, `source.include` should not be used to compile the entire `node_modules` directory. For example, the following configuration is not recommended:
```ts title="rsbuild.config.ts"
export default {
source: {
include: [/[\\/]node_modules[\\/]/],
},
};
```
This is because most of the npm packages in `node_modules` are already compiled, and it is usually unnecessary to recompile them. Compiling the entire `node_modules` will increase compilation time and may cause unexpected errors in certain npm packages, such as `core-js`, which may result in runtime exceptions after compilation.
If you are willing to accept the increase in compilation time, you can use the following configuration to compile all JavaScript files but exclude `core-js':
```ts title="rsbuild.config.ts"
export default {
source: {
include: [{ not: /[\\/]core-js[\\/]/ }],
},
};
```
---
url: /config/source/pre-entry.md
---
# source.preEntry
- **Type:** `string | string[]`
- **Default:** `undefined`
Add a script before the entry file of each page. This script will be executed before the page code. Use this to execute global logic, such as injecting polyfills, setting global styles, etc.
## Add a single script
First create a `src/polyfill.ts` file:
```js
console.log('I am a polyfill');
```
Then configure `src/polyfill.ts` to `source.preEntry`:
```ts title="rsbuild.config.ts"
export default {
source: {
preEntry: './src/polyfill.ts',
},
};
```
Re-run the compilation and visit any page. You can see that the code in `src/polyfill.ts` has been executed, and `I am a polyfill` is logged in the console.
## Add global style
You can also configure global styles using `source.preEntry`. This CSS code will be loaded earlier than the page code, such as introducing a `normalize.css` file:
```ts title="rsbuild.config.ts"
export default {
source: {
preEntry: './src/normalize.css',
},
};
```
## Add multiple scripts
You can add multiple scripts by setting `preEntry` to an array, and they will be executed in array order:
```ts title="rsbuild.config.ts"
export default {
source: {
preEntry: ['./src/polyfill-a.ts', './src/polyfill-b.ts'],
},
};
```
---
url: /config/source/transform-import.md
---
# source.transformImport
- **Type:**
```ts
type TransformImport =
| Array<{
libraryName: string;
libraryDirectory?: string;
style?: string | boolean;
styleLibraryDirectory?: string;
camelToDashComponentName?: boolean;
transformToDefaultImport?: boolean;
customName?: string;
customStyleName?: string;
}>
| Function;
```
- **Default:** `undefined`
Transform the import path to modularly import subpaths of third-party packages. The functionality is similar to [babel-plugin-import](https://npmjs.com/package/babel-plugin-import).
## Example
### Import antd on demand
When using the [antd](https://github.com/ant-design/ant-design) component library (versions below v5), you can import components on demand with this config:
```ts title="rsbuild.config.ts"
export default {
source: {
transformImport: [
{
libraryName: 'antd',
libraryDirectory: 'es',
style: 'css',
},
],
},
};
```
The source code is:
```js
import { Button } from 'antd';
```
Will be transformed into:
```js
import Button from 'antd/es/button';
import 'antd/es/button/style';
```
### Import lodash on demand
When using lodash, you can automatically refer to the subpath through `transformImport` to reduce bundle size.
```ts title="rsbuild.config.ts"
export default {
source: {
transformImport: [
{
libraryName: 'lodash',
customName: 'lodash/{{ member }}',
},
],
},
};
```
The source code is:
```js
import { get } from 'lodash';
```
Will be transformed to:
```js
import get from 'lodash/get';
```
Please avoid the following usage, otherwise all of lodash's code will be imported:
```js
import _ from 'lodash';
import lodash from 'lodash';
```
## Scope
`transformImport` is only applicable to modules compiled by Rsbuild. Note that Rsbuild does not compile JavaScript files in the node_modules by default. This means that the code in the node_modules directory will not be processed by `transformImport`.
If you want to process the code in node_modules through `transformImport`, please add the relevant modules to the [source.include](/config/source/include) config.
```ts title="rsbuild.config.ts"
export default {
source: {
include: [/node_modules[\\/]some-package[\\/]/],
},
};
```
## Options
### libraryName
- **Type:** `string`
The original import path that needs to be transformed.
### libraryDirectory
- **Type:** `string`
- **Default:** `'lib'`
Constructs the transformed path by concatenating `${libraryName}/${libraryDirectory}/${member}`, where member is the imported member.
Example:
```ts
import { Button } from 'foo';
```
Out:
```ts
import Button from 'foo/lib/button';
```
### style
- **Type:** `boolean`
- **Default:** `undefined`
Determines whether to import related styles. If it is `true`, the path `${libraryName}/${libraryDirectory}/${member}/style` will be imported. If it is `false` or `undefined`, the style will not be imported.
When it is set to `true`:
```ts
import { Button } from 'foo';
```
Out:
```ts
import Button from 'foo/lib/button';
import 'foo/lib/button/style';
```
### styleLibraryDirectory
- **Type:** `string`
- **Default:** `undefined`
Constructs the import path when importing styles. If this configuration is specified, the `style` configuration option will be ignored. The constructed import path is `${libraryName}/${styleLibraryDirectory}/${member}`.
When it is set to `styles`:
```ts
import { Button } from 'foo';
```
Out:
```ts
import Button from 'foo/lib/button';
import 'foo/styles/button';
```
### camelToDashComponentName
- **Type:** `boolean`
- **Default:** `true`
Whether to convert camelCase imports to kebab-case.
Example:
```ts
import { ButtonGroup } from 'foo';
```
Out:
```ts
// set to true:
import ButtonGroup from 'foo/button-group';
// set to false:
import ButtonGroup from 'foo/ButtonGroup';
```
### transformToDefaultImport
- **Type:** `boolean`
- **Default:** `true`
Whether to convert import statements to default imports.
Example:
```ts
import { Button } from 'foo';
```
Out:
```ts
// set to true:
import Button from 'foo/button';
// set to false:
import { Button } from 'foo/button';
```
### customName
- **Type:** `string`
- **Default:** `undefined`
Customize the transformed path.
For example, the following config will transform `import { foo } from 'my-lib'` into `import foo from 'my-lib/foo'`.
```ts title="rsbuild.config.ts"
export default {
source: {
transformImport: [
{
libraryName: 'my-lib',
customName: `my-lib/{{ member }}`,
},
],
},
};
```
In addition, you can also declare the format of the path after transformation, for example setting it to `my-lib/{{ camelCase member }}` to convert member into camel case.
The following formats are supported:
- `kebabCase`: lowercase letters, words joined by hyphens. For example: `my-variable-name`.
- `snakeCase`: lowercase letters, words joined by underscores. For example: `my_variable_name`.
- `camelCase`: first letter lowercase, the first letter of each following word uppercase. For example: `myVariableName`.
- `upperCase`: uppercase letters, other characters unchanged. For example: `MY-VARIABLE-NAME`.
- `lowerCase`: lowercase letters, other characters unchanged. For example: `my-variable-name`.
### customStyleName
- **Type:** `string`
- **Default:** `undefined`
Customize the transformed style path, the usage is consistent with `customName`.
## Function type
The `transformImport` can be a function, it will accept the previous value, and you can modify it.
```ts title="rsbuild.config.ts"
export default {
source: {
transformImport: (imports) => {
return imports.filter((data) => data.libraryName !== 'antd');
},
},
};
```
You can also return a new value as the final result in the function, which will replace the previous value.
```ts title="rsbuild.config.ts"
export default {
source: {
transformImport: () => {
return [
{
libraryName: 'antd',
libraryDirectory: 'es',
style: 'css',
},
];
},
},
};
```
---
url: /config/source/tsconfig-path.md
---
# source.tsconfigPath
- **Type:** `string`
- **Default:** `'tsconfig.json'`
Configure a custom tsconfig.json file path to use, can be a relative or absolute path.
## Purpose
The `tsconfig.json` configuration file affects the following behaviors of Rsbuild:
- The `paths` field configures [Path Aliases](/guide/advanced/alias).
- Sets the scope and rules for the [@rsbuild/plugin-type-check](https://github.com/rspack-contrib/rsbuild-plugin-type-check).
## Example
The value of `source.tsconfigPath` can be set to a relative or an absolute path. Relative path will be resolved relative to the project root directory.
- Relative path example:
```ts title="rsbuild.config.ts"
export default {
source: {
tsconfigPath: './tsconfig.custom.json',
},
};
```
- Absolute path example:
```ts
import path from 'node:path';
export default {
source: {
tsconfigPath: path.join(__dirname, 'tsconfig.custom.json'),
},
};
```
---
url: /config/output/asset-prefix.md
---
# output.assetPrefix
- **Type:** `string | 'auto'`
- **Default:** [server.base](/config/server/base)
In [production mode](/config/mode), use this option to configure the URL prefix for static assets, such as a CDN URL.
`assetPrefix` affects the URLs of most static assets, including JavaScript files, CSS files, images, videos, etc. If it is set incorrectly, these resources may return 404 errors.
This configuration is only used in `production` mode or `none` mode. In `development` mode, use [dev.assetPrefix](/config/dev/asset-prefix) to configure the URL prefix.
## Example
Setting `output.assetPrefix` will add the value as a prefix to the URLs of all static assets like JavaScript, CSS, images, etc.
- For example, setting it to a CDN address:
```ts title="rsbuild.config.ts"
export default {
output: {
assetPrefix: 'https://cdn.example.com/assets/',
},
};
```
After the build, the URL of the JS bundle in the HTML file will be:
```html
```
- Setting it to a relative path:
```ts title="rsbuild.config.ts"
export default {
output: {
assetPrefix: './',
},
};
```
After the build, the URL of the JS bundle in the HTML file will be:
```html
```
## Default value
The default value of `output.assetPrefix` is the same as [server.base](/config/server/base).
When `server.base` is `/foo`, `index.html` and static assets can be accessed through `http://localhost:3000/foo/`.
When you customize `output.assetPrefix`, keep its URL prefix consistent with `server.base` so assets load correctly during [Rsbuild preview](/guide/basic/cli#rsbuild-preview). For example:
```ts title="rsbuild.config.ts"
export default {
output: {
assetPrefix: '/foo/bar/',
},
server: {
base: '/foo',
},
};
```
## Path types
The `assetPrefix` option accepts the following path types:
- **absolute path**: The most common choice, including specific server paths like `/assets/` or CDN paths like `https://cdn.example.com/assets/`.
- **relative path**: For example, `./assets/`.
- **'auto'**: Rspack will automatically calculate the path and generate relative paths based on file location.
:::tip
It's not recommended to set assetPrefix as a relative path like `'./assets/'`. This is because when assets are at different path depths, using relative paths may cause assets to load incorrectly.
:::
## Compare with `publicPath`
The functionality of `output.assetPrefix` is basically the same as the [output.publicPath](https://rspack.rs/config/output#outputpublicpath) config in Rspack.
Key differences from the native configuration:
- `output.assetPrefix` only takes effect in production mode.
- `output.assetPrefix` default value is the same as [server.base](/config/server/base).
- `output.assetPrefix` automatically appends a trailing `/` by default.
- The value of `output.assetPrefix` is added to the [process.env.ASSET_PREFIX](/guide/advanced/env-vars#processenvasset_prefix) environment variable (can only be accessed in client code).
## Dynamic asset prefix
Use the `__webpack_public_path__` variable provided by Rspack to dynamically set the URL prefix of static assets in JavaScript code.
See [Rspack - Dynamically set publicPath](https://rspack.rs/config/output#dynamically-set-publicpath).
---
url: /config/output/charset.md
---
# output.charset
- **Type:** `'ascii' | 'utf8'`
- **Default:** `'utf8'`
The `charset` config sets the [character encoding](https://developer.mozilla.org/en-US/docs/Glossary/Character_encoding) for output files, ensuring they display correctly across different environments.
## UTF8
By default, Rsbuild outputs files encoded in [UTF-8](https://developer.mozilla.org/en-US/docs/Glossary/UTF-8), the most common character encoding for web applications.
```ts title="rsbuild.config.ts"
export default {
output: {
charset: 'utf8', // This is the default
},
};
```
When your web server returns resources, ensure it sends the correct [Content-Type](https://developer.mozilla.org/en-US/docs/Web/HTTP/Headers/Content-Type) response header so browsers can parse them correctly.
## ASCII
To use [ASCII](https://developer.mozilla.org/en-US/docs/Glossary/ASCII) encoding for output files, configure it like this:
```ts title="rsbuild.config.ts"
export default {
output: {
charset: 'ascii',
},
};
```
With ASCII encoding, all non-ASCII characters are escaped with backslashes, making files slightly larger and harder to read.
## Notes
The `charset` option only affects files compiled with [SWC](/guide/configuration/swc), which includes JavaScript and TypeScript files by default. HTML and CSS files are not affected by this option.
For HTML files, Rsbuild adds a `` tag by default. You can change this using the [html.meta](/config/html/meta) option.
---
url: /config/output/clean-dist-path.md
---
# output.cleanDistPath
- **Type:**
```ts
type CleanDistPath = boolean | 'auto' | CleanDistPathObject;
```
- **Default:** `'auto'`
Configure whether to clean all files in the output directory before the build starts. The output directory is the [output.distPath.root](/config/output/dist-path) directory.
## Default behavior
The default value of `output.cleanDistPath` is `'auto'`:
- In development mode, if [dev.writeToDisk](/config/dev/write-to-disk) is `false`, Rsbuild will not perform cleanup.
- In any mode, if [output.distPath.root](/config/output/dist-path) is an external directory or equals the project root directory, Rsbuild will not perform cleanup to avoid accidentally deleting files from other directories.
```ts title="rsbuild.config.ts"
export default {
output: {
distPath: {
root: '../../some-dir',
},
},
};
```
## Forced switch
Set `cleanDistPath` to `true` to force enable it, or `false` to force disable it.
```ts title="rsbuild.config.ts"
export default {
output: {
cleanDistPath: true,
},
};
```
## Conditional
To clean files only in production mode and not in development mode, configure it as:
```ts title="rsbuild.config.ts"
export default {
output: {
cleanDistPath: process.env.NODE_ENV === 'production',
},
};
```
## Options
`output.cleanDistPath` supports configuration as an object to achieve more granular control.
### enable
- **Type:** `boolean | 'auto'`
- **Default:** `'auto'`
Whether to clean up all files in the output directory before the build starts.
```ts title="rsbuild.config.ts"
export default {
output: {
// Equivalent to `cleanDistPath: true`
cleanDistPath: {
enable: true,
},
},
};
```
### keep
- **Type:** `RegExp[]`
- **Default:** `undefined`
Specify the files to keep in the output directory. If the file's absolute path matches the regular expression in `keep`, the file will not be removed.
For example, to keep the `dist/foo.json` file:
```ts title="rsbuild.config.ts"
export default {
output: {
cleanDistPath: {
keep: [/dist\/foo.json/],
},
},
};
```
---
url: /config/output/copy.md
---
# output.copy
- **Type:** `Rspack.CopyRspackPluginOptions | Rspack.CopyRspackPluginOptions['patterns']`
- **Default:** `undefined`
Copies the specified file or directory to the dist directory, implemented based on [rspack.CopyRspackPlugin](https://rspack.rs/plugins/rspack/copy-rspack-plugin).
> Please refer to the configuration options here: [rspack.CopyRspackPlugin](https://rspack.rs/plugins/rspack/copy-rspack-plugin).
## Example
Copy files from `./src/assets` to the `./dist` directory:
```ts title="rsbuild.config.ts"
export default {
output: {
copy: [
// `./src/assets/image.png` -> `./dist/image.png`
{ from: './src/assets' },
],
},
};
```
Copy files from `./src/assets` to the `./dist/assets` directory:
```ts title="rsbuild.config.ts"
export default {
output: {
copy: [
// `./src/assets/image.png` -> `./dist/assets/image.png`
{ from: './src/assets', to: 'assets' },
],
},
};
```
When copying files from the public directory to the dist directory during a production build, the `public/someDir` directory will be ignored:
```ts title="rsbuild.config.ts"
export default {
output: {
copy: [{ from: './public', globOptions: { ignore: ['**/someDir/**'] } }],
},
server: {
publicDir: {
copyOnBuild: false,
},
},
};
```
---
url: /config/output/css-modules.md
---
# output.cssModules
- **Type:** `CSSModules`
Configure custom CSS Modules settings.
The CSS Modules feature in Rsbuild is based on the `modules` option of css-loader. You can refer to [css-loader - modules](https://github.com/webpack/css-loader?tab=readme-ov-file#modules) to learn more.
## cssModules.auto
The `auto` option enables CSS Modules automatically based on filenames.
- **Type:**
```ts
type Auto =
| boolean
| RegExp
| ((
resourcePath: string,
resourceQuery: string,
resourceFragment: string,
) => boolean);
```
- **Default:** `true`
Type descriptions:
- `true`: Enable CSS Modules for all files matching the `/\.module\.\w+$/i.test(filename)` regexp.
- `false`: Disable CSS Modules.
- `RegExp`: Enable CSS Modules for all files matching `/RegExp/i.test(filename)` regexp.
- `function`: Enable CSS Modules for files based on the filename satisfying your filter function check.
For example, to additionally enable CSS Modules for files in the `shared/` directory:
```ts title="rsbuild.config.ts"
export default {
output: {
cssModules: {
auto: (resource) => {
return resource.includes('.module.') || resource.includes('shared/');
},
},
},
};
```
Another example, to treat all files containing `.module.` and `.modules.` as CSS Modules:
```ts title="rsbuild.config.ts"
export default {
output: {
cssModules: {
auto: /\.modules?\./,
},
},
};
```
## cssModules.exportLocalsConvention
Style of exported class names.
- **Type:**
```ts
type CSSModulesLocalsConvention =
| 'asIs'
| 'camelCase'
| 'camelCaseOnly'
| 'dashes'
| 'dashesOnly';
```
- **Default:** `'camelCase'`
Type description:
- `asIs`: Class names will be exported as is.
- `camelCase`: Class names will be camelized, the original class name will be exported.
- `camelCaseOnly`: Class names will be camelized, the original class name will not be exported.
- `dashes`: Only dashes in class names will be camelized, the original class name will be exported.
- `dashesOnly`: Dashes in class names will be camelized, the original class name will not be exported.
```ts title="rsbuild.config.ts"
export default {
output: {
cssModules: {
exportLocalsConvention: 'camelCaseOnly',
},
},
};
```
### Example
Suppose you have the following CSS file:
```css title="src/style.module.css"
.dash-class {
color: blue;
}
.camelClass {
color: red;
}
.underscore_class {
color: green;
}
```
Different `exportLocalsConvention` configurations will produce different export results:
```js title="src/index.js"
import styles from './style.module.css';
console.log(styles);
// camelCase (default)
// { 'dash-class': '...', 'dashClass': '...', 'camelClass': '...', 'underscore_class': '...', 'underscoreClass': '...' }
// camelCaseOnly
// { 'dashClass': '...', 'camelClass': '...', 'underscoreClass': '...' }
// dashes
// { 'dash-class': '...', 'dashClass': '...', 'camelClass': '...', 'underscore_class': '...' }
// dashesOnly
// { 'dashClass': '...', 'camelClass': '...', 'underscore_class': '...' }
// asIs
// { 'dash-class': '...', 'camelClass': '...', 'underscore_class': '...' }
```
## cssModules.exportGlobals
- **Type:** `boolean`
- **Default:** `false`
Allows exporting names from global class names, so you can use them via import.
### Example
Set the `exportGlobals` to `true`:
```ts title="rsbuild.config.ts"
export default {
output: {
cssModules: {
exportGlobals: true,
},
},
};
```
Use `:global()` in CSS Modules:
```css title="style.module.css"
:global(.blue) {
color: blue;
}
.red {
color: red;
}
```
Then you can import the class name wrapped with `:global()`:
```tsx title="Button.tsx"
import styles from './style.module.css';
console.log(styles.blue); // 'blue'
console.log(styles.red); // 'red-[hash]'
```
## cssModules.localIdentName
- **Type:** `string`
- **Default:**
```ts
// isProd indicates that the production build
const localIdentName = isProd
? '[local]-[hash:base64:6]'
: '[path][name]__[local]-[hash:base64:6]';
```
Sets the format of the class names generated by CSS Modules after compilation.
### Default value
`localIdentName` has different default values in development and production.
In a production, Rsbuild will generate shorter class names to reduce the bundle size.
```ts
import styles from './index.module.scss';
// In development, the value is `src-index-module__header-[hash]`
// In production, the value is `header-[hash]`
console.log(styles.header);
```
### Placeholders
You can use the following placeholders in `localIdentName`:
- `[name]` - the basename of the asset.
- `[local]` - original class.
- `[hash]` - the hash of the string.
- `[folder]` - the folder relative path.
- `[path]` - the relative path.
- `[file]` - filename and path.
- `[ext]` - extension with leading dot.
- `[hash::]`: hash with hash settings. `hashDigest` is the [hash encodings](https://rspack.rs/config/output#outputhashdigest), and `hashDigestLength` is the length of the hash value.
### Example
Set `localIdentName` to other value, for example, the shorter 5-character hash value:
```ts title="rsbuild.config.ts"
export default {
output: {
cssModules: {
localIdentName: '[hash:base64:5]',
},
},
};
```
:::tip
If the hash length is set too short, it may increase the risk of class name conflicts.
:::
## cssModules.mode
- **Type:**
```ts
type Mode =
| 'local'
| 'global'
| 'pure'
| 'icss'
| ((resourcePath: string) => 'local' | 'global' | 'pure' | 'icss');
```
- **Default:** `'local'`
Controls the mode of compilation applied to the CSS Modules.
### Optional values
`cssModules.mode` can take one of the following values:
1. `'local'` (default): This enables the CSS Modules specification for scoping CSS locally. Class and ID selectors are rewritten to be module-scoped, and `@value` bindings are injected.
2. `'global'`: This opts-out of the CSS Modules behavior, disabling both local scoping and injecting `@value` bindings. Global selectors are preserved as-is.
3. `'pure'`: This enables dead-code elimination by removing any unused local classnames and values from the final CSS. It still performs local scoping and `@value` injection.
4. `'icss'`: This compiles to the low-level Interoperable CSS format, which provides a syntax for declaring `:import` and `:export` dependencies between CSS and other languages. It does not perform any scoping or `@value` injection.
The `'local'` mode is the most common use case for CSS Modules, enabling modular and locally-scoped styles within components. The other modes may be used in specific scenarios.
For example:
```ts title="rsbuild.config.ts"
export default {
output: {
cssModules: {
mode: 'global',
},
},
};
```
### Function
You can also pass a function to `modules.mode` that determines the mode based on the resource path, query, or fragment. This allows you to use different modes for different files.
For example, to use local scoping for `.module.css` files and global styles for other files:
```js
modules: {
mode: (resourcePath) => {
if (/\.module\.\css$/.test(resourcePath)) {
return 'local';
}
return 'global';
};
}
```
## cssModules.namedExport
- **Type:** `boolean`
- **Default:** `false`
Whether to enable ES modules named export for class names.
```ts title="rsbuild.config.ts"
export default {
output: {
cssModules: {
namedExport: true,
},
},
};
```
### Example
```css title="style.module.css"
.foo {
color: blue;
}
```
- `namedExport: false`:
```js
import styles from './style.module.css';
console.log(styles.foo);
```
- `namedExport: true`:
```js
import { foo } from './style.module.css';
// or
import * as styles from './style.module.css';
console.log(foo);
console.log(styles.foo);
```
:::tip
When `namedExport` is set to true, the `default` class exported by CSS Modules will be automatically renamed to `_default` class because `default` is a reserved word in ECMA modules.
:::
---
url: /config/output/data-uri-limit.md
---
# output.dataUriLimit
- **Type:**
```ts
type DataUriLimit =
| number
| {
svg?: number;
font?: number;
image?: number;
media?: number;
assets?: number;
};
```
- **Default:**
```js
const defaultDatUriLimit = {
svg: 4096,
font: 4096,
image: 4096,
media: 4096,
assets: 4096,
};
```
Set the size threshold to inline static assets such as images and fonts.
By default, static assets will be Base64 encoded and inlined into the page if they are smaller than 4KiB.
You can adjust this threshold by setting the `dataUriLimit` config.
Details:
- `svg`: The threshold for SVG images.
- `font`: The threshold for font files.
- `image`: The threshold for non-SVG images.
- `media`: The threshold for media assets such as videos.
- `assets`: The threshold for other static assets, such as those defined in [Extend Asset Types](/guide/basic/static-assets#extend-asset-types).
> See [Inline static assets](/guide/optimization/inline-assets) for more details.
## Example
- Inline all static assets less than 10KiB:
```ts title="rsbuild.config.ts"
export default {
output: {
dataUriLimit: 10 * 1024,
},
};
```
- Disable inlining of static assets:
```ts title="rsbuild.config.ts"
export default {
output: {
dataUriLimit: 0,
},
};
```
- Inline all static assets:
```ts title="rsbuild.config.ts"
export default {
output: {
dataUriLimit: Number.MAX_SAFE_INTEGER,
},
};
```
- Set the threshold for image assets to 5KiB and do not inline video assets:
```ts title="rsbuild.config.ts"
export default {
output: {
dataUriLimit: {
image: 5 * 1024,
media: 0,
},
},
};
```
---
url: /config/output/dist-path.md
---
# output.distPath
- **Type:**
```ts
type DistPathConfig =
| string
| {
root?: string;
html?: string;
favicon?: string;
js?: string;
jsAsync?: string;
css?: string;
cssAsync?: string;
svg?: string;
font?: string;
wasm?: string;
image?: string;
media?: string;
assets?: string;
};
```
- **Default:**
```js
const defaultDistPath = {
root: 'dist',
html: './',
favicon: './',
js: output.target === 'node' ? '' : 'static/js',
jsAsync: output.target === 'node' ? '' : 'static/js/async',
css: 'static/css',
cssAsync: 'static/css/async',
svg: 'static/svg',
font: 'static/font',
wasm: 'static/wasm',
image: 'static/image',
media: 'static/media',
assets: 'static/assets',
};
```
Configure the directory for output files. Rsbuild outputs files to the specified subdirectory according to file type.
- `string`: Set the root output directory to a specific path, equivalent to `distPath.root`.
- `object`: Set the output directory for each file type.
> See [Output files](/guide/basic/output-files) for more information.
## File types
`output.distPath` can be configured differently for different file types.
Each `output.distPath` option controls different file types:
- `root`: The root directory of all output files.
- `html`: The output directory of HTML files.
- `favicon`: The output directory of favicon files.
- `js`: The output directory of JavaScript files.
- `jsAsync`: The output directory of async JavaScript files, which by default are output to the `async` subdirectory of `distPath.js`.
- `css`: The output directory of CSS style files.
- `cssAsync`: The output directory of async CSS files, which by default are output to the `async` subdirectory of `distPath.css`.
- `svg`: The output directory of SVG images.
- `font`: The output directory of font files.
- `wasm`: The output directory of WebAssembly files.
- `image`: The output directory of non-SVG images.
- `media`: The output directory of media assets, such as videos.
- `assets`: The output directory of other static assets, such as the assets defined in [Extend Asset Types](/guide/basic/static-assets#extend-asset-types).
## Root directory
The `root` is the root directory of the build artifacts and can be specified as a relative or absolute path. If `root` is a relative path, it is appended to the project's root directory to form an absolute path.
Other directories can only be specified as relative paths and will be output relative to the `root` directory.
## Example
The JavaScript files will be output to the `distPath.root` + `distPath.js` directory, which is `dist/static/js`.
To output JavaScript files to the `build/resource/js` directory, add the following configuration:
```ts title="rsbuild.config.ts"
export default {
output: {
distPath: {
root: 'build',
js: 'resource/js',
},
},
};
```
The above configuration will generate the following directory structure:
```bash
build
├── resource
│ └── js
│ └── index.js
└── index.html
```
## Version history
| Version | Changes |
| ------- | ------------------------------------------- |
| v1.4.13 | Added support for `distPath.favicon` option |
| v1.6.0 | Added support for string type |
---
url: /config/output/emit-assets.md
---
# output.emitAssets
- **Type:** `boolean`
- **Default:** `true`
Controls whether to emit static assets such as images, fonts, audio, video, etc.
In scenarios such as SSR, you may not need to emit duplicate static assets. You can set `emitAssets` to `false` to avoid emitting assets.
## Example
The following example will emit static assets when building web bundles, and avoid emitting when building node bundles.
```ts title="rsbuild.config.ts"
export default {
environments: {
web: {
output: {
target: 'web',
},
},
node: {
output: {
target: 'node',
emitAssets: false,
},
},
},
};
```
---
url: /config/output/emit-css.md
---
# output.emitCss
- **Type:** `boolean`
- **Default:** `true` when [output.target](/config/output/target) is `web`, otherwise `false`
Controls whether CSS is emitted to output bundles.
If `false`, the CSS will not be extracted to separate files or injected into the JavaScript bundles via [output.injectStyles](/config/output/inject-styles).
:::tip
When `output.emitCss` is `false`, the class name information of CSS Modules will still be injected into the JS bundles, which helps to ensure the correctness of CSS Modules class names in SSR.
:::
## Example
When building Node.js bundles, set `output.emitCss` to `true` to output CSS files:
```ts title="rsbuild.config.ts"
export default {
output: {
target: 'node',
emitCss: true,
},
};
```
---
url: /config/output/externals.md
---
# output.externals
- **Type:**
```ts
type Externals =
| string
| object
| function
| RegExp
| Array;
```
- **Default:** `undefined`
At build time, prevent some `import` dependencies from being packed into bundles in your code, and instead fetch them externally at runtime.
> For more information, please see: [Rspack Externals](https://rspack.rs/config/externals).
## Examples
### Basic usage
Exclude the `react-dom` dependency from the output bundle. To get this module at runtime, the value of `react-dom` will globally retrieve the `ReactDOM` variable.
```ts title="rsbuild.config.ts"
export default {
output: {
externals: {
'react-dom': 'ReactDOM',
},
},
};
```
### Array format
Use an array to define multiple external configurations:
```ts title="rsbuild.config.ts"
export default {
output: {
externals: [
{
react: 'React',
'react-dom': 'ReactDOM',
},
'lodash',
],
},
};
```
### Using with CDN
A common use case is to load libraries from CDN and exclude them from your bundle, then use [html.tags](/config/html/tags) to include them in your HTML.
```ts title="rsbuild.config.ts"
export default {
output: {
externals: {
axios: 'axios',
},
},
html: {
tags: [
{
tag: 'script',
append: false,
attrs: {
defer: true,
crossorigin: true,
src: 'https://unpkg.com/axios@1/dist/axios.min.js',
},
},
],
},
};
```
Then you can use the external libraries in your source code:
```js title="src/api.js"
const response = await window.axios.get('/api/users');
```
### RegExp patterns
Use regular expressions to match multiple modules with a pattern:
```ts title="rsbuild.config.ts"
export default {
output: {
externals: [
// Externalize all @babel packages
/^@babel\/.+$/,
// Externalize all lodash sub-modules
/^lodash\/.+$/,
],
},
};
```
:::tip
If [output.target](/config/output/target) is `web-worker`, externals will not take effect. This is because the Web Worker environment cannot access global variables.
:::
---
url: /config/output/filename-hash.md
---
# output.filenameHash
- **Type:** `boolean | string`
- **Default:** `true`
Configure whether to add a hash value to the filename after the production build.
### Disable hash
By default, output file names include a hash value:
```bash
dist/static/css/index.7879e19d.css
dist/static/js/index.18a568e5.js
```
You can set `output.filenameHash` to `false` to disable this behavior:
```ts title="rsbuild.config.ts"
export default {
output: {
filenameHash: false,
},
};
```
After rebuilding, the output filenames become:
```bash
dist/static/css/index.css
dist/static/js/index.js
```
### Hash format
The default hash format is `contenthash:8`, which generates an 8-bit hash based on the content of the file.
You can set `output.filenameHash` to other formats supported by Rspack and customize the length.
```ts title="rsbuild.config.ts"
export default {
output: {
filenameHash: 'fullhash:16',
},
};
```
The optional hash formats are:
- `fullhash`: The hash value of the entire compilation. If any file changes, the hash values of all output files in the entire project will change.
- `chunkhash`: The hash value of the chunk. The hash value will only change when the content of the chunk (and its included modules) changes.
- `contenthash`: The hash value of the file content. The hash value will only change when the content of the file itself changes.
### Notes
- [output.filename](/config/output/filename) has a higher priority than `output.filenameHash`.
- By default, when the target is not `web`, the hash will not be included in the filename of the output files, such as Node.js bundles.
- By default, the filename in development mode does not include a hash.
---
url: /config/output/filename.md
---
# output.filename
- **Type:**
```ts
type FilenameConfig = {
html?: string;
js?: string | Function;
css?: string | Function;
svg?: string | Function;
font?: string | Function;
wasm?: string;
image?: string | Function;
media?: string | Function;
assets?: string | Function;
};
```
- **Default:**
```js
// Development mode
const devDefaultFilename = {
html: '[name].html',
js: '[name].js',
css: '[name].css',
svg: '[name].[contenthash:8].svg',
font: '[name].[contenthash:8][ext]',
wasm: '[contenthash:8].module.wasm',
image: '[name].[contenthash:8][ext]',
media: '[name].[contenthash:8][ext]',
assets: '[name].[contenthash:8][ext]',
};
// Production mode
const prodDefaultFilename = {
html: '[name].html',
js: output.target === 'node' ? '[name].js' : '[name].[contenthash:8].js',
css: '[name].[contenthash:8].css',
svg: '[name].[contenthash:8].svg',
font: '[name].[contenthash:8][ext]',
wasm: '[contenthash:8].module.wasm',
image: '[name].[contenthash:8][ext]',
media: '[name].[contenthash:8][ext]',
assets: '[name].[contenthash:8][ext]',
};
```
Set the filename of output files.
After a production build, Rsbuild adds a hash to the filename by default. To disable this behavior, set [output.filenameHash](/config/output/filename-hash) to `false`.
:::tip
Rsbuild generates the final file path based on `output.filename` and [output.distPath](/config/output/dist-path).
See [Output files](/guide/basic/output-files) for more information.
:::
## File types
`output.filename` can be set differently for different file types.
Each `output.filename` option controls different file types:
- `html`: The name of the HTML files.
- `js`: The name of the JavaScript files.
- `css`: The name of the CSS files.
- `svg`: The name of the SVG images.
- `font`: The name of the font files.
- `wasm`: The name of the Wasm files.
- `image`: The name of non-SVG images.
- `media`: The name of media assets, such as video.
- `assets`: The name of other static assets, such as the assets defined in [Extend Asset Types](/guide/basic/static-assets#extend-asset-types).
## Example
To set the name of the JavaScript files to `[name]_script.js`:
```ts title="rsbuild.config.ts"
export default {
output: {
filename: {
js: '[name]_script.js',
},
},
};
```
Set different filenames for development and production builds:
```ts title="rsbuild.config.ts"
const isProd = process.env.NODE_ENV === 'production';
export default {
output: {
filename: {
js: isProd ? '[name]_script.[contenthash:8].js' : '[name]_script.js',
},
},
};
```
:::tip Filename hash
Typically, Rsbuild only sets the filename hash in production mode (`process.env.NODE_ENV === 'production'`).
Setting the filename hash in development mode may cause HMR to fail (especially for CSS files). This happens because each time the file content changes, the hash value changes, preventing the bundler from reading the latest file content.
:::
## Filename placeholders
In `output.filename`, you can use filename placeholders to dynamically generate file names.
Common filename placeholders include:
- `[name]` - entry name, which is the key of [source.entry](/config/source/entry).
- `[contenthash]` - hash value generated based on file content.
- `[contenthash:]` - hash value generated based on file content, with specified hash length.
- `[ext]` - file extension, including the dot.
> For more filename placeholders, refer to [Rspack - Filename placeholders](https://rspack.rs/config/filename-placeholders).
:::tip
- `filename.html` can only use certain filename placeholders like `[name]` and `[contenthash:]`.
- `filename.js` and `filename.css` do not support `[ext]`.
:::
## Filename of async modules
When you import a module via dynamic import, the module will be bundled into a separate file using these default naming rules:
- In development mode, the filename will be generated based on the module path, such as `dist/static/js/async/src_add_ts.js`.
- In production mode, it will be a random numeric id, such as `dist/static/js/async/798.27e3083e.js`. This is to avoid leaking the source code path in production mode, and the number of characters is also less.
```js title="src/index.ts"
const { add } = await import('./add.ts');
```
To specify a fixed name for the async module, use the [magic comments](https://rspack.rs/api/runtime-api/module-methods#magic-comments) supported by Rspack. Use `webpackChunkName` to specify the module name:
```js title="src/index.ts"
const { add } = await import(
/* webpackChunkName: "my-chunk-name" */ './add.ts'
);
```
After specifying the module name as shown above, the generated file will be `dist/static/js/async/my-chunk-name.js`.
## Using function
You can pass a function to dynamically set the filename based on the file information.
The function receives two parameters:
- `pathData`: An object containing file path information.
- `assetInfo`: An optional object containing additional assets information.
Dynamically set the filename for JavaScript files:
```ts title="rsbuild.config.ts"
const isProd = process.env.NODE_ENV === 'production';
export default {
output: {
filename: {
js: (pathData, assetInfo) => {
console.log(pathData); // You can check the contents of pathData here
if (pathData.chunk?.name === 'index') {
return isProd ? '[name].[contenthash:8].js' : '[name].js';
}
return '/some-path/[name].js';
},
},
},
};
```
Dynamically set the filename for CSS files:
```ts title="rsbuild.config.ts"
const isProd = process.env.NODE_ENV === 'production';
export default {
output: {
filename: {
css: (pathData, assetInfo) => {
if (pathData.chunk?.name === 'index') {
return isProd ? '[name].[contenthash:8].css' : '[name].css';
}
return '/some-path/[name].css';
},
},
},
};
```
Dynamically set the filename for image files:
```ts title="rsbuild.config.ts"
export default {
output: {
filename: {
image: (pathData) => {
if (pathData.filename?.includes('foo')) {
return '/foo/[name][ext]';
}
return '/bar/[name][ext]';
},
},
},
};
```
:::tip
`output.filename.html` does not support using functions yet.
:::
## Query hash
To generate hash values on the URL query of assets, refer to:
```ts title="rsbuild.config.ts"
const isProd = process.env.NODE_ENV === 'production';
export default {
output: {
filename: {
js: isProd ? '[name].js?v=[contenthash:8]' : `[name].js`,
css: isProd ? '[name].css?v=[contenthash:8]' : `[name].css`,
},
},
};
```
In this case, the filenames of JS and CSS will not include a hash, but the URLs in the HTML will contain a hash query.
```html
```
---
url: /config/output/inject-styles.md
---
# output.injectStyles
- **Type:** `boolean`
- **Default:** `false`
Whether to inject styles into DOM.
By default, Rsbuild will extract CSS into a separate `.css` file and output it to the dist directory. When this option is set to `true`, CSS files will be inlined into JS files and inserted on the page at runtime via `

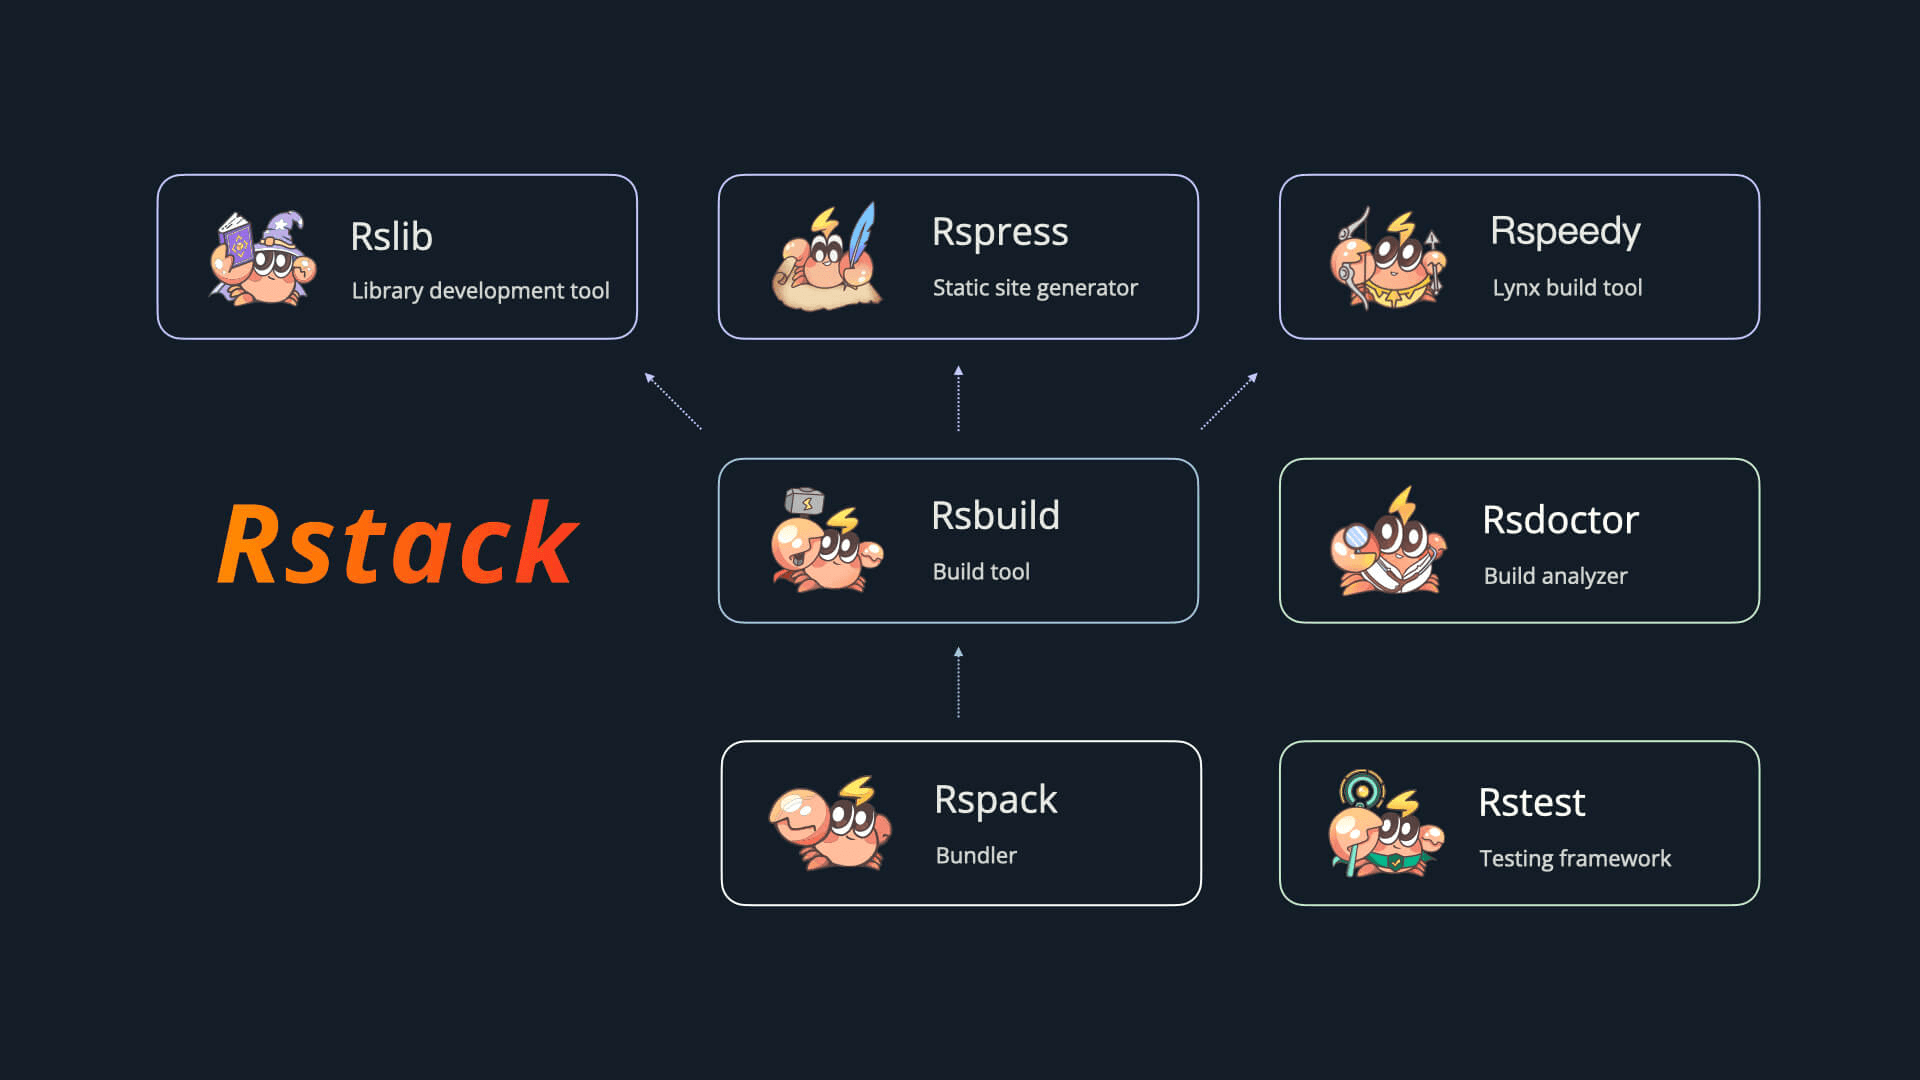 Rstack includes the following tools:
| Name | Description | Version |
| ----------------------------------------------------- | ------------------------ | -------------------------------------------------------------------------------------------------------------------------------------------------------------------------------- |
| [Rspack](https://github.com/web-infra-dev/rspack) | Bundler |
Rstack includes the following tools:
| Name | Description | Version |
| ----------------------------------------------------- | ------------------------ | -------------------------------------------------------------------------------------------------------------------------------------------------------------------------------- |
| [Rspack](https://github.com/web-infra-dev/rspack) | Bundler |  |
| [Rslib](https://github.com/web-infra-dev/rslib) | Library development tool |
|
| [Rslib](https://github.com/web-infra-dev/rslib) | Library development tool |  |
| [Rspress](https://github.com/web-infra-dev/rspress) | Static site generator |
|
| [Rspress](https://github.com/web-infra-dev/rspress) | Static site generator |  |
| [Rsdoctor](https://github.com/web-infra-dev/rsdoctor) | Build analyzer |
|
| [Rsdoctor](https://github.com/web-infra-dev/rsdoctor) | Build analyzer |  |
| [Rstest](https://github.com/web-infra-dev/rstest) | Testing framework |
|
| [Rstest](https://github.com/web-infra-dev/rstest) | Testing framework |  |
| [Rslint](https://github.com/web-infra-dev/rslint) | Linter |
|
| [Rslint](https://github.com/web-infra-dev/rslint) | Linter |  |
## 🔗 Links
- [awesome-rstack](https://github.com/web-infra-dev/awesome-rstack): A curated list of awesome things related to Rstack.
- [rstack-examples](https://github.com/rspack-contrib/rstack-examples): Examples showcasing Rstack tools.
- [storybook-rsbuild](https://github.com/rspack-contrib/storybook-rsbuild): Storybook builder powered by Rsbuild.
- [rsbuild-plugin-template](https://github.com/rspack-contrib/rsbuild-plugin-template): Use this template to create your own Rsbuild plugin.
- [rstack-design-resources](https://github.com/rspack-contrib/rstack-design-resources): Design resources for Rstack.
## 🧑💻 Community
Come and chat with us on [Discord](https://discord.gg/XsaKEEk4mW)! The Rstack team and users are active there, and we're always looking for contributions.
## ✨ Next step
You may want:
import NextSteps from '@components/NextSteps';
import Step from '@components/Step';
|
## 🔗 Links
- [awesome-rstack](https://github.com/web-infra-dev/awesome-rstack): A curated list of awesome things related to Rstack.
- [rstack-examples](https://github.com/rspack-contrib/rstack-examples): Examples showcasing Rstack tools.
- [storybook-rsbuild](https://github.com/rspack-contrib/storybook-rsbuild): Storybook builder powered by Rsbuild.
- [rsbuild-plugin-template](https://github.com/rspack-contrib/rsbuild-plugin-template): Use this template to create your own Rsbuild plugin.
- [rstack-design-resources](https://github.com/rspack-contrib/rstack-design-resources): Design resources for Rstack.
## 🧑💻 Community
Come and chat with us on [Discord](https://discord.gg/XsaKEEk4mW)! The Rstack team and users are active there, and we're always looking for contributions.
## ✨ Next step
You may want:
import NextSteps from '@components/NextSteps';
import Step from '@components/Step';
 Create a new Rsbuild project.
## Next step
You may want:
import NextSteps from '@components/NextSteps';
import Step from '@components/Step';
Create a new Rsbuild project.
## Next step
You may want:
import NextSteps from '@components/NextSteps';
import Step from '@components/Step';